Stuart Campbell is making a guitar which he is donating to Folk at the Salmon Bothy to be raffled to raise Club funds.
Tickets £10 each available from Bob Philips or at any of our forthcoming events. Maximum of 250 tickets available. Draw will take place on Sunday 7th June at the Haal in Portsoy.
Here’s Stuart’s latest update on progress so far…
February has flown past, so this month’s update is more about the neck (or rather, less of the neck); shaping the heel and the head; and rosette building.


I still needed a little bit of work with the Shinto rasp, and a Japanese draw saw, to rough out the shape of the heel. It will be refined as the neck gets nearer its final profile.
I moved on to using progressively finer (Iwasaki) rasps, Swiss needle files, cabinet scrapers and sandpaper to get close to the shape of the neck I’m looking, or feeling, for. The closer I get to the shape, the more carefully (and slowly) I need to work and concentrate. When contemplating a block of Carrara marble, Michelangelo believed he could feel the shape of the statue, that it was already in it and his job was to reveal it. I’m no Michelangelo, but, while it’s possible to buy templates for carving the neck, I’m inclined to shape it for how it feels in the hand. This photo also shows the ‘flame’ character of the maple.

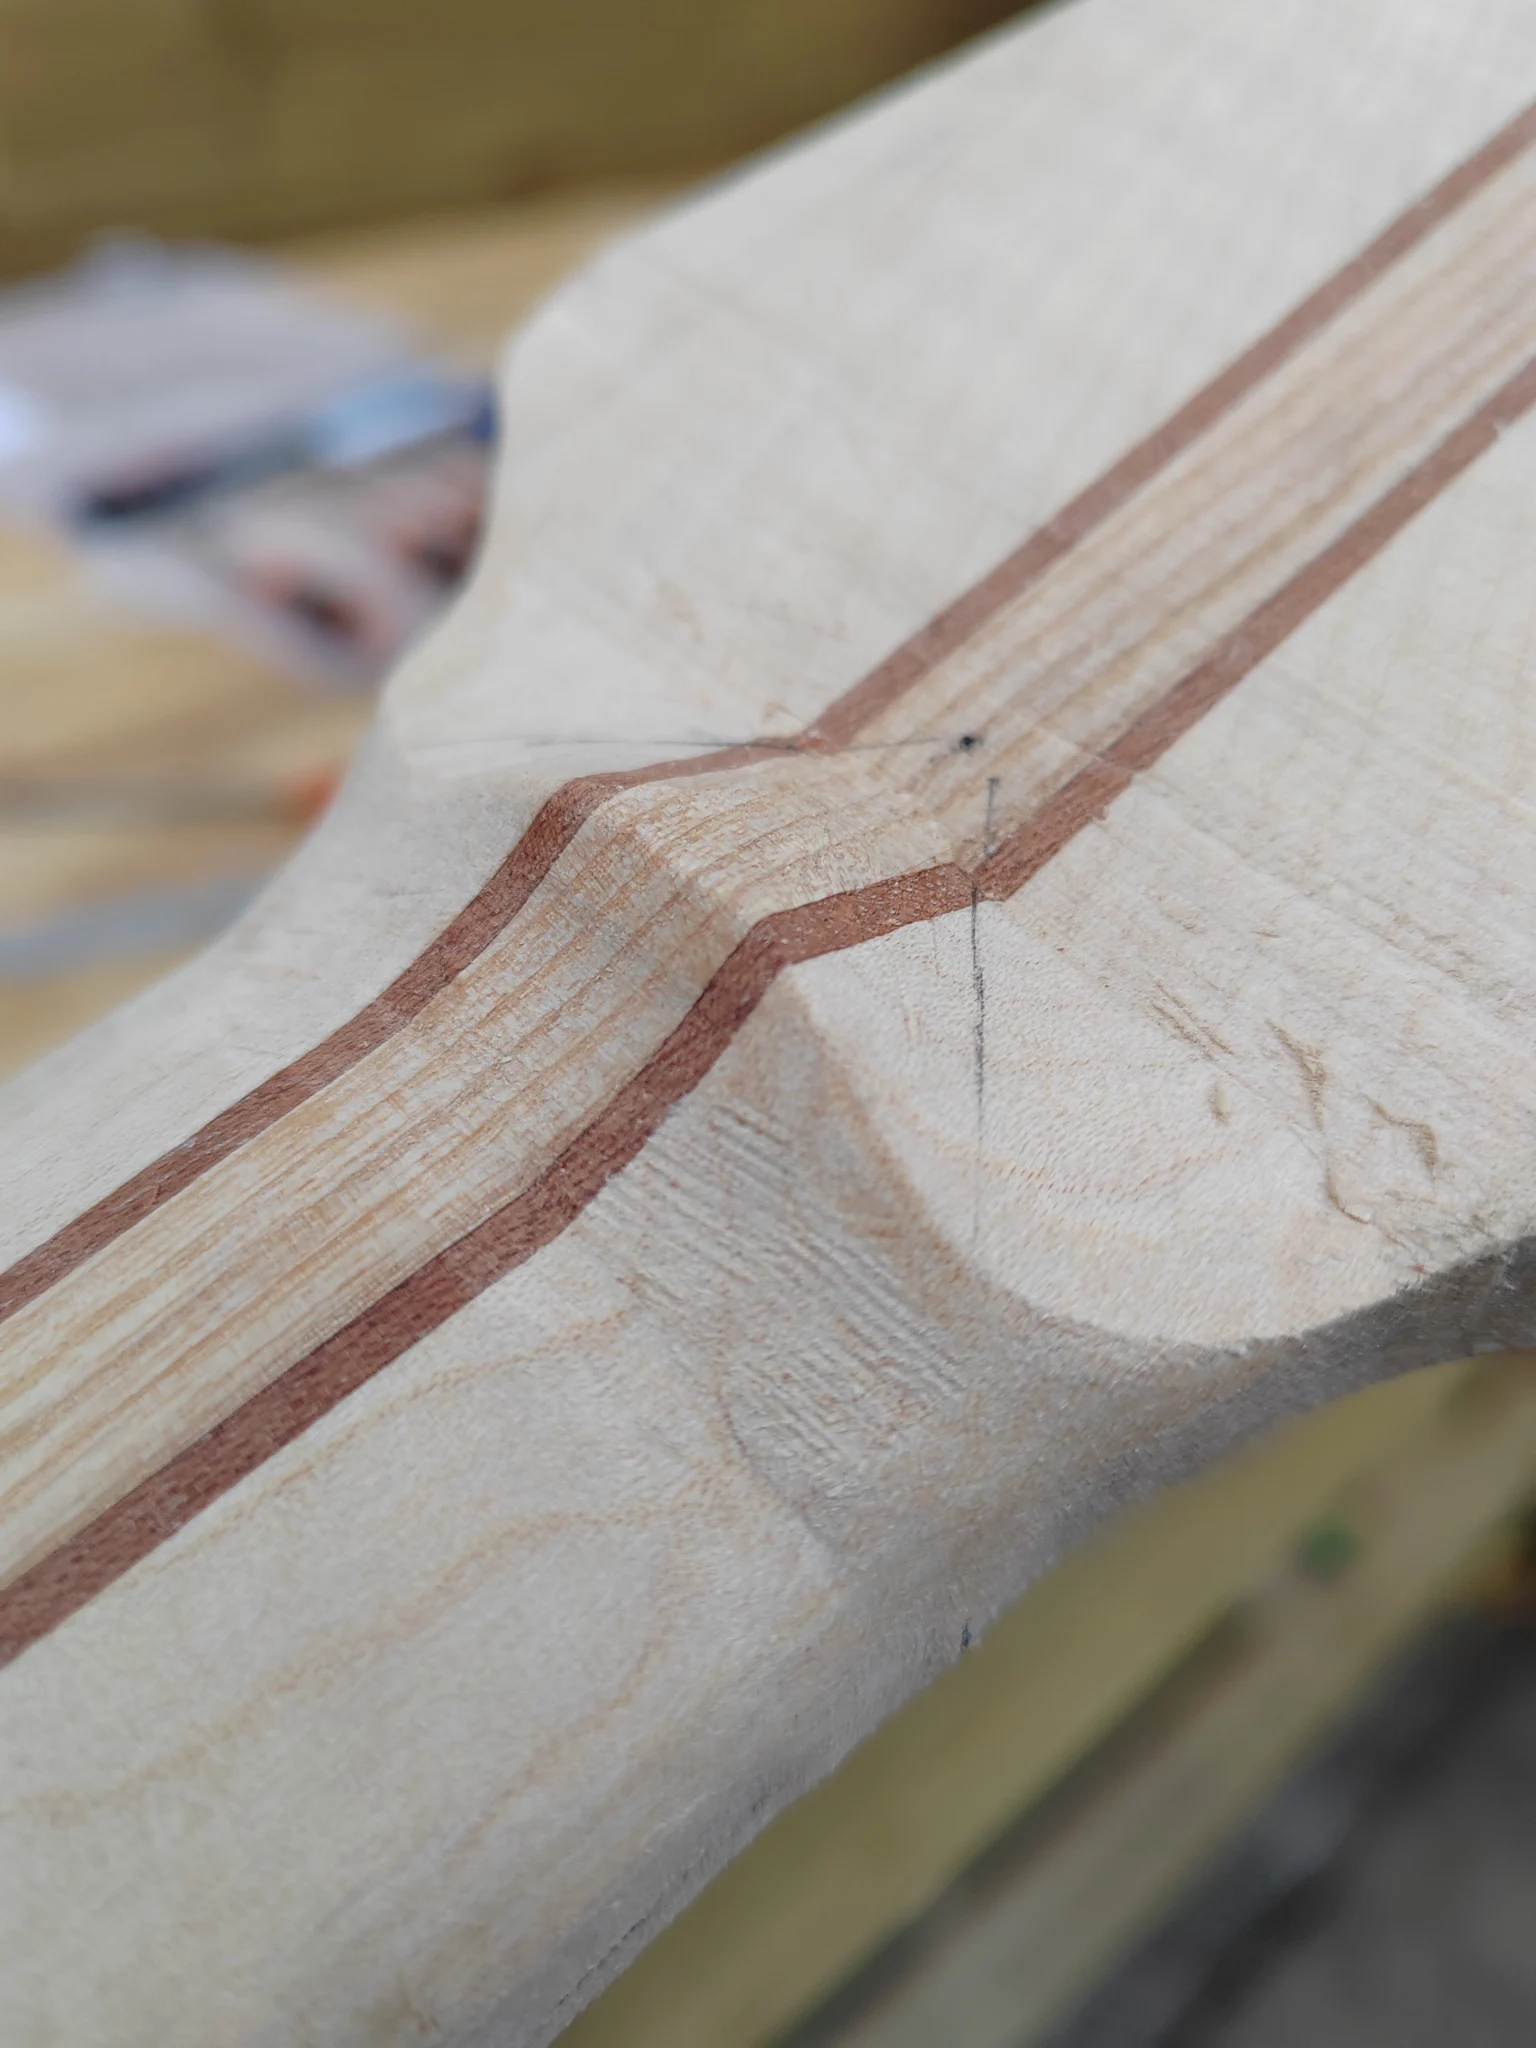
Having made a lot of progress with the neck (it won’t be finished until the fingerboard is fitted), I began roughing out the shape of the head. Getting the approximate shape doesn’t take too much time, the tricky bit is carving the point where the neck blends into the head – especially if a volute is included. This feature isn’t really necessary in a neck that’s carved from a single piece of timber… but it looks cool… Cabinet scrapers, very fine files and luthiers’ carving knives are what I use for this task – apart from a couple of guide lines, it’s all done by hand and eye.

I can take absolutely no credit for the design of the headplate or rosette; that’s all down to the genius of Jen Humphreys, from Banff (she was a finalist in ‘Britain’s Best Woodworker’ on Channel Four). I’d asked Jen if she could design a headplate and rosette for a tenor guitar I was building and she came up with a stunning design – I’ve just taken her idea and developed it.
The headplate is made up of eleven different types of wood. These all need to be book-matched so there are no gaps between the joins, and each piece is separated with a .5mm sliver of smoked eucalyptus. The final shape was done using a vertical drum sander and is bound with 1.5mm thick rosewood – cutting micro mitre joints in the binding is just about as tricky as it gets for me…
… and clamping the curved rosewood binding is an exercise in problem solving.


Once the glue was set, the excess wood was removed with a finger plane before the assembly was put through the thickness sander to reduce it to 3mm.

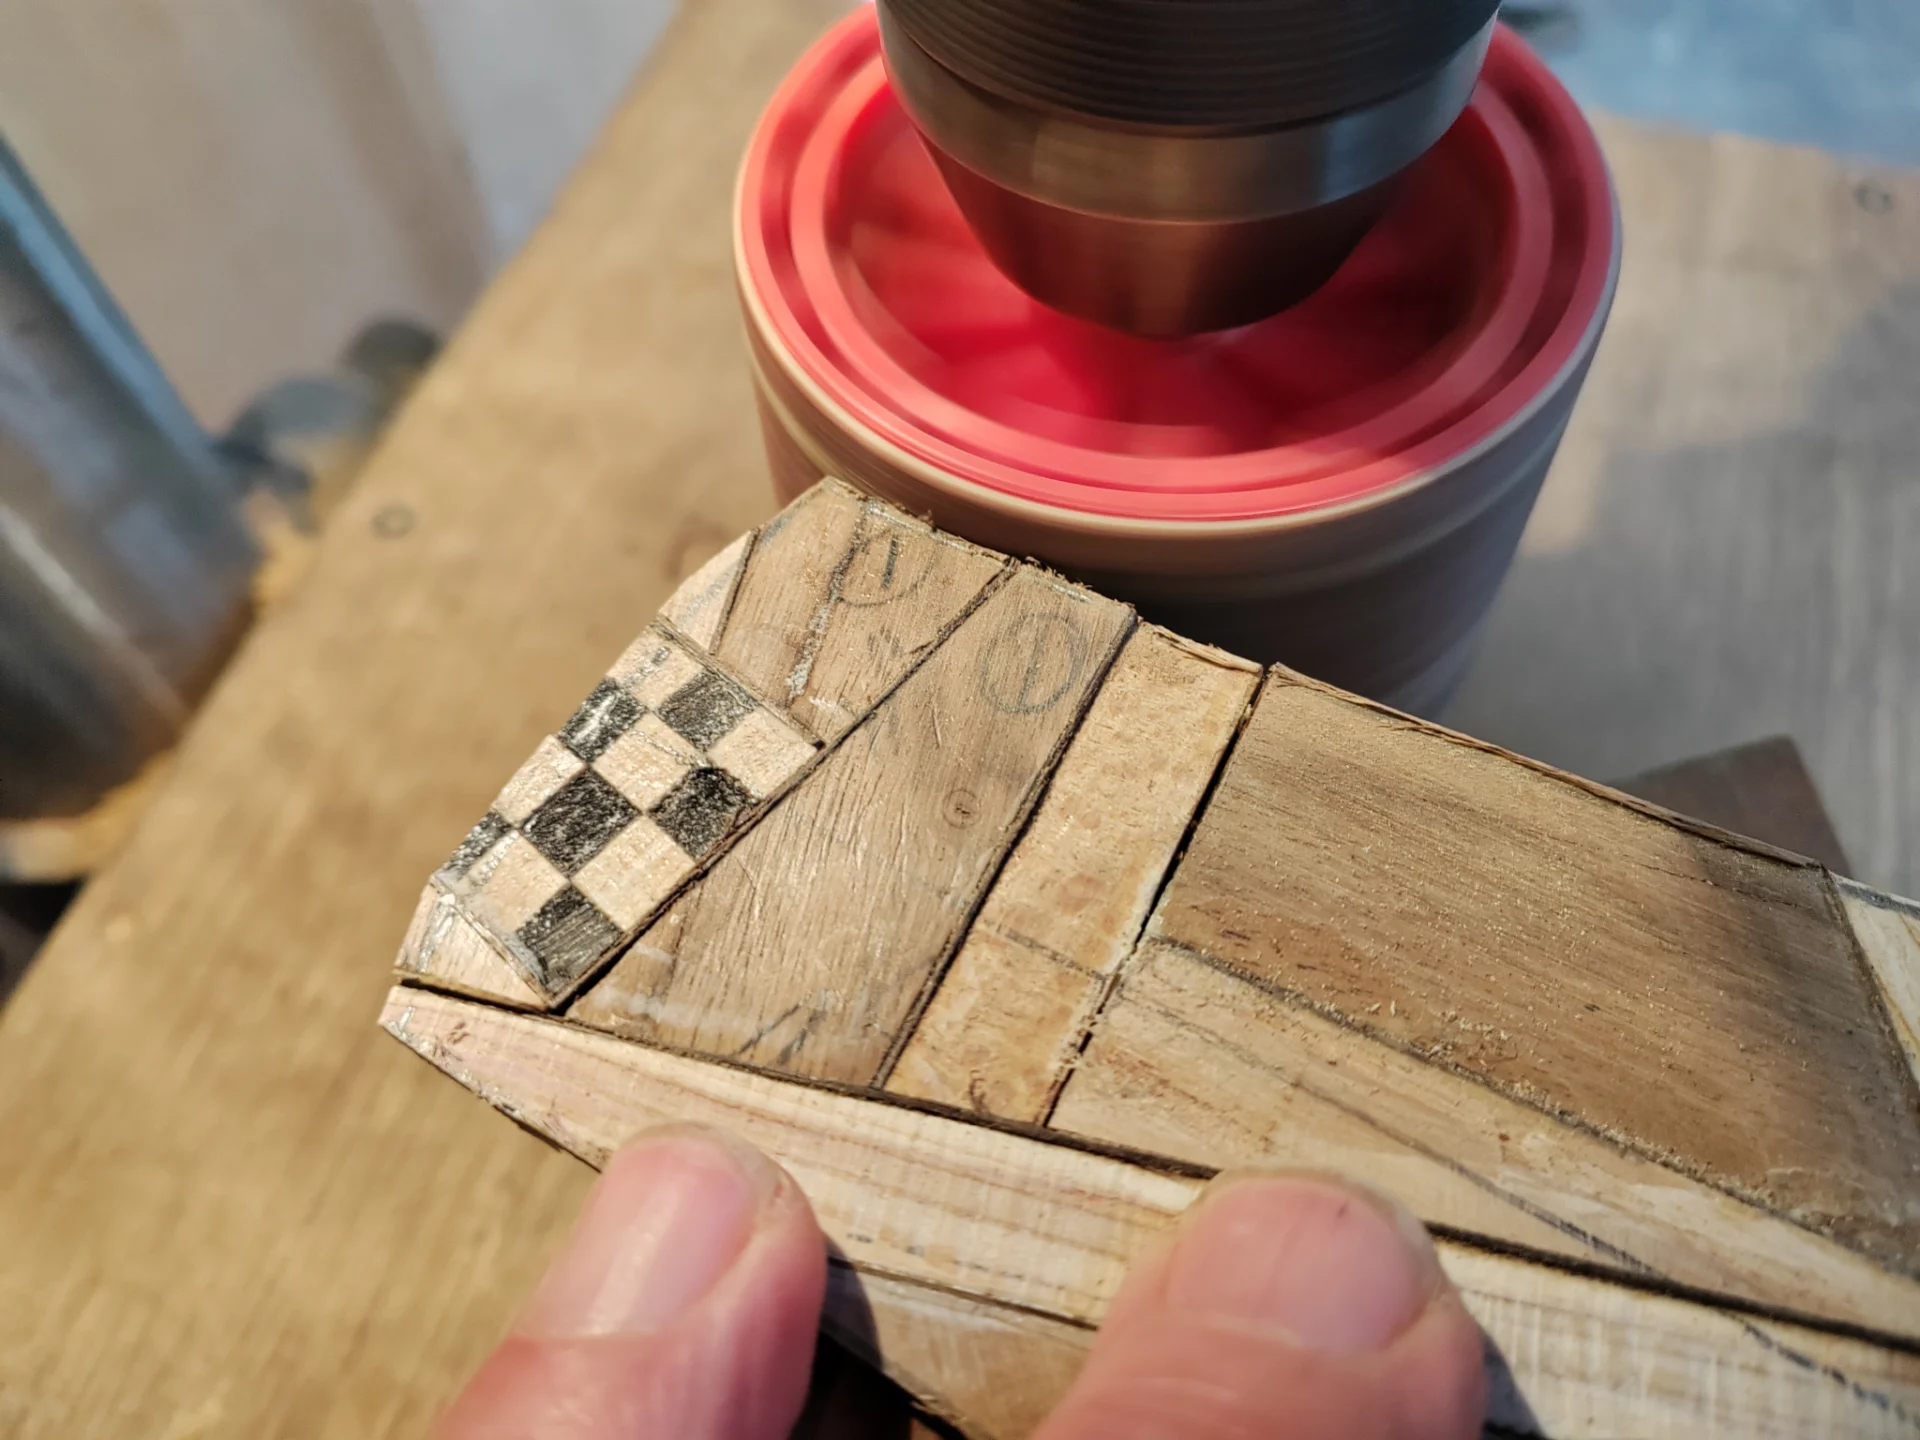
The process was more or less the same for making the ‘cracked ice’ mosaic for the rosette. The problem with trying to make something look random is that if left to chance (like if I just threw all the cuts of wood on the table) it would look too disorganised. That’s a consequence of the human brain’s constant searching for patterns (even an infant can anticipate classical music). All of which is a long winded way of saying it takes a lot of trial and error (and a template) to make something look random. The plaque was reduced to 1.6mm thick because it needs (once it is cut into a doughnut) to fit a 1.5mm recess that will be cut into the soundboard.
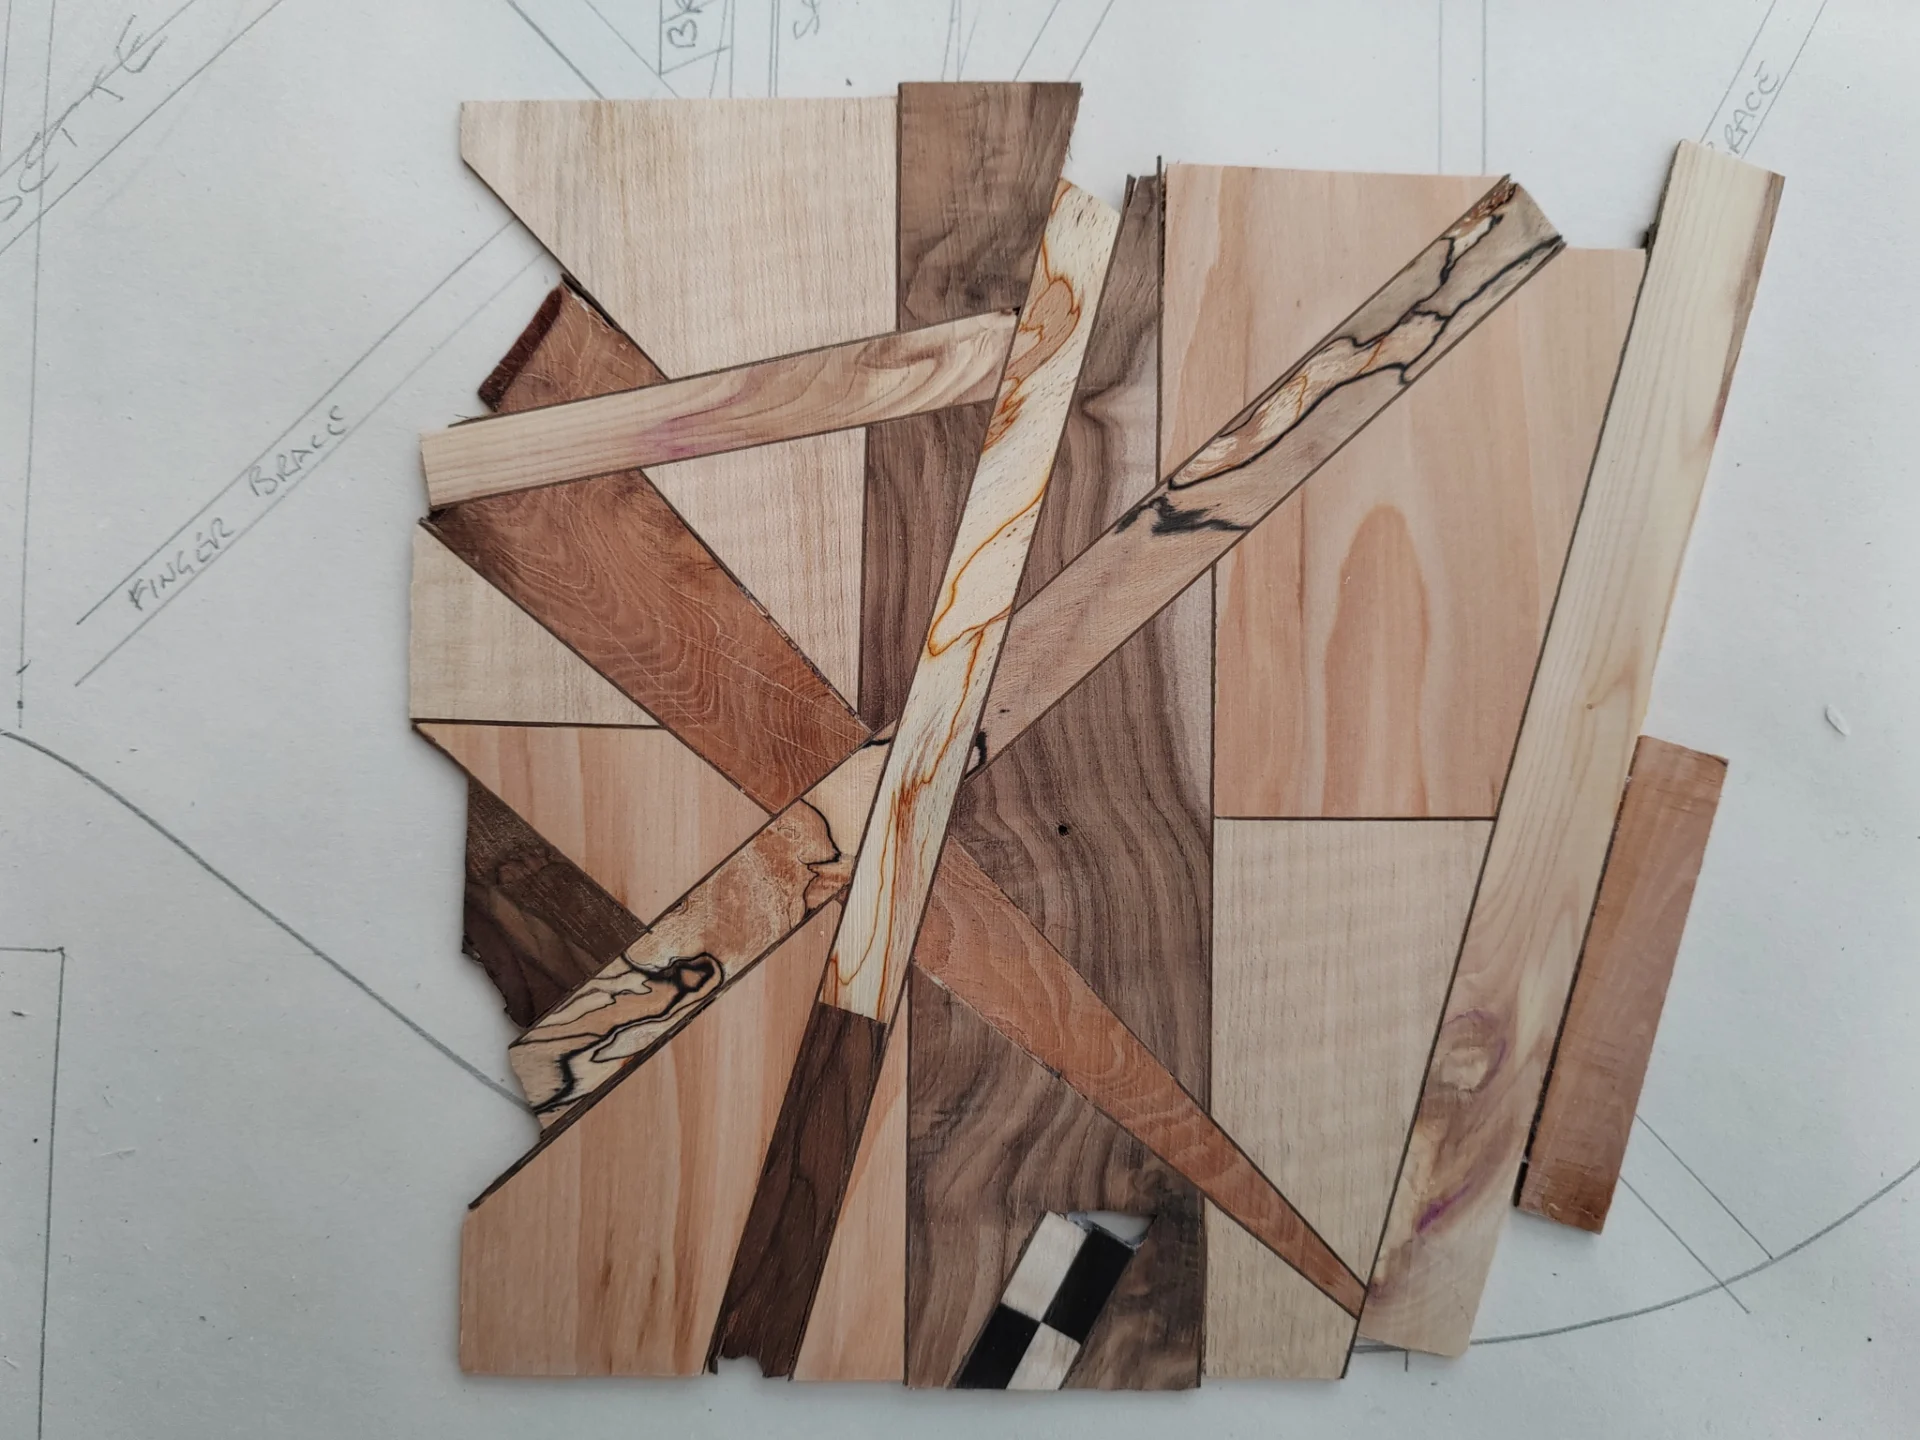
The rosette is made up from maple, apple, cherry, walnut, lilac, beech, ash, ebony and some 2,500 – 4,000 year old bog yew, with 25 pieces of smoked eucalyptus. All this is pretty fiddly and at times frustrating. It took about 25 hours to make the headplate and 35 hours for the rosette. Of course, you can buy ready made rosettes and I could have just used a single piece of wood, like ebony, for the headplate, but every hand built guitar is unique, so a one-off design seems right.
Next steps are to thickness the back, sides and soundboard. After that the two halves of the soundboard are glued together, the rosette will be inserted and the soundhole cut – once that’s done, I’ll be ready to make a start on the bracing.
That’s it (til next time…)
