Things are beginning to take shape!
I’ve been conscious that the previous posts have mostly had pictures of bits of wood and little that actually looked like a guitar. Maybe I should have posted a warning – it’s not like an ‘airfix’ kit; making a guitar from scratch means making all the individual parts before they can be assembled. For those of you who have been following this blog (thanks for taking an interest) you will finally get see some photos of something at least guitar shaped.
It’s reckoned that a fully trained luthier (which I am not) will take about 200 hours to build a guitar. My previous builds have taken me in the region of 250 hours (though the last guitar – which had a complex design – took nearer 400). So I’m just around the halfway point now, though the construction will accelerate a bit. That’s just for a bit of context – if you’ve ever wondered why a hand built guitar costs so much, well, 200 hours at even the minimum basic wage… you’ll get the idea…
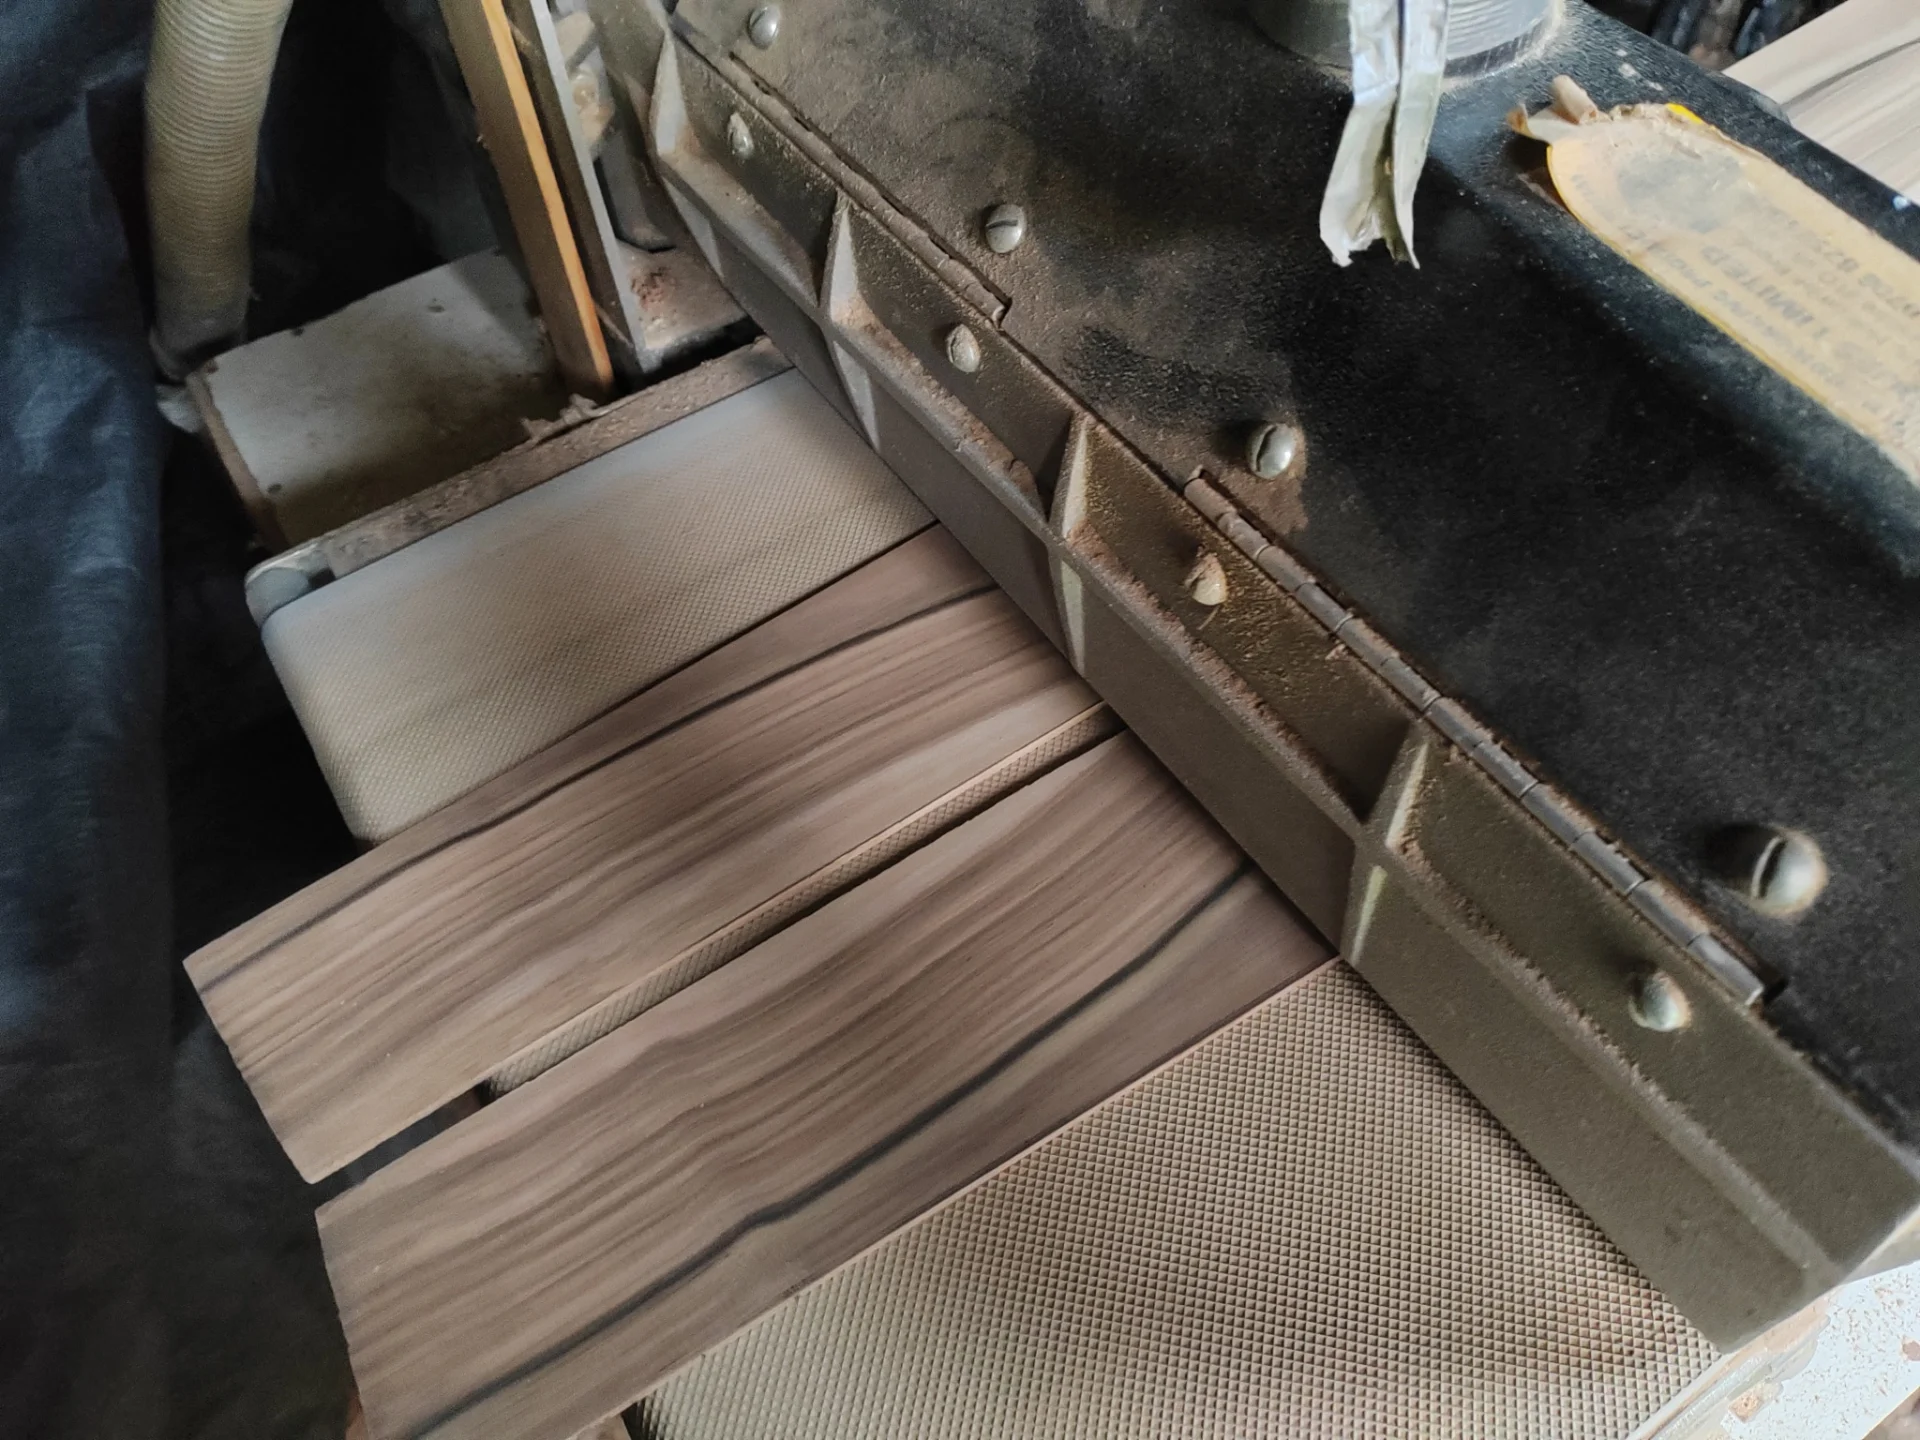
The boards for the top, back and sides were put through the thicknessing sander to arrive at their working size (3mm, 2.5mm and 2mm, respectively). Some builders will aim for the likes of the soundboard to be thinner and lighter, maybe 2.5mm, but I reckon that once the whole guitar has been sanded prior to finishing, the soundboard will be a little less than 3mm.
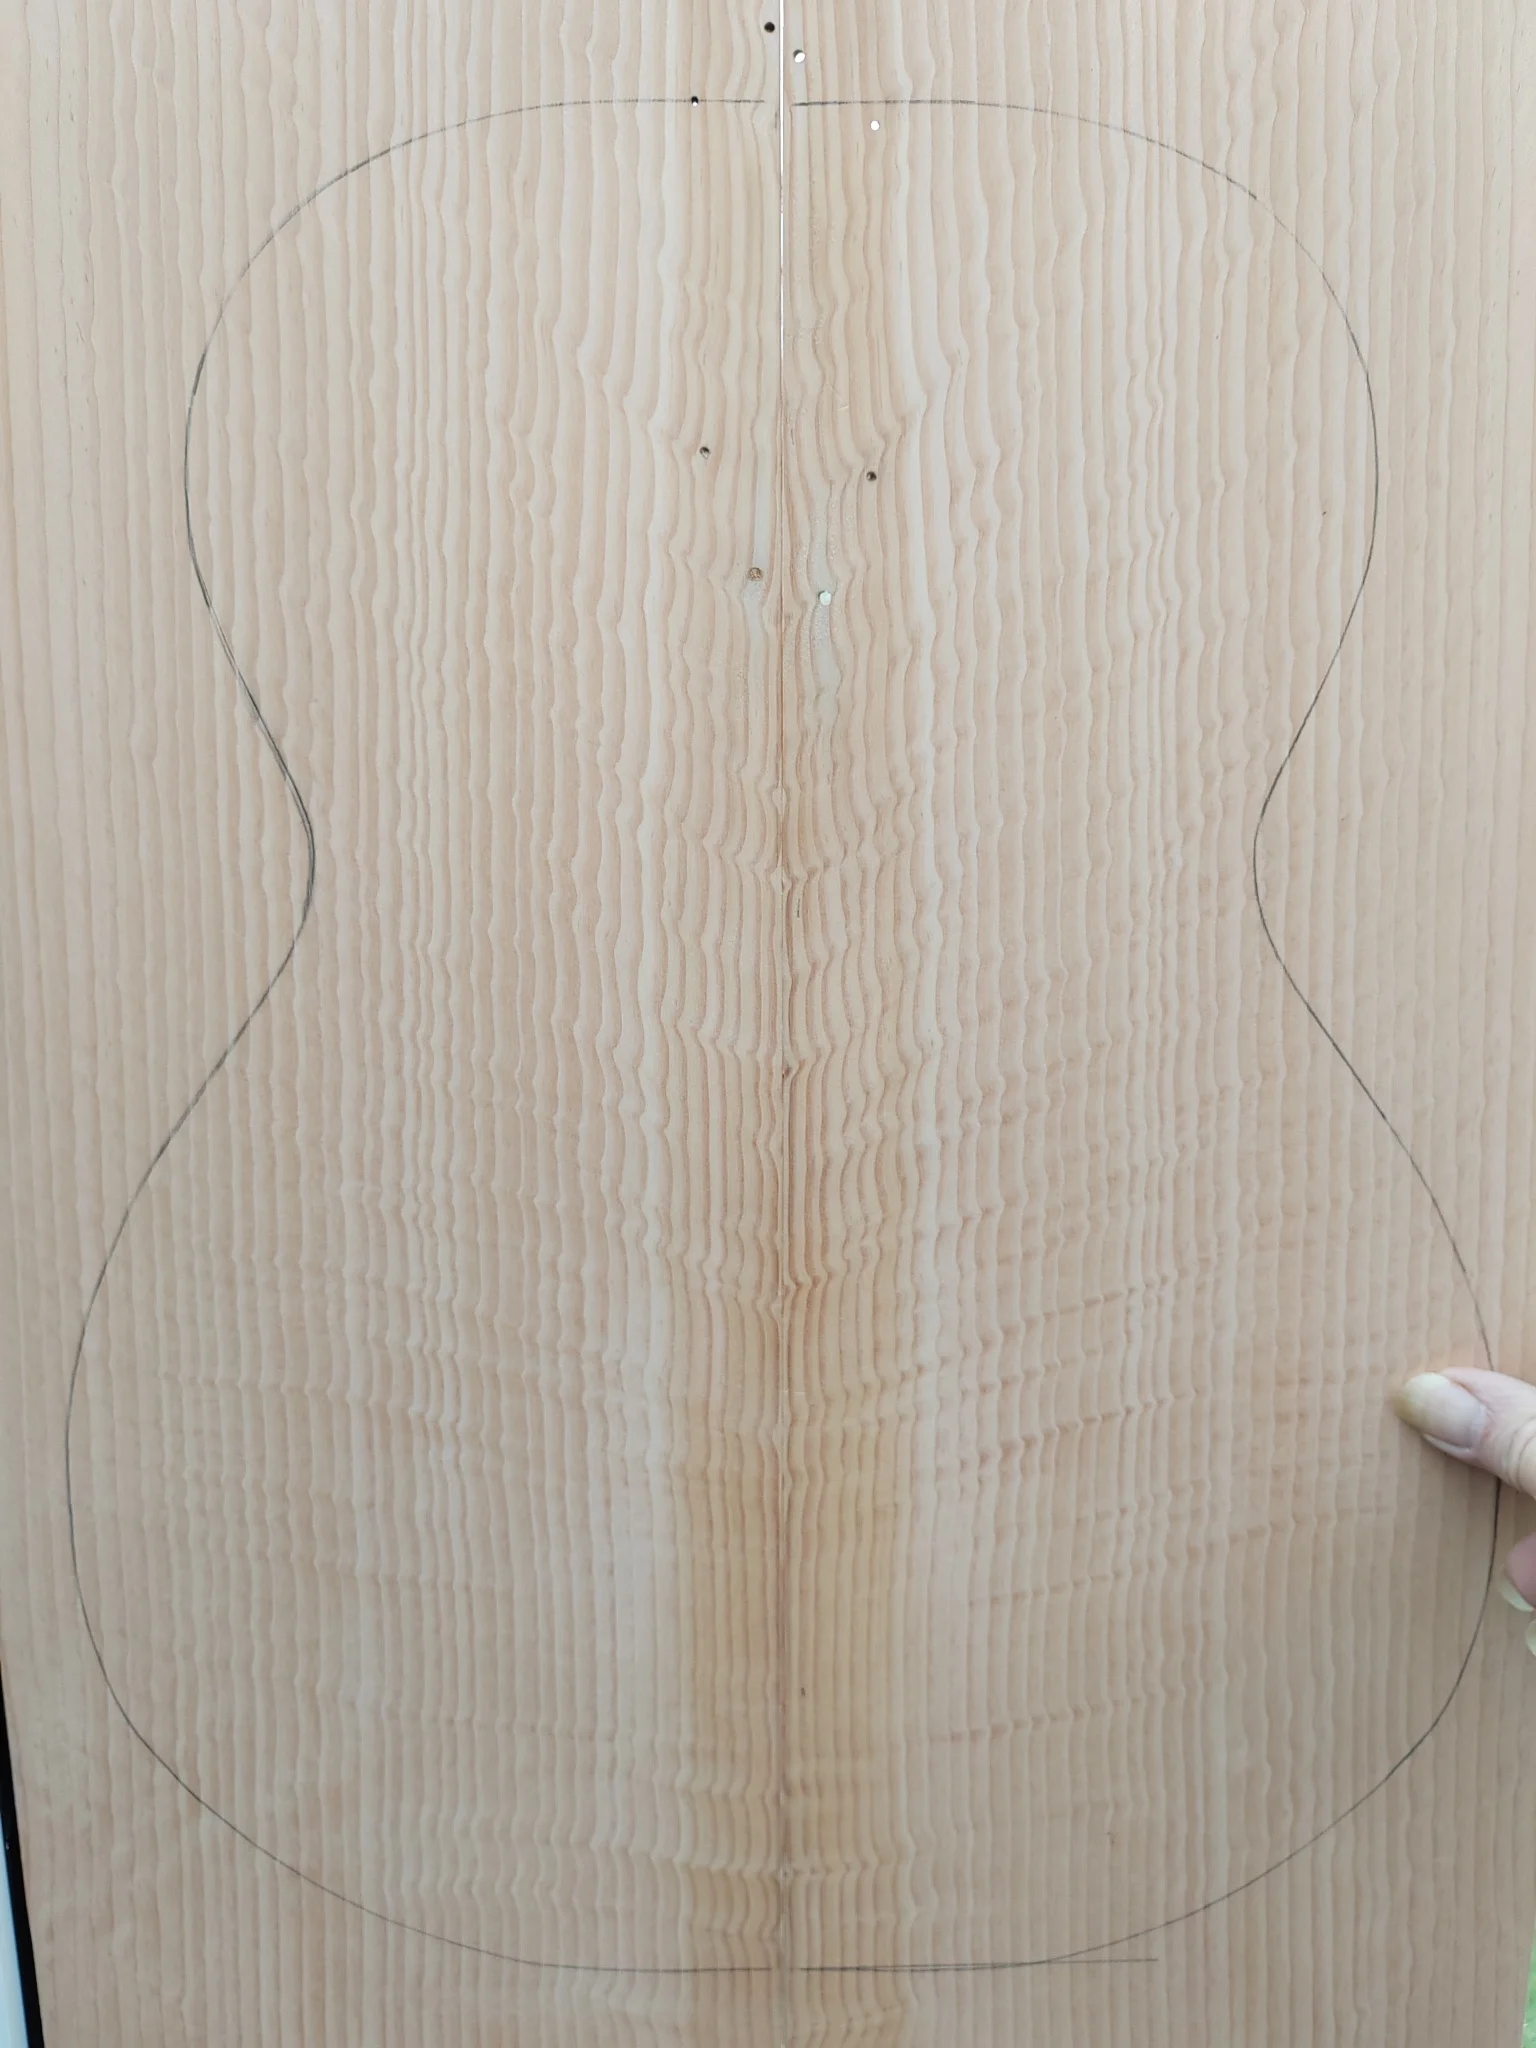
The book-matched top and back boards were checked for a tight (light-proof) join then glued together.
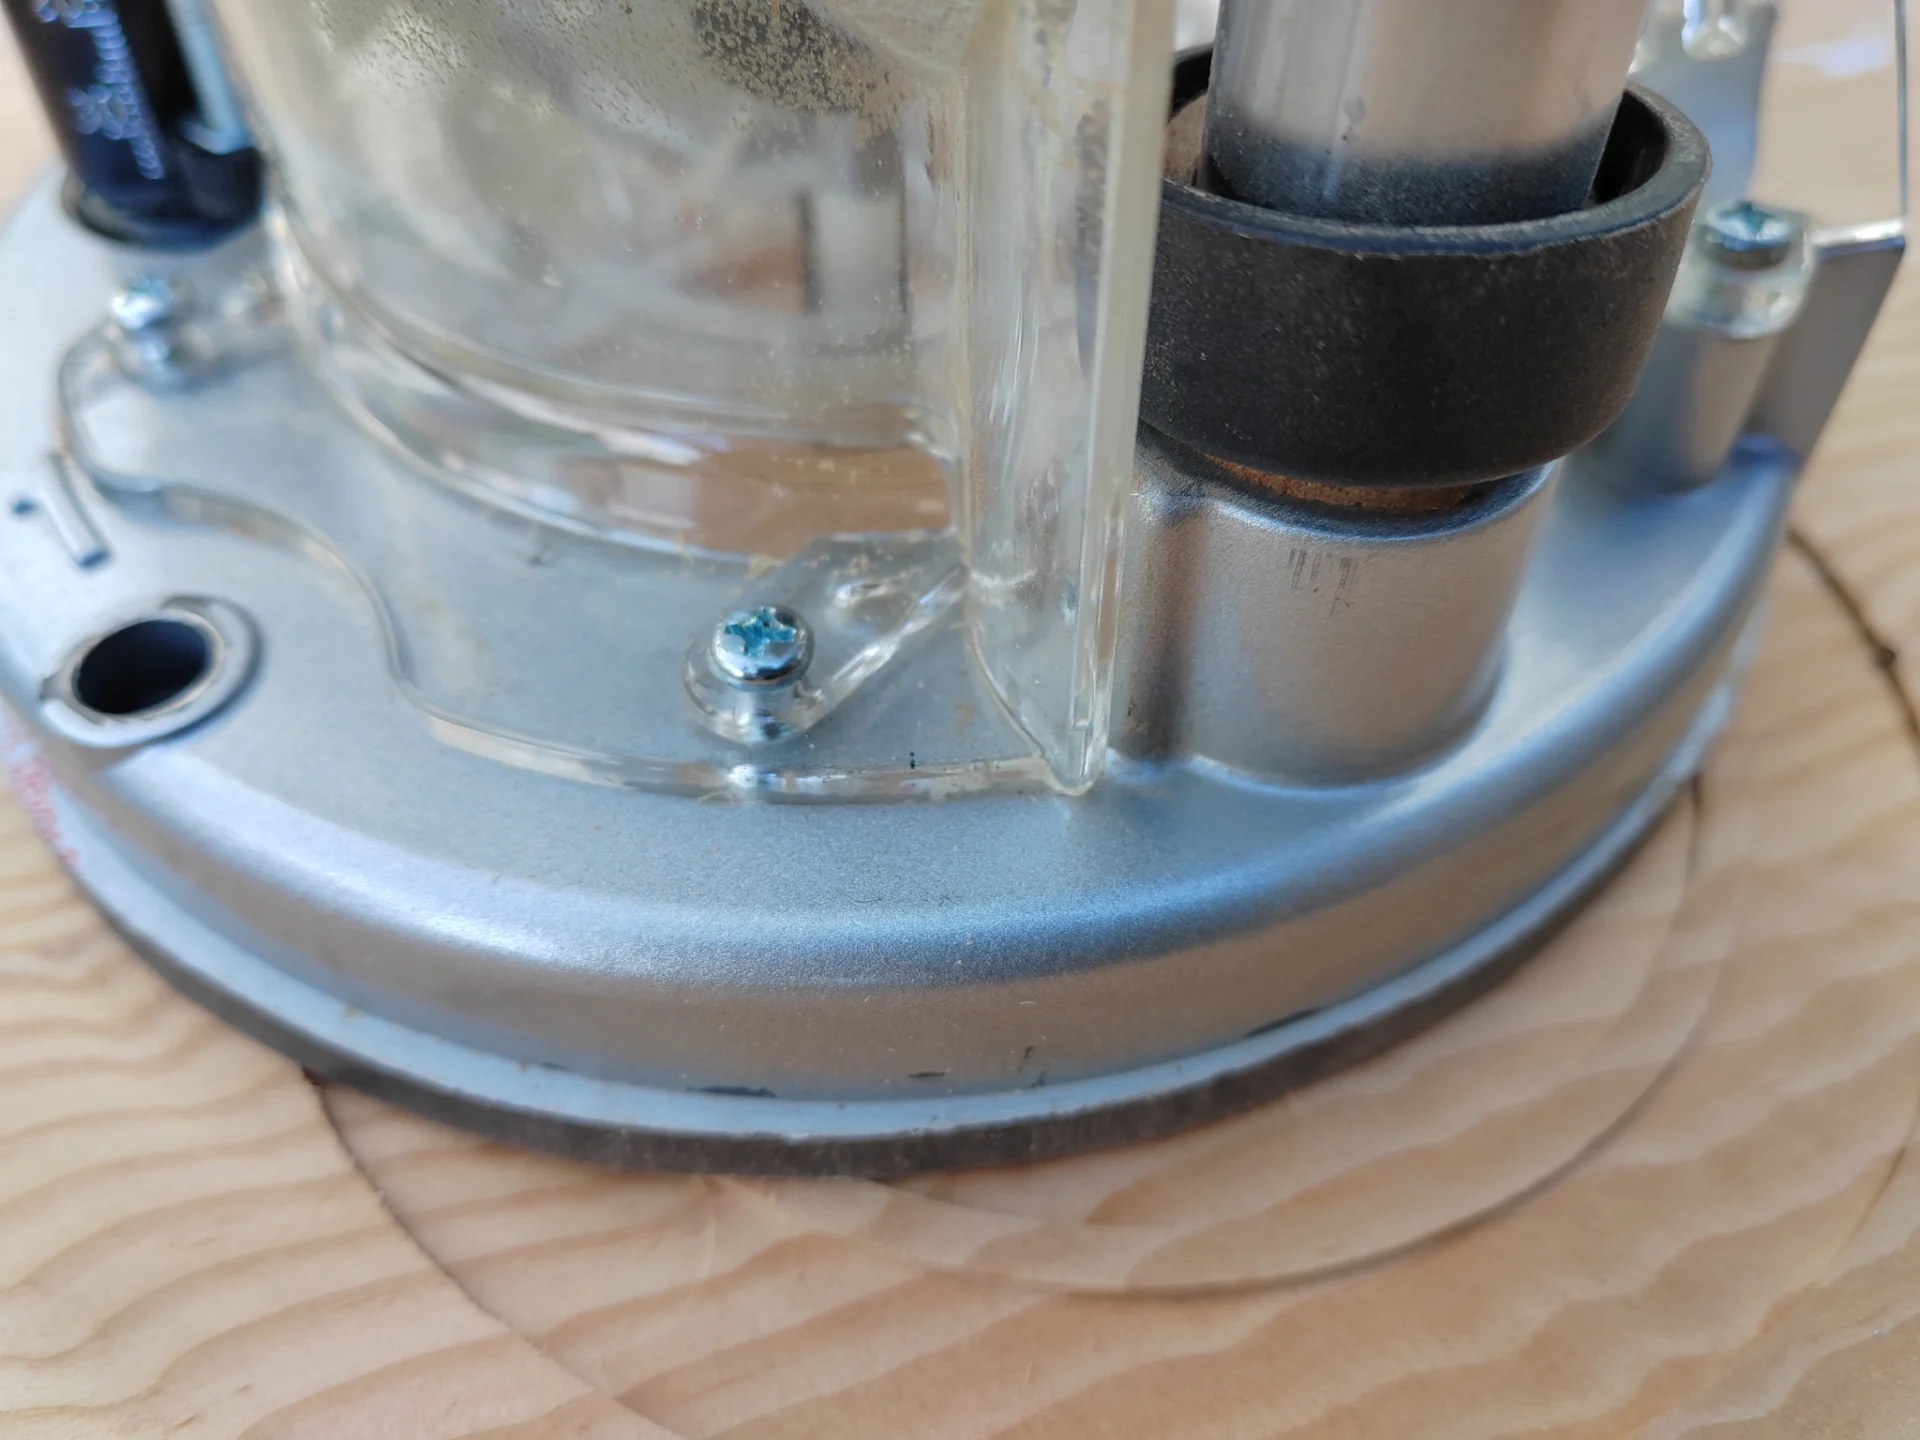
At this point the soundboard doesn’t have any bracing and is quite fragile, but the 1.5mm rebate for the rosette has to be routed out – it’s a delicate operation which takes about a dozen passes with the router (just a fraction at a time is the way to go).
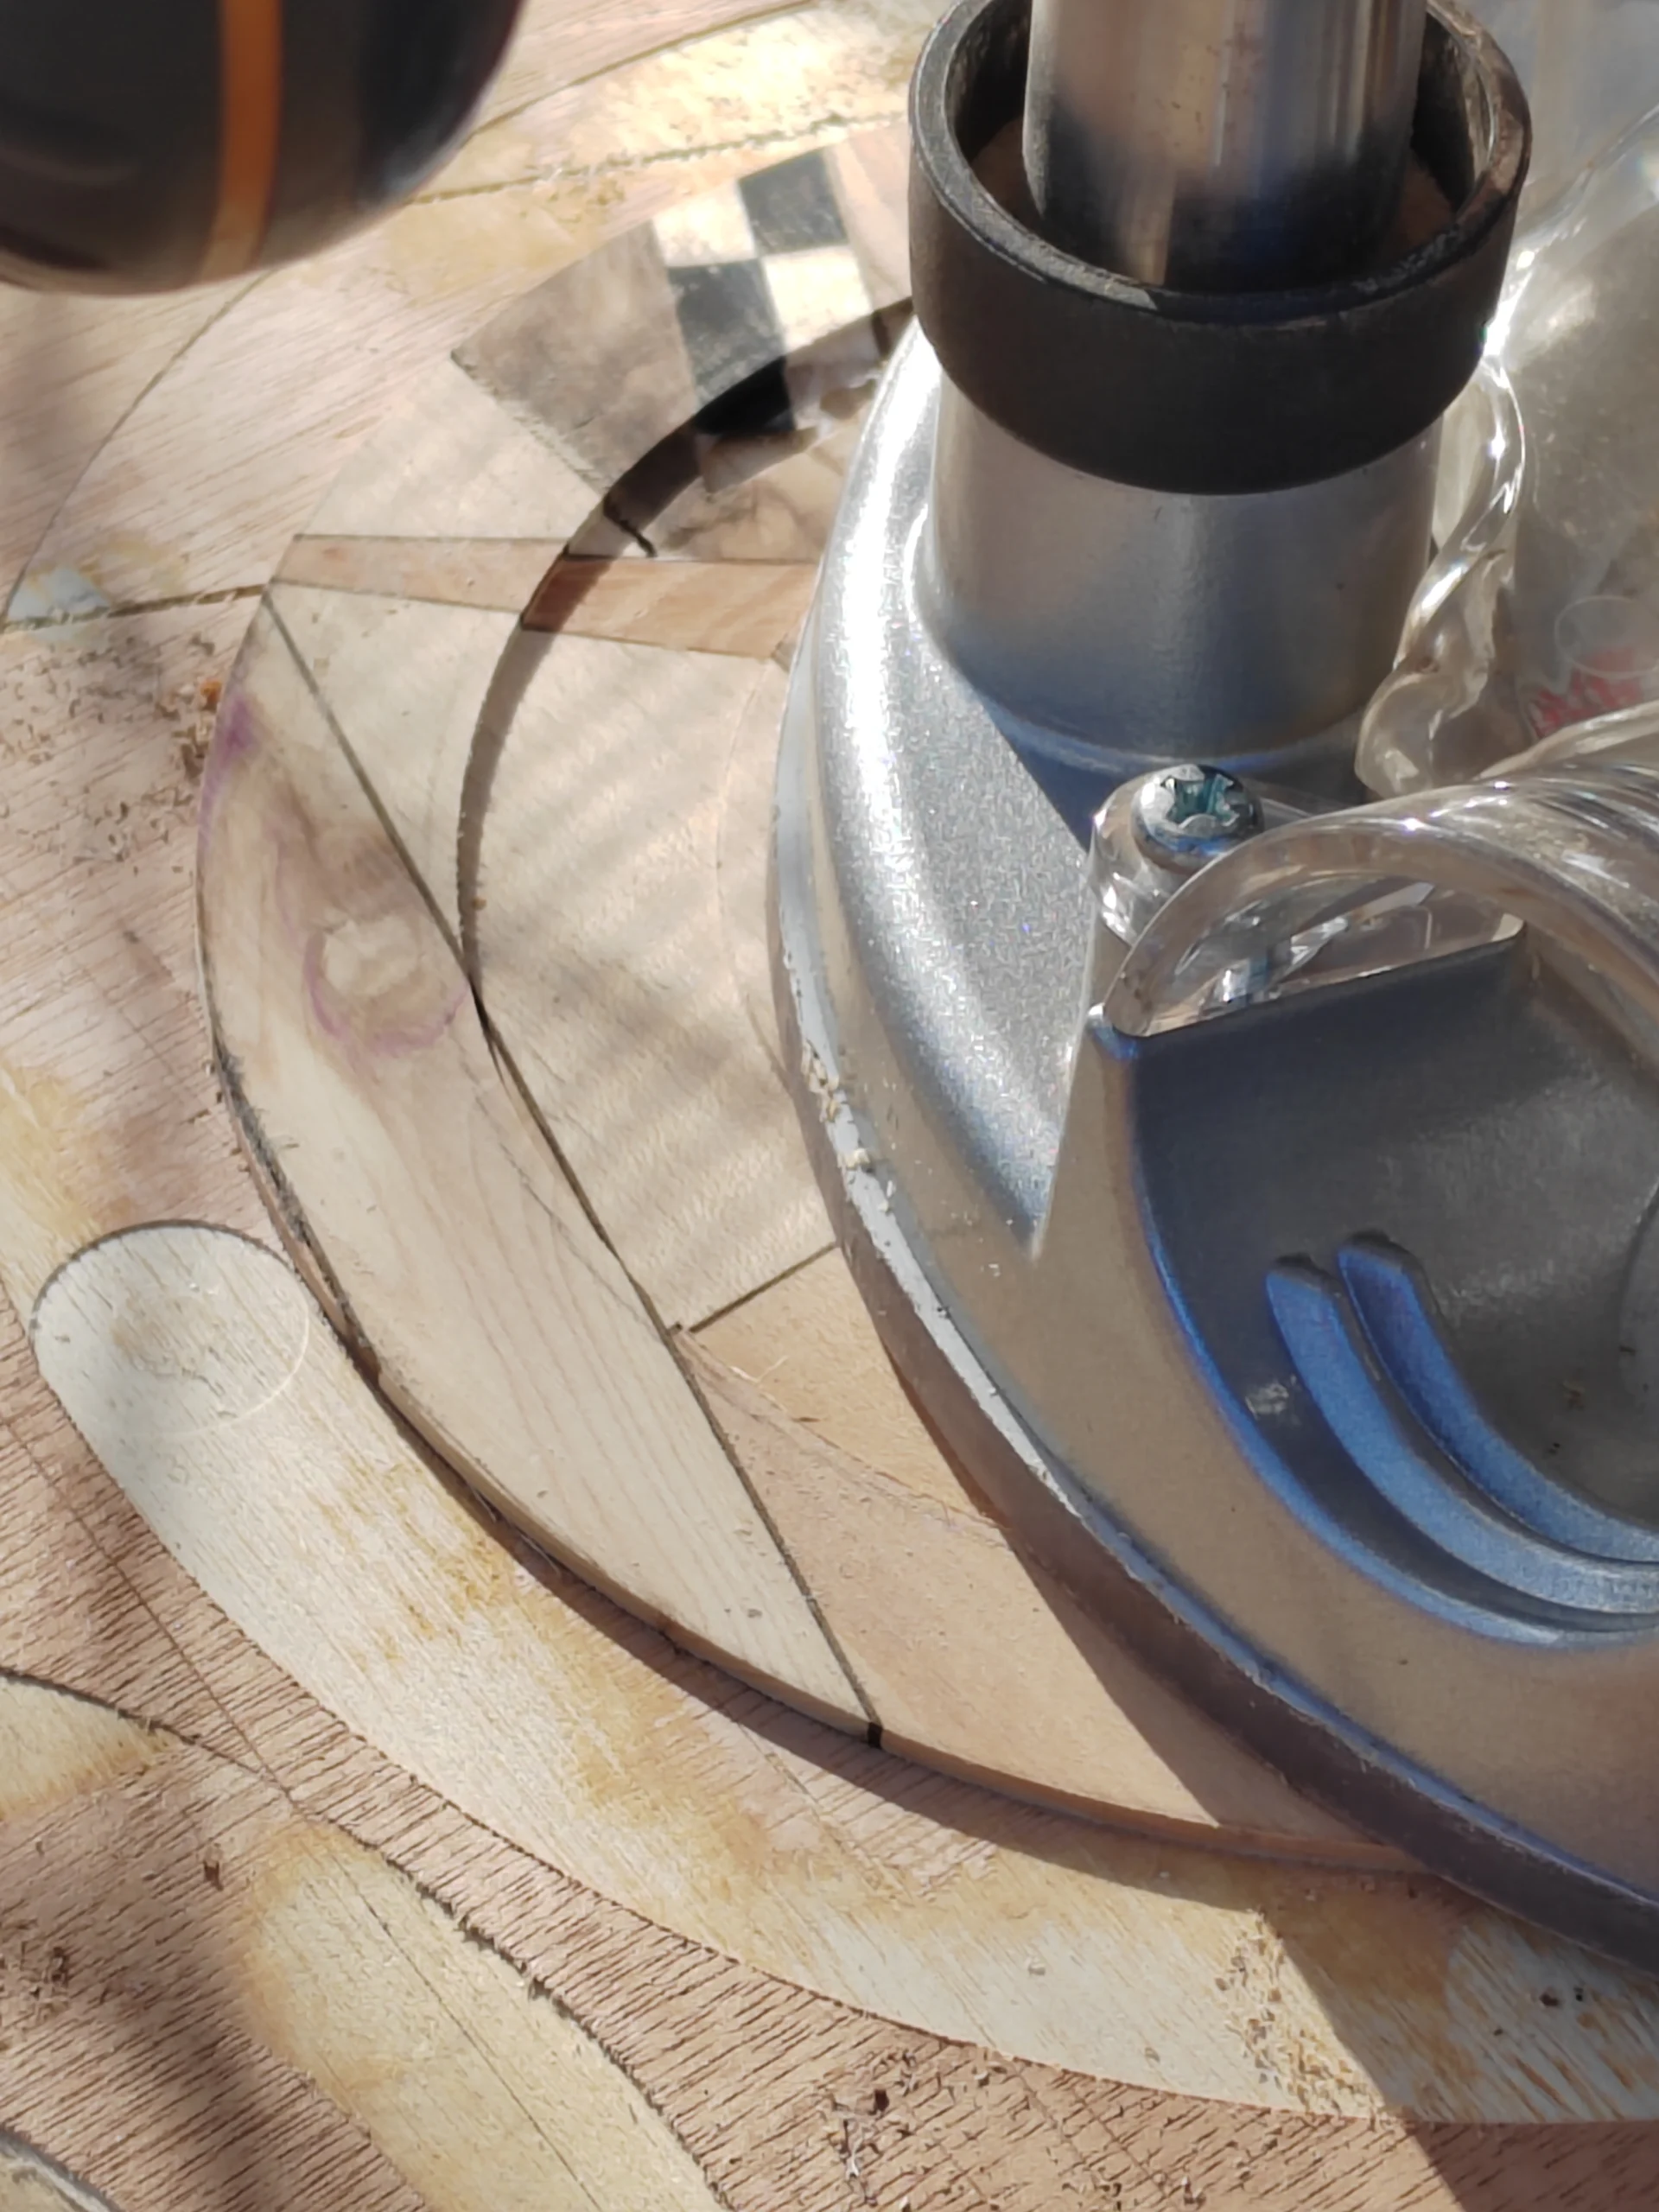
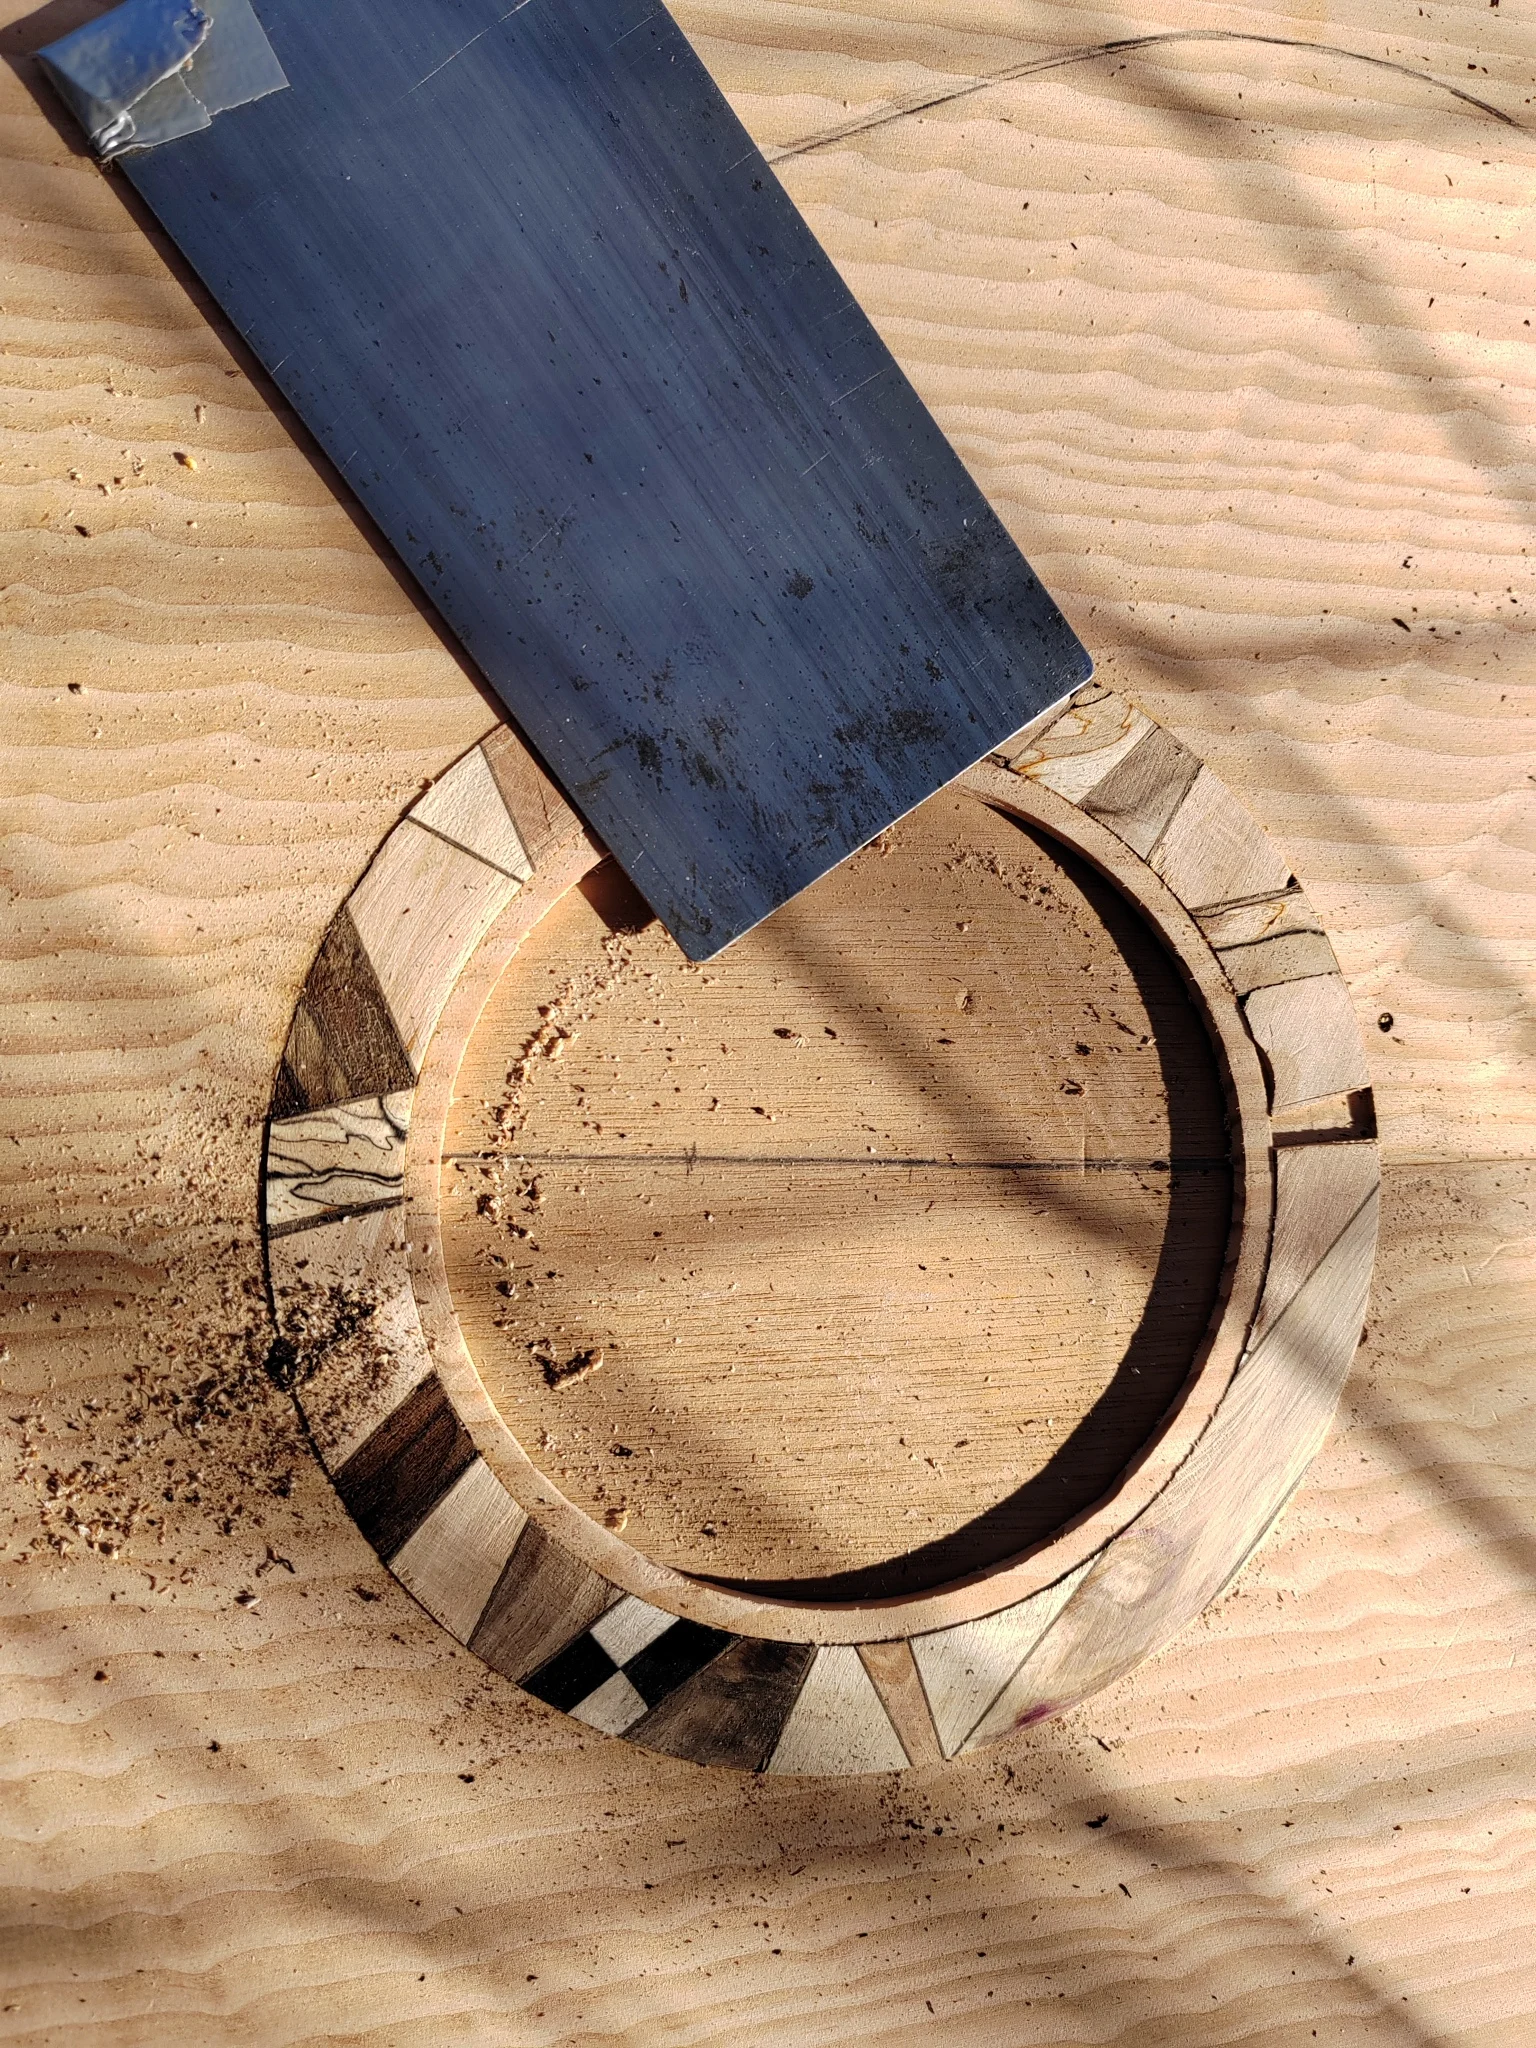
The rosette ‘mosaic’ was also put through the sander – it needs a lot of passes because it is even more fragile – to arrive at 1.6mm. The ‘doughnut’ shape was then cut out using the router… I lost count of the number of passes it took, but, given the risk of it fracturing and all the pieces going everywhere, it was loads…
Once the rosette was glued in place, a cabinet scraper was used to bring it down level with the soundboard.
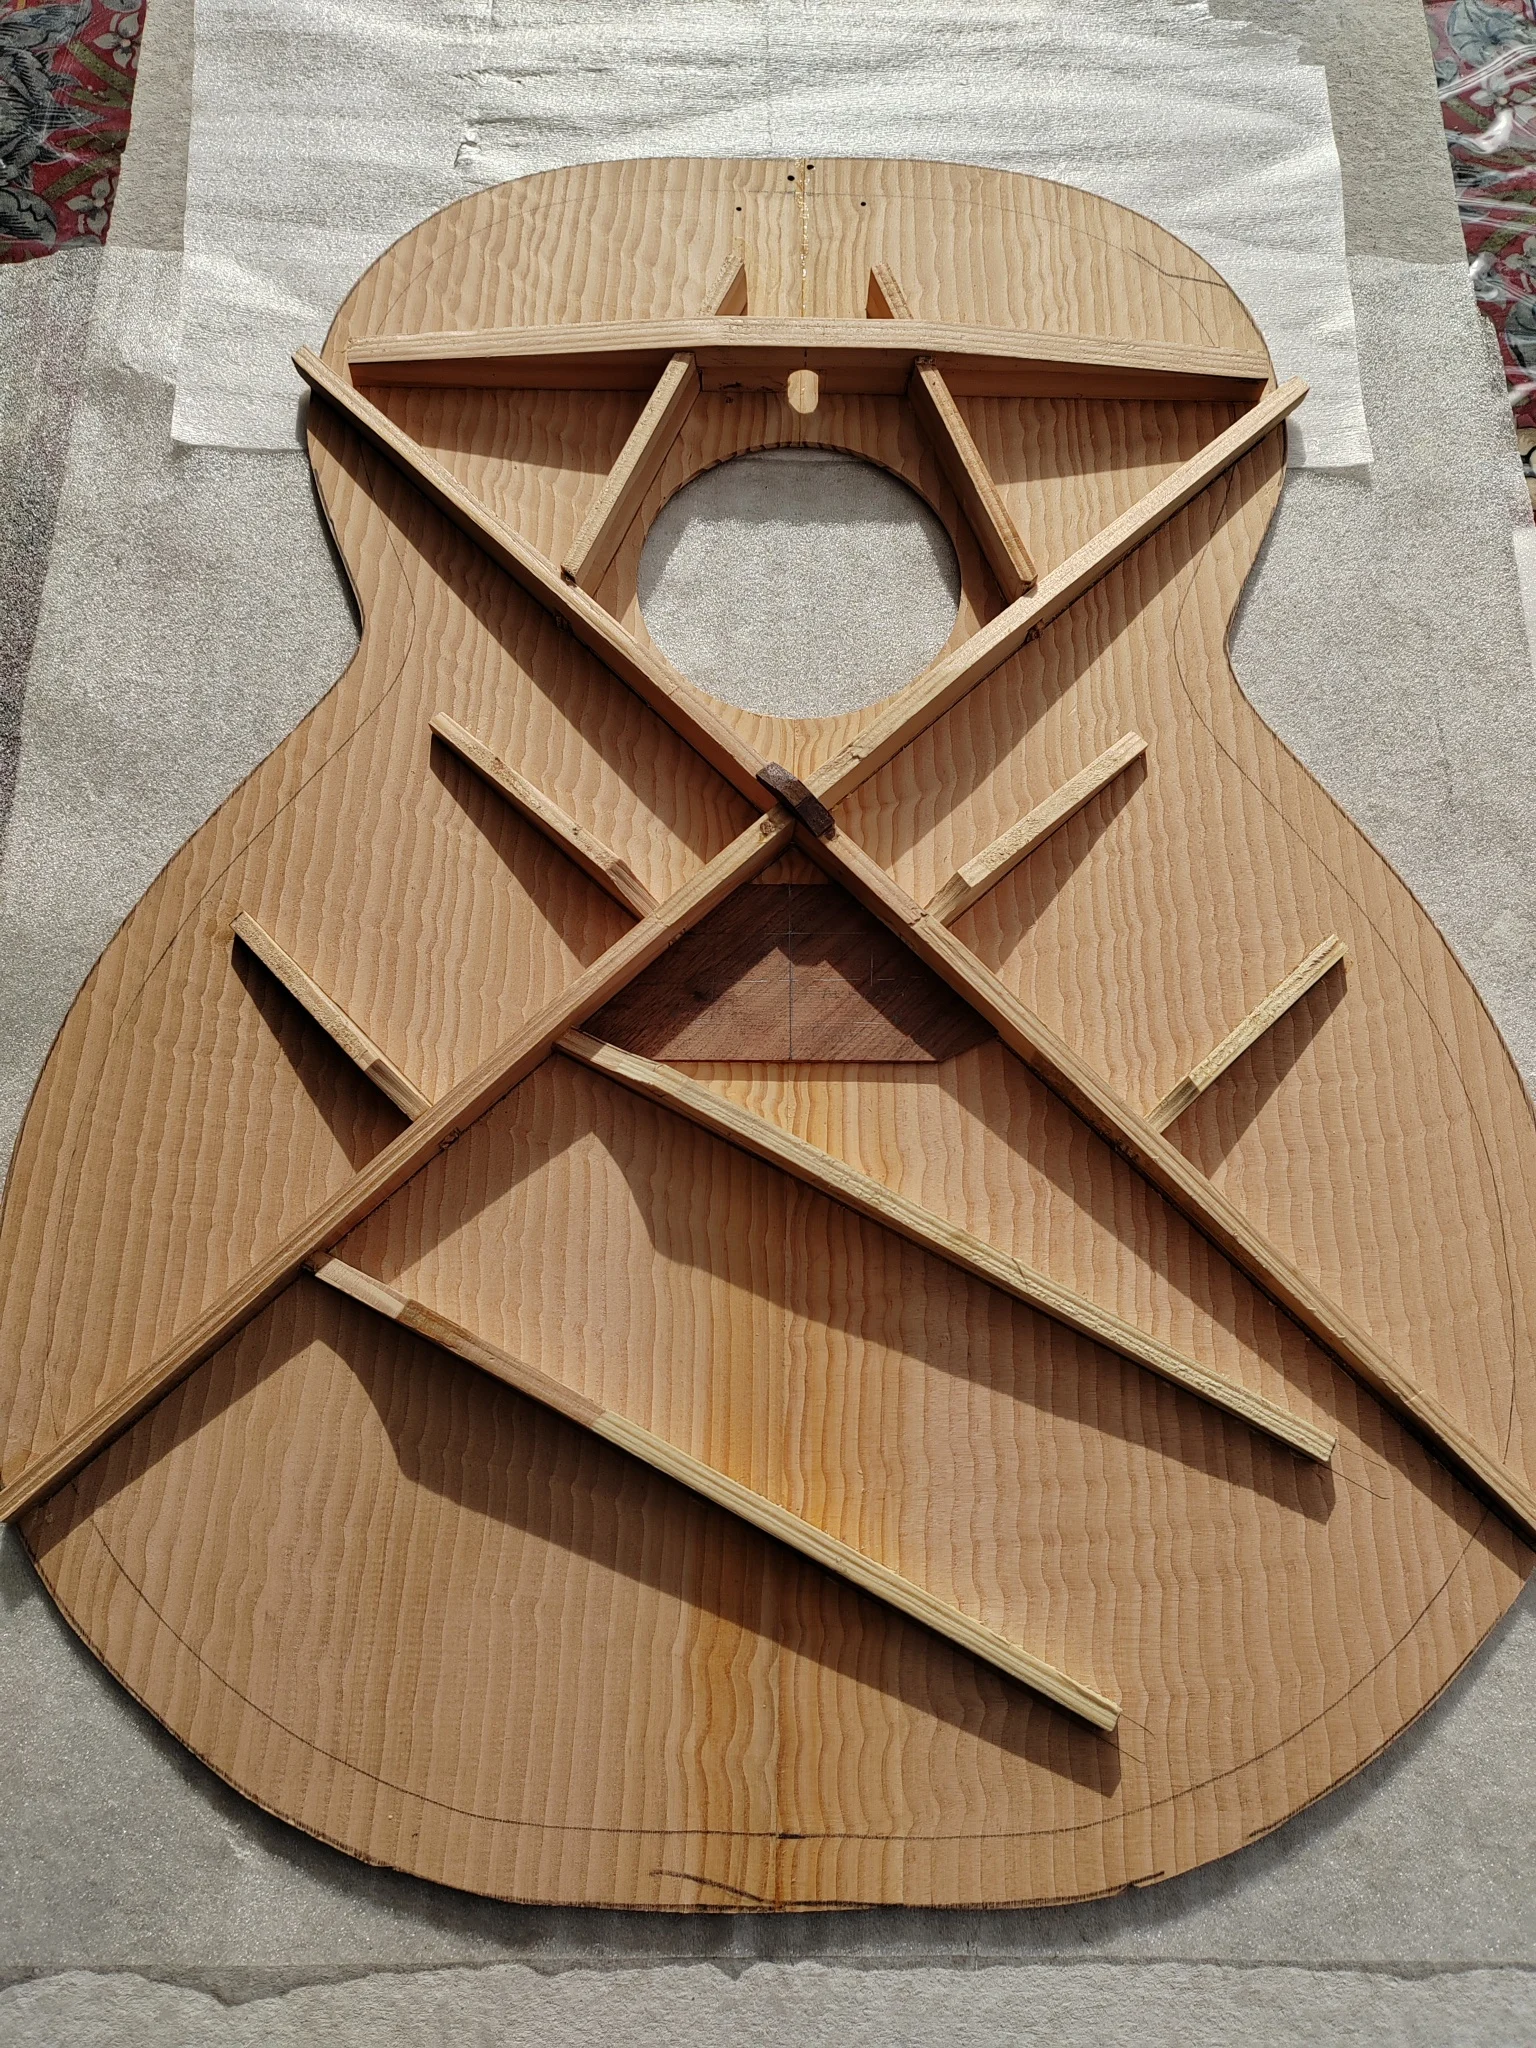
With the rosette in place I could move on to cutting the back and top to their shape and start to glue on the bracing. There’s a lot of views and debate about how to brace a guitar – especially the soundboard. Some of it is pseudo-science, some of it is habit and history; and some of it is received wisdom and mythology. For instance, it’s widely believed that CF Martin invented the X-brace, but I’ve seen an x-ray of a 1782 guitar, by Longman & Broderip, which shows X-bracing – that’s fifty years before Martin Guitars came along…
There are so many variables involved in bracing and the best that can be said is that there is no single ‘right’ or ‘wrong’ way to do it; everything is a trade-off with everything. I’ve had the good fortune to discuss the matter with a friend who was the head design engineer of a major plant manufacturer and another who is a professor of engineering at a top university (because at the end of the day it’s all about mechanics). So, it’s a case of each to their own to some extent when it comes to bracing; I use a differential system.
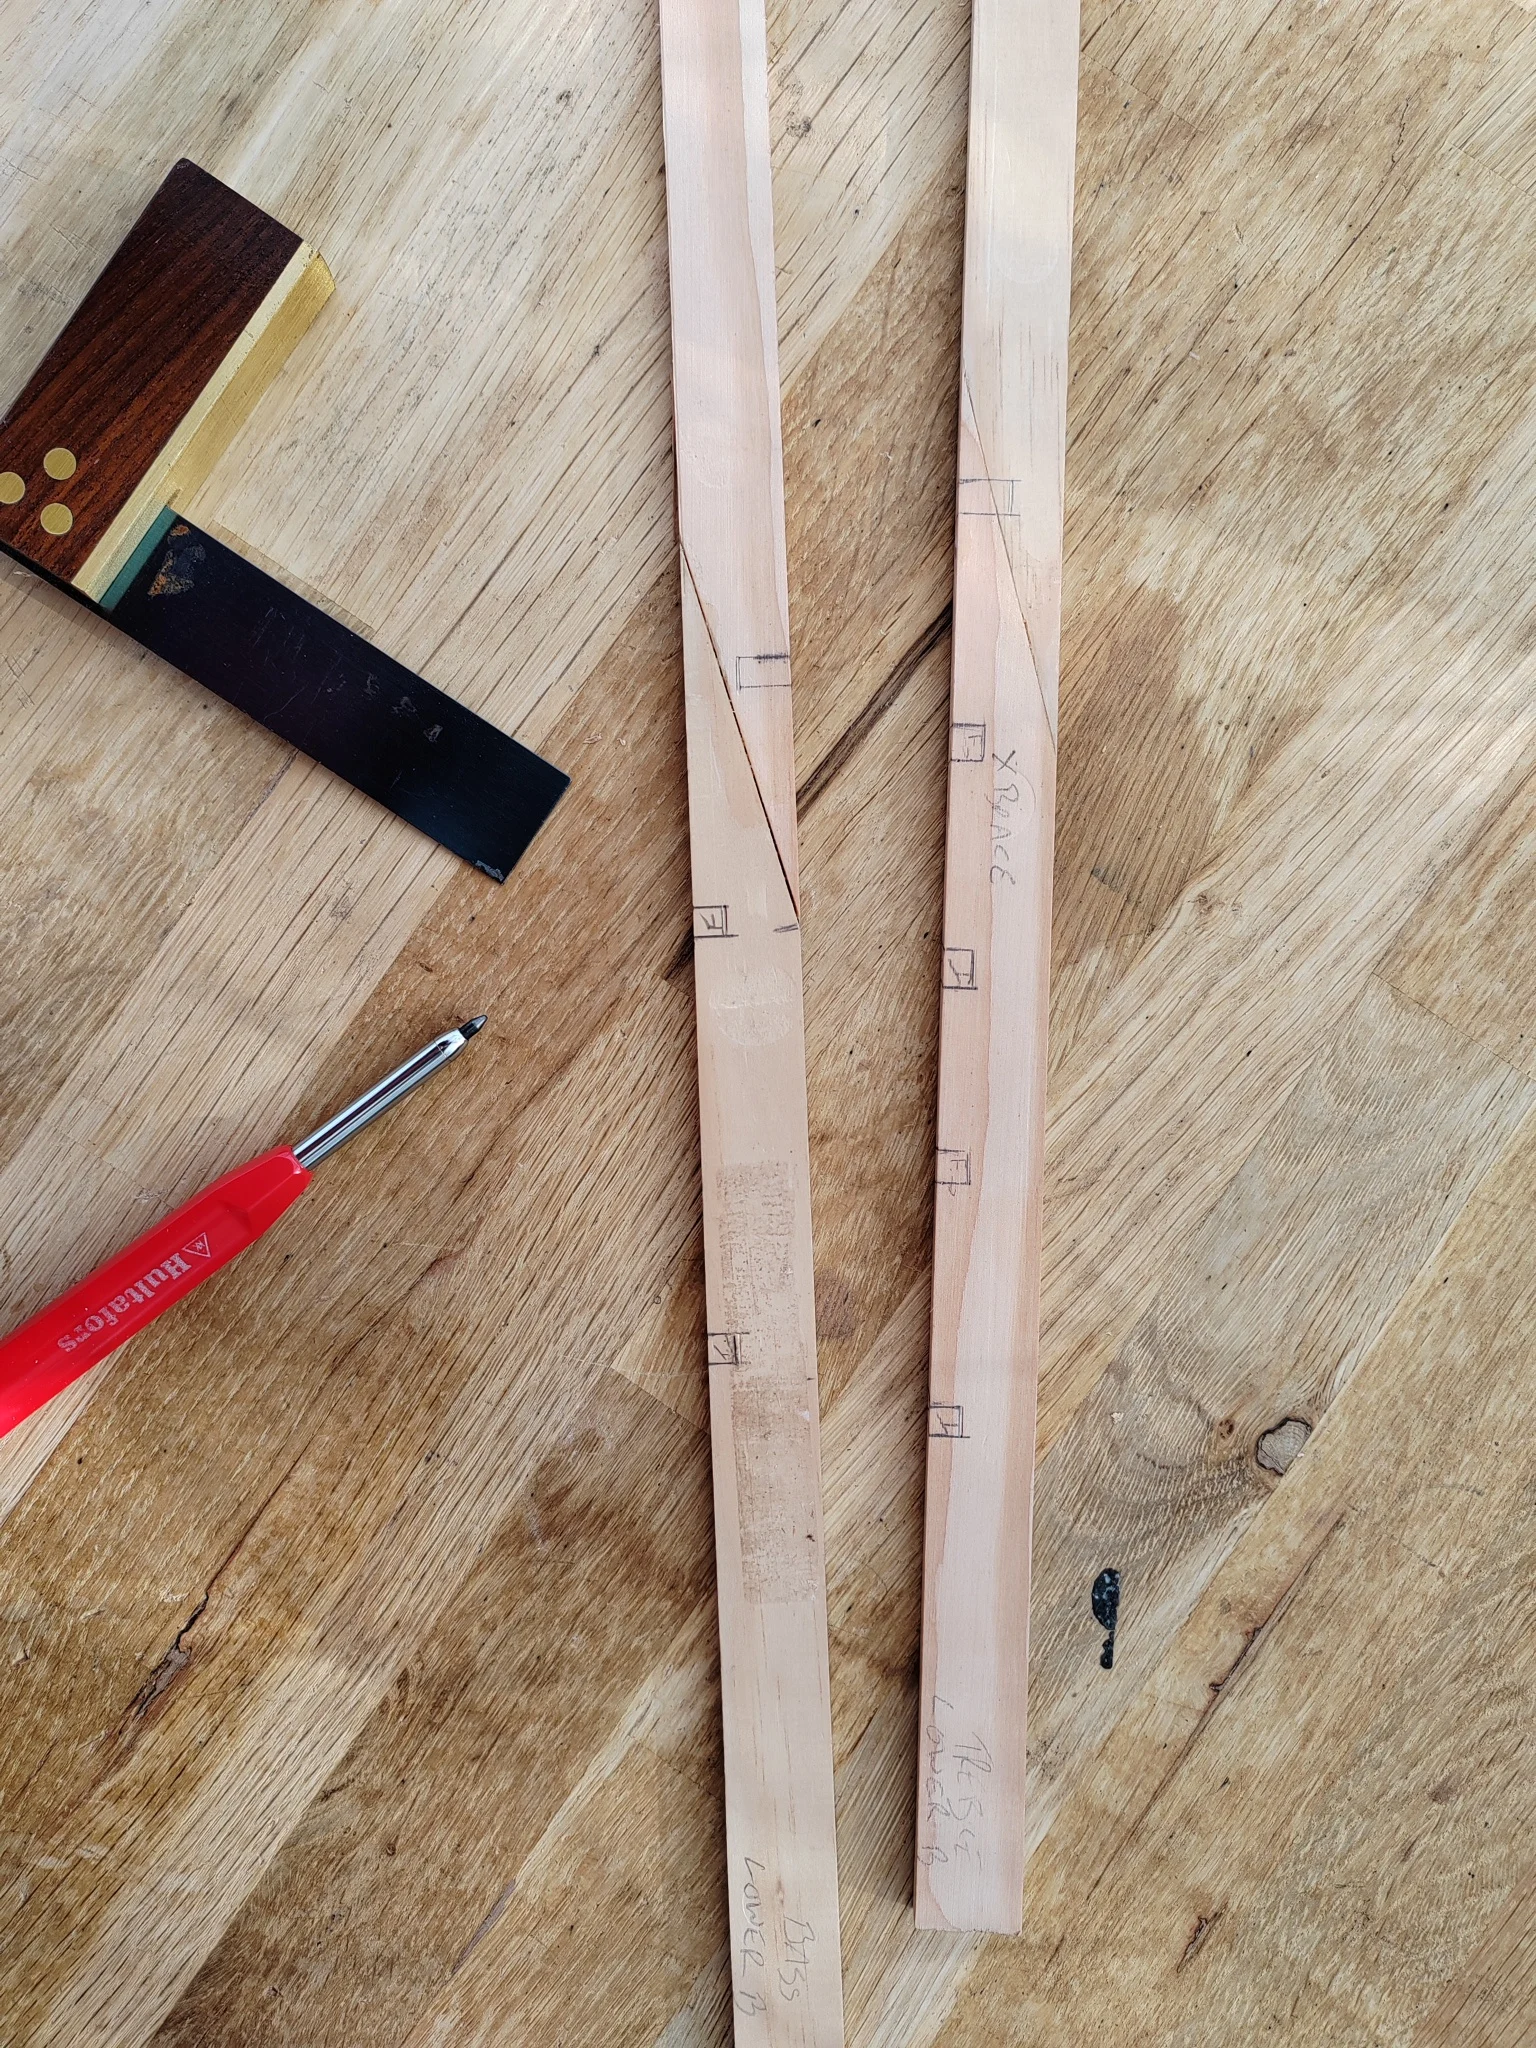
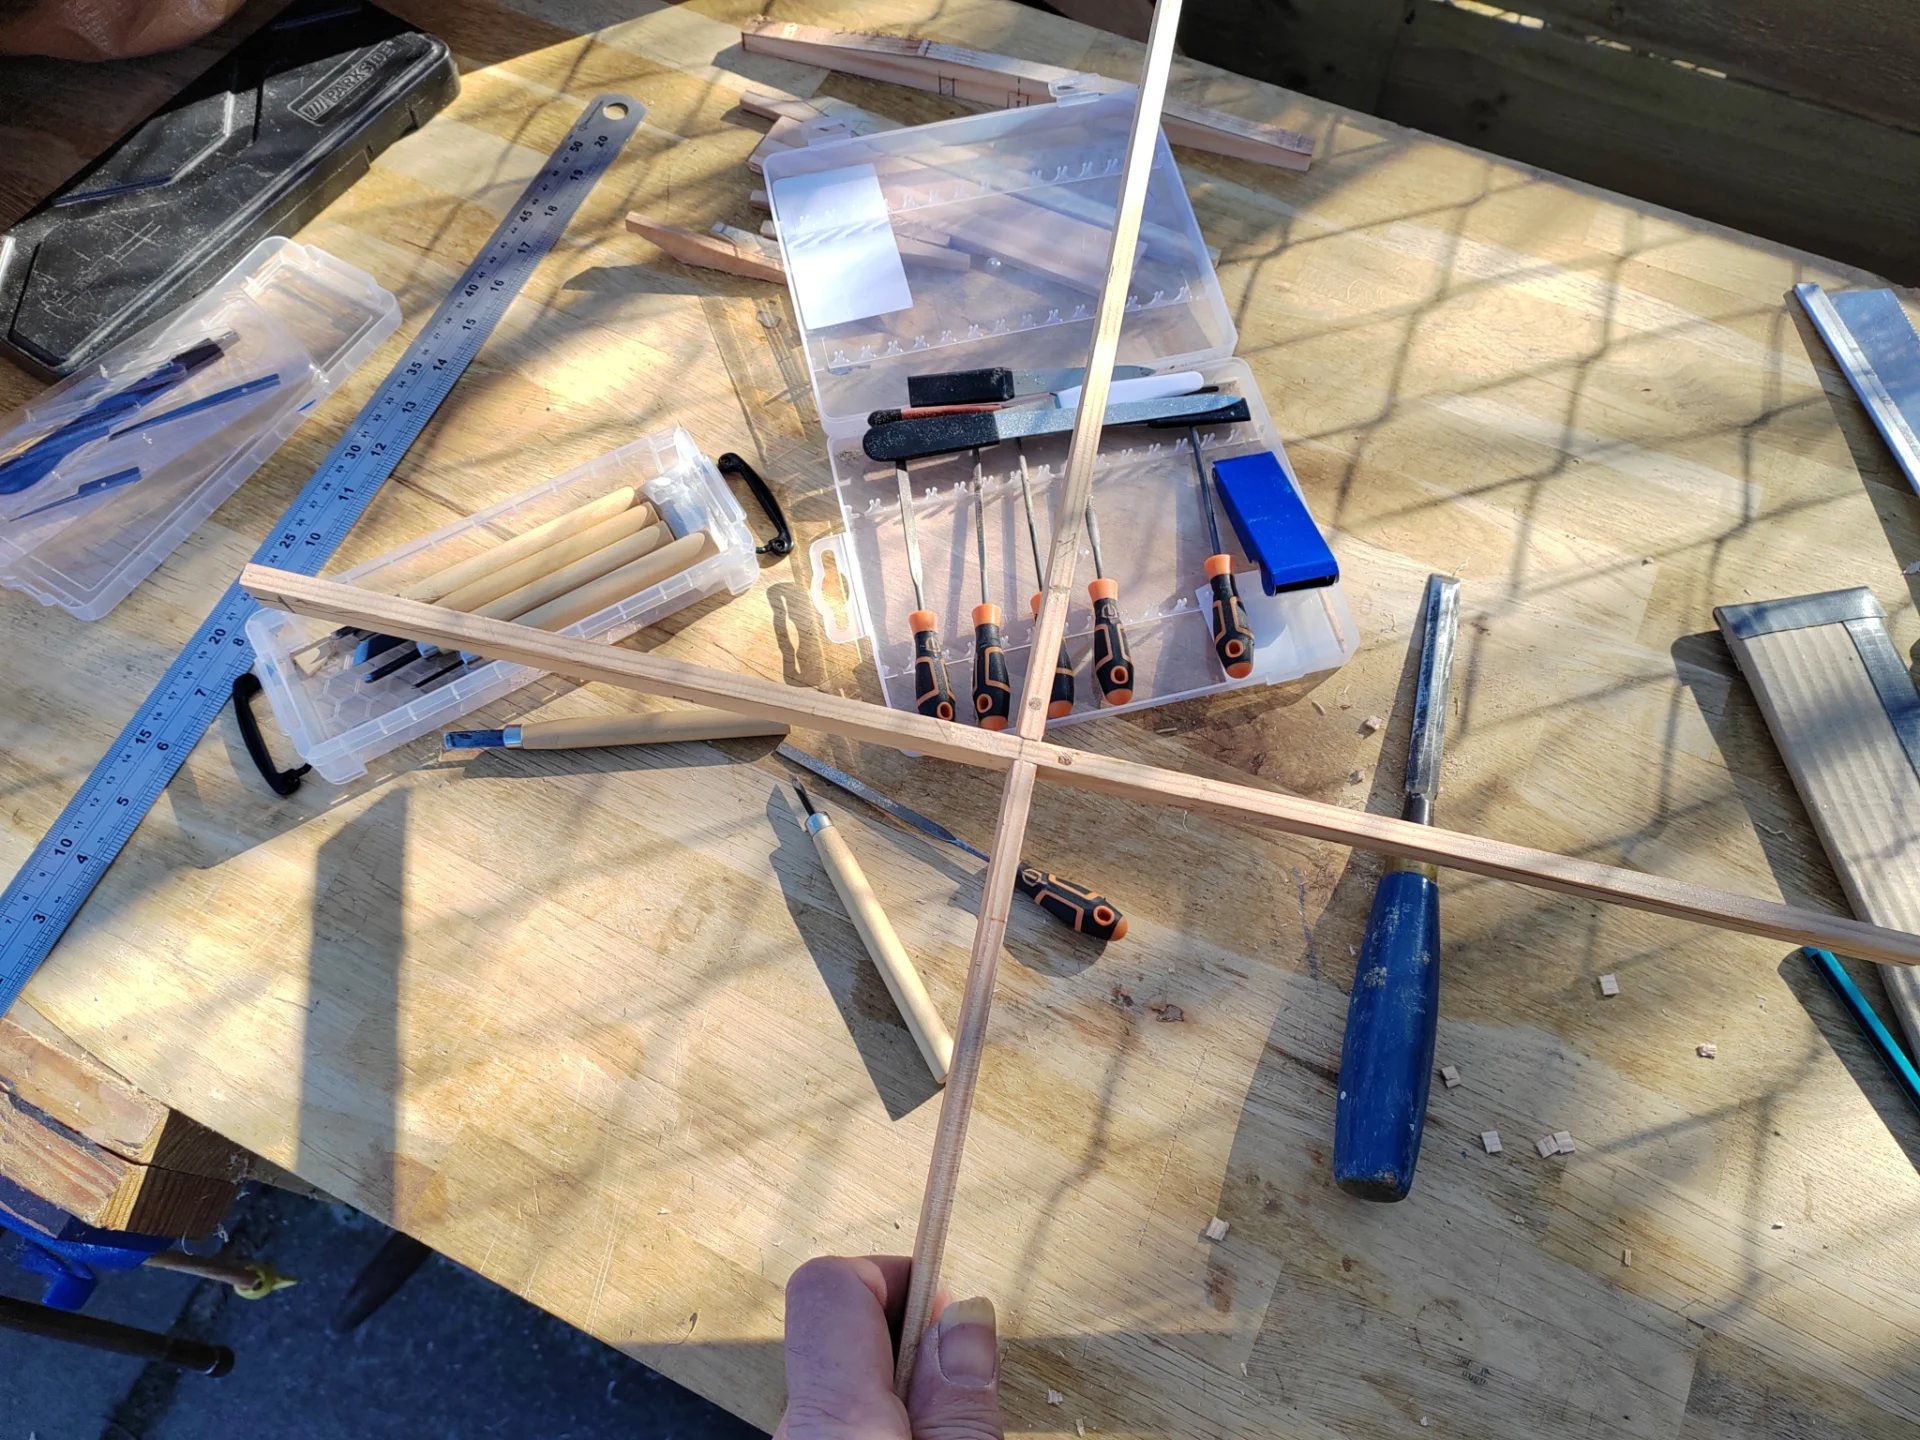
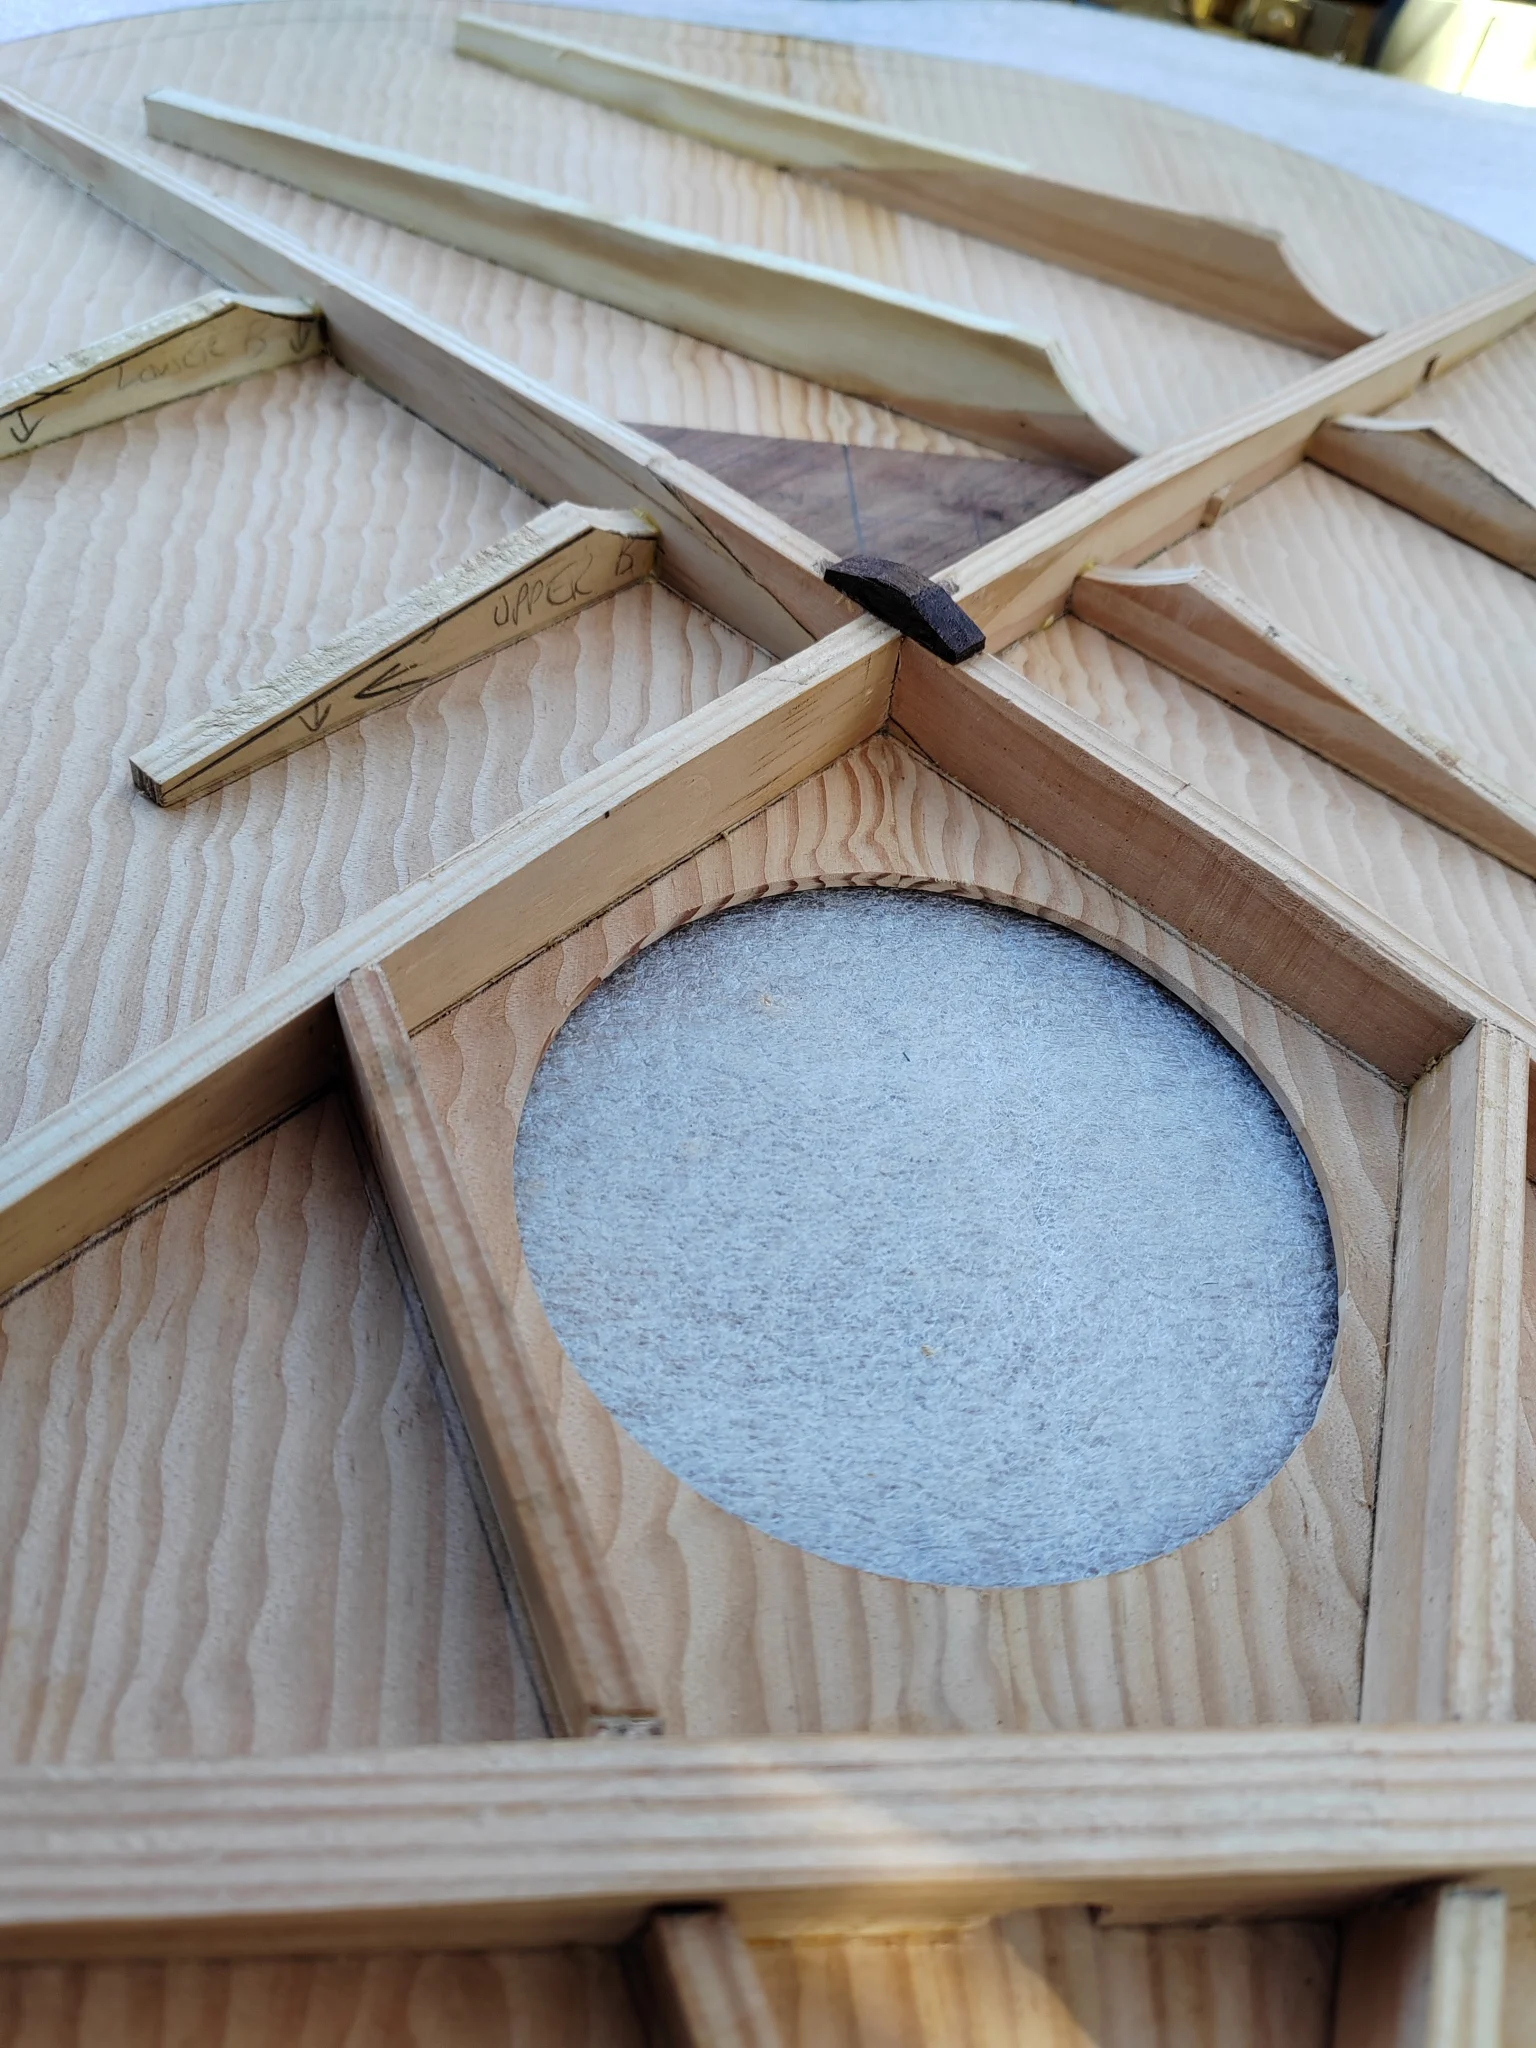
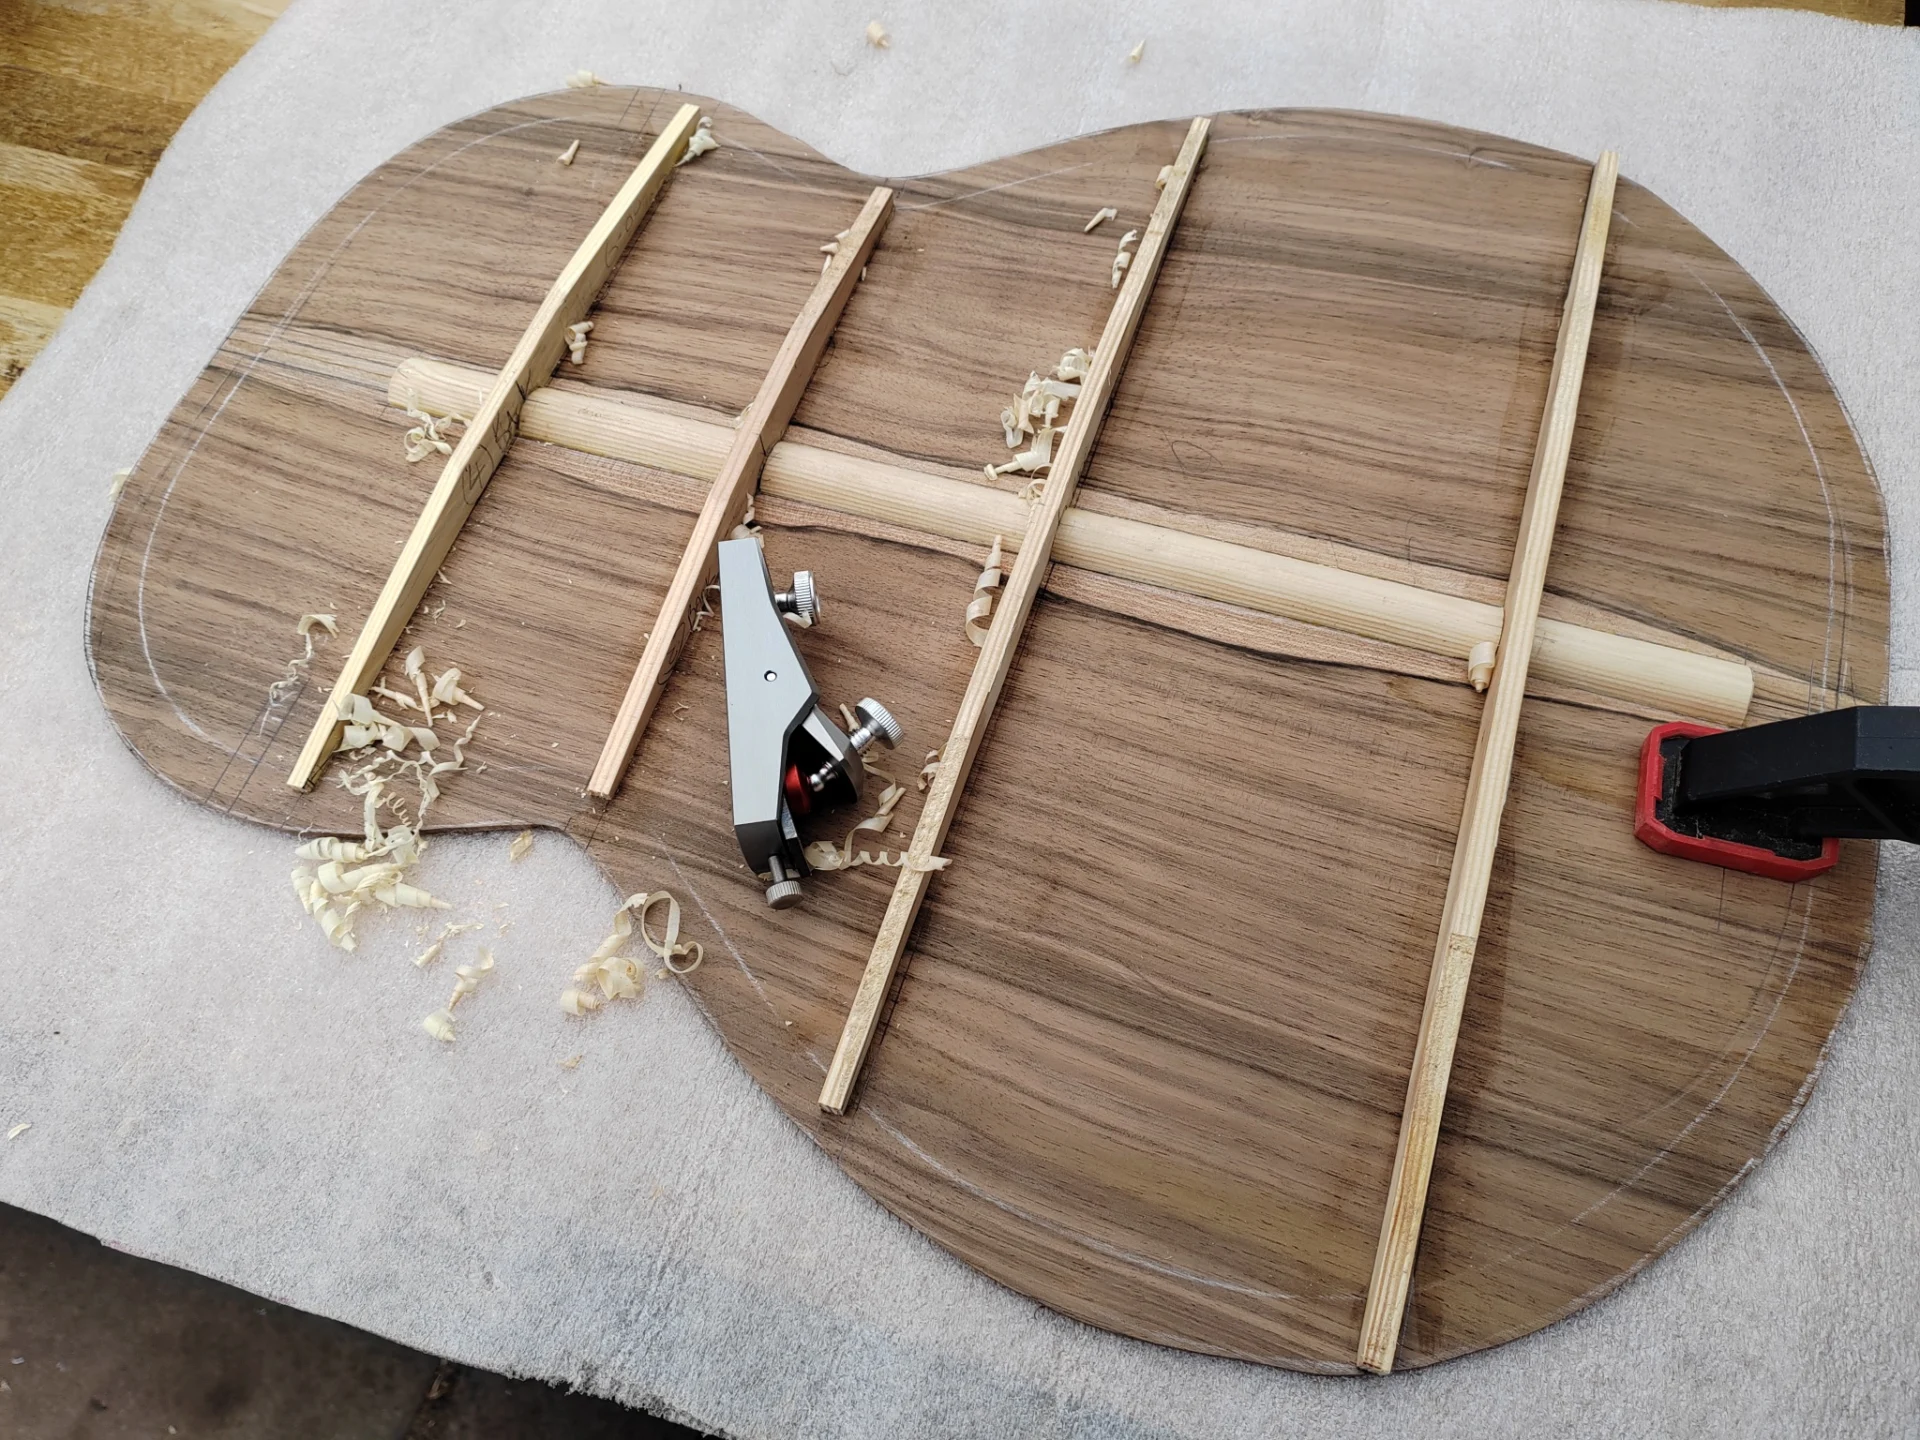
I tie in all the soundboard braces using a half-lap joint. It is perfectly feasible to just glue them to the top, but by jointing them the bracing works as a whole system and makes the soundboard tighter. This means first marking up the position of the ten joints.
By far the most important joint is for the X-brace. This has to be bang on 90° and very tight. Calling it the X-brace is actually a misnomer, because it doesn’t function as a single unit. It’s actually two ‘V’-braces – the bottom ‘V’ (at the lower bout) mechanically acts as a ‘tie’, whilst the top ‘V’ (at the upper bout) functions as a ‘strut’. The X-brace is less about keeping the soundboard flat and far more to do with managing the longitudinal forces (50 – 60Kg) exerted by the strings. All of which has a bearing on how the X-brace is finally attached to the sides and heel-block.

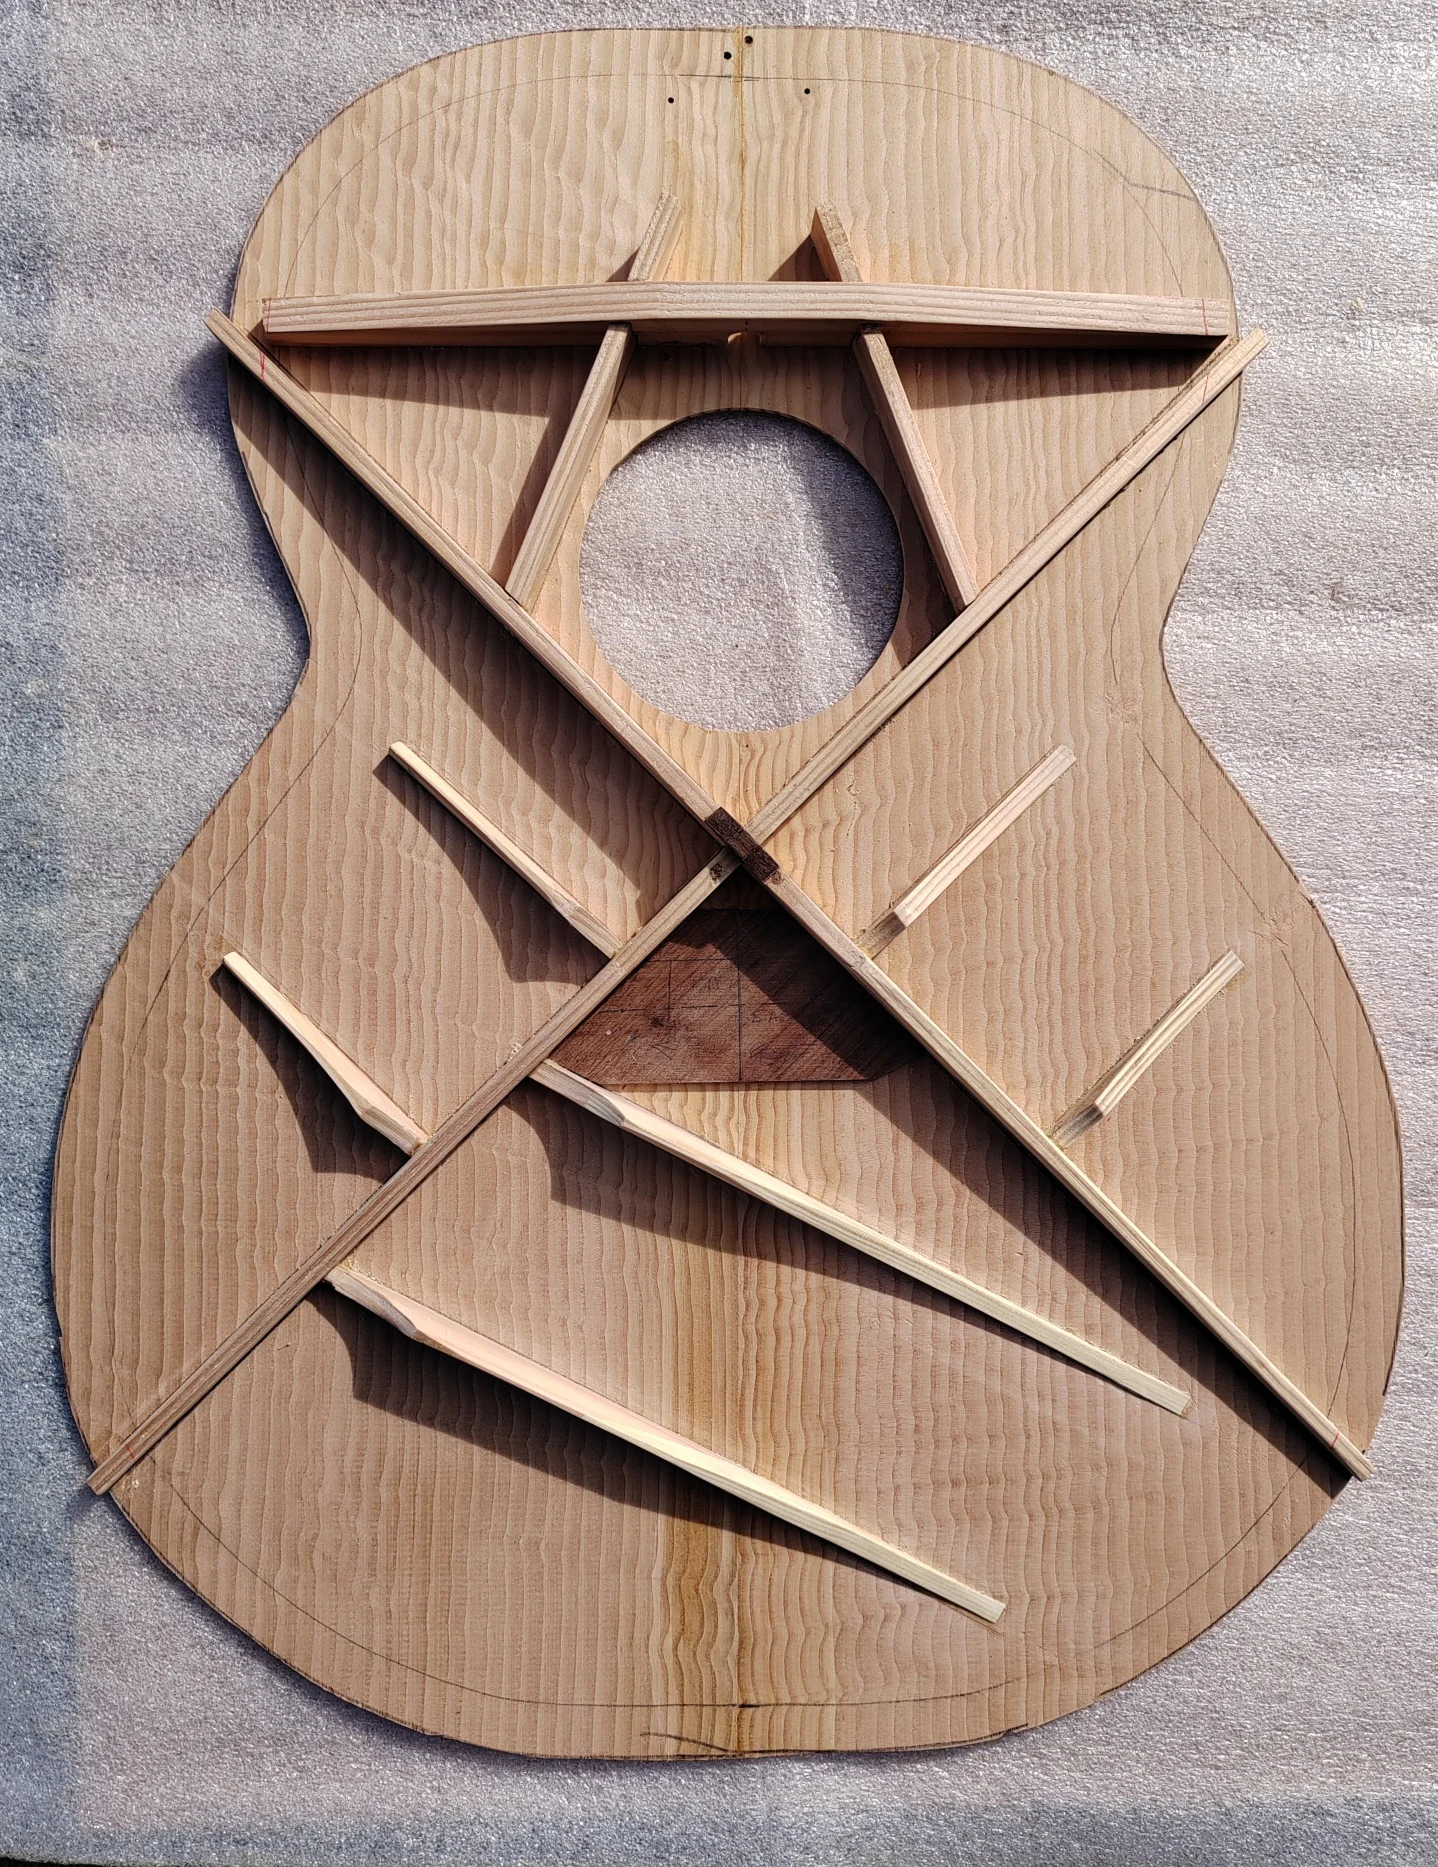
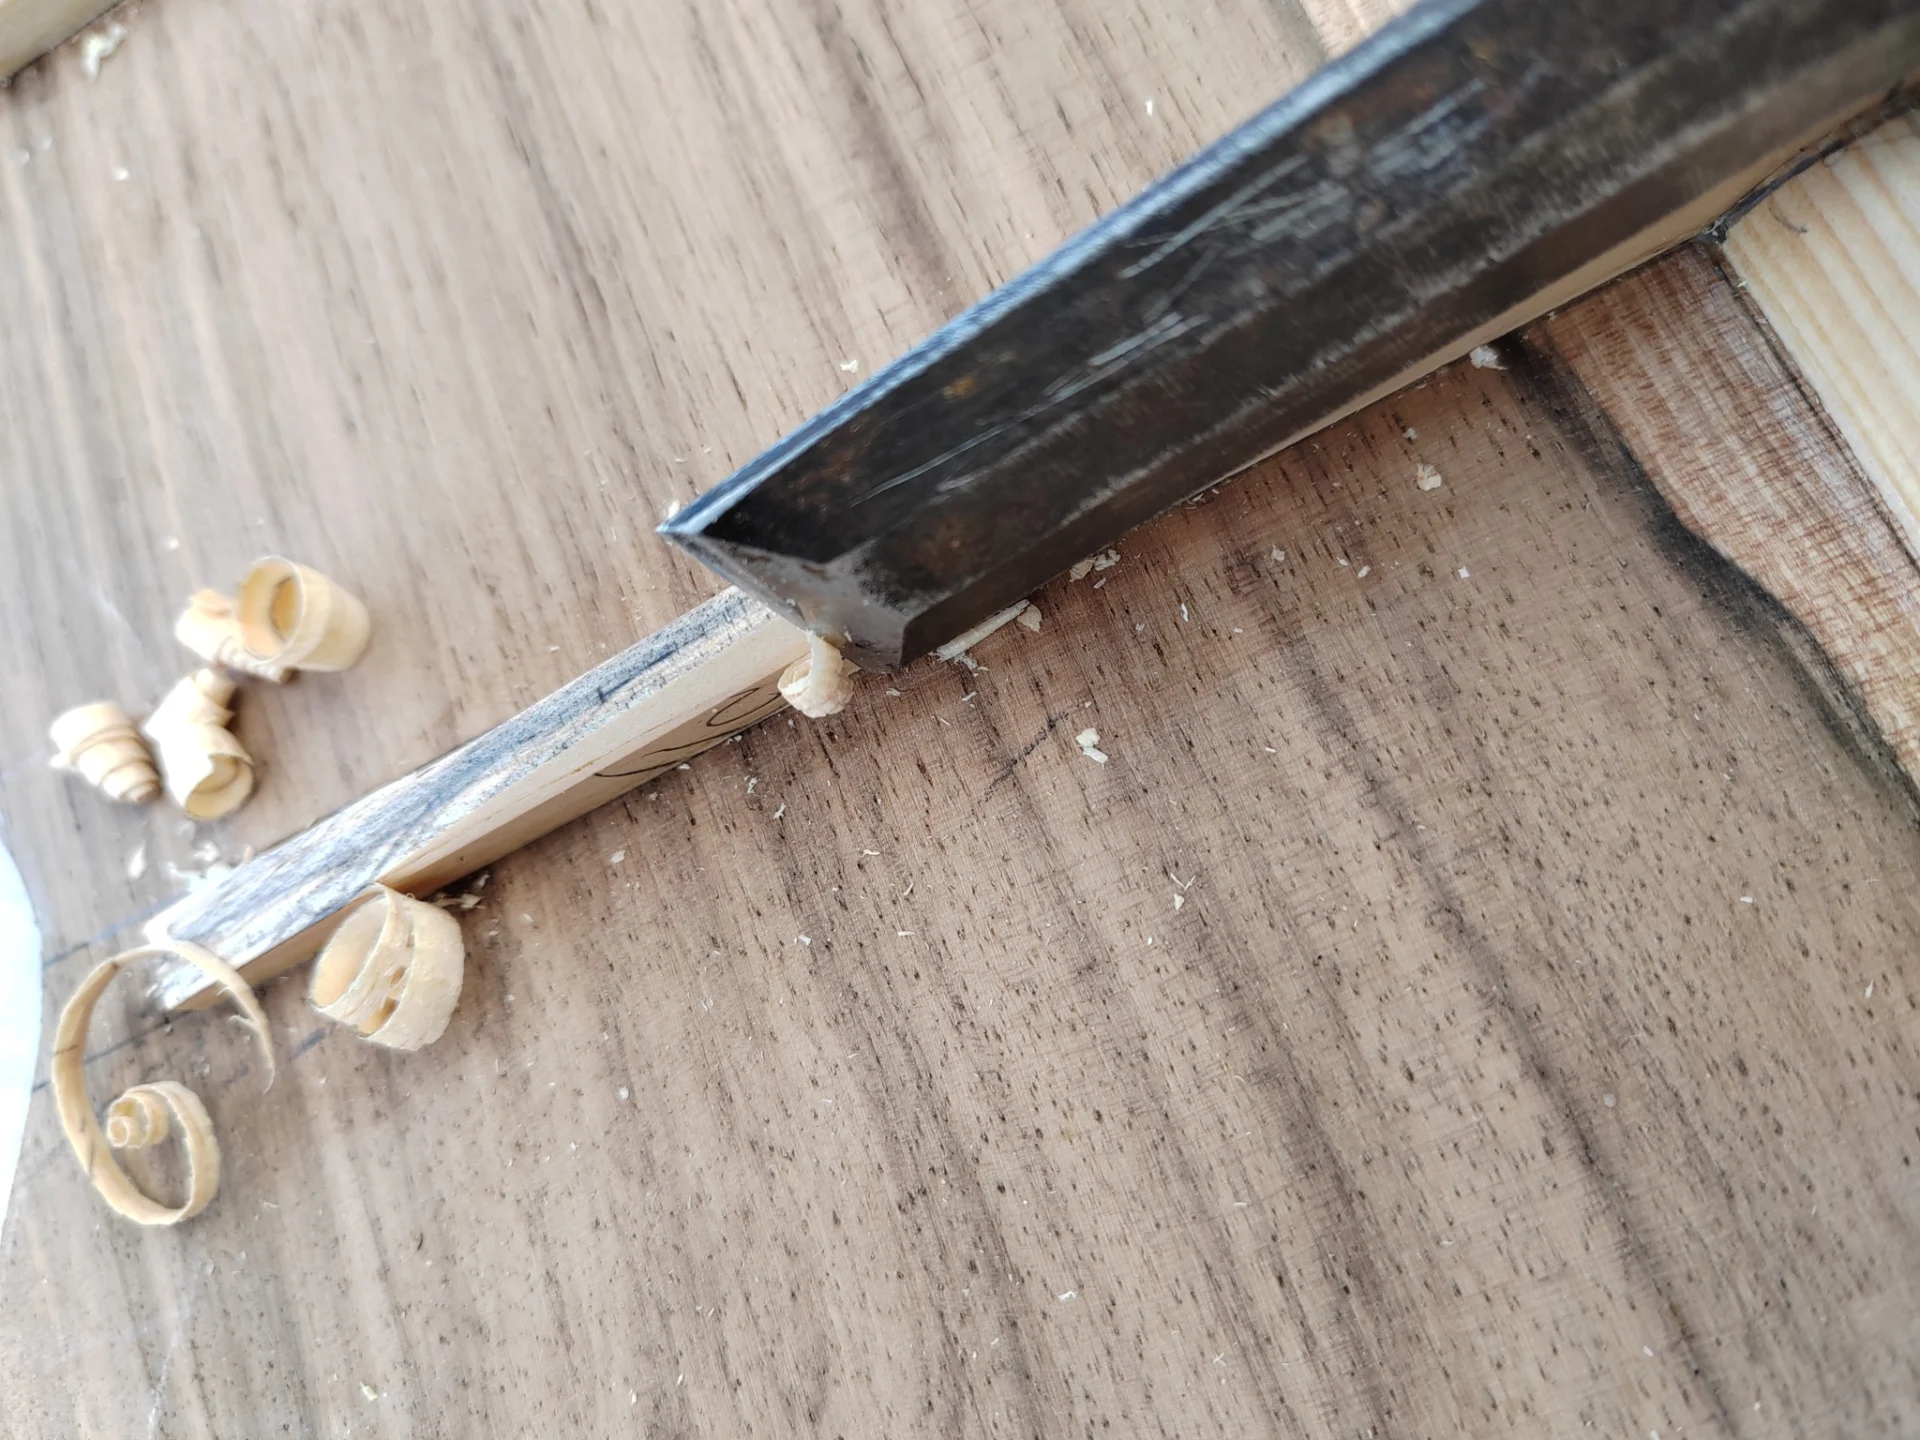
Once the braces have been glued in place, the interesting process of ‘tuning’ the soundboard can begin. This is done by tapping the soundboard, listening for the sort of frequencies it’s producing and then adjusting the density of the braces using finger planes and chisels.
Tuning the soundboard actually begins right at the start by tapping the ‘raw’ boards to hear if they’ve got some inherent natural resonance – these boards seemed to hold a lot of promise.
Tuning the soundboard is quite a lengthy process – tap, listen, plane a sliver off one brace, then repeate, repeat, repeat….
Ideally what I’m looking for is the soundboard to produce a broad range of frequencies, because that’s the best indicator that the guitar will sound good. The logic of Newtonian physics is that everything in the universe can be predicted, but with guitar building you have to accept the uncertainty principle of quantum mechanics – it’s where Schrödinger’s cat plays guitar. At this point the guitar is both just ‘so-so’ and WOW! It’s impossible to know exactly what the guitar sounds like until the strings are on. As well as listening, I use a sound analyser to see what sort of frequencies are being produced.
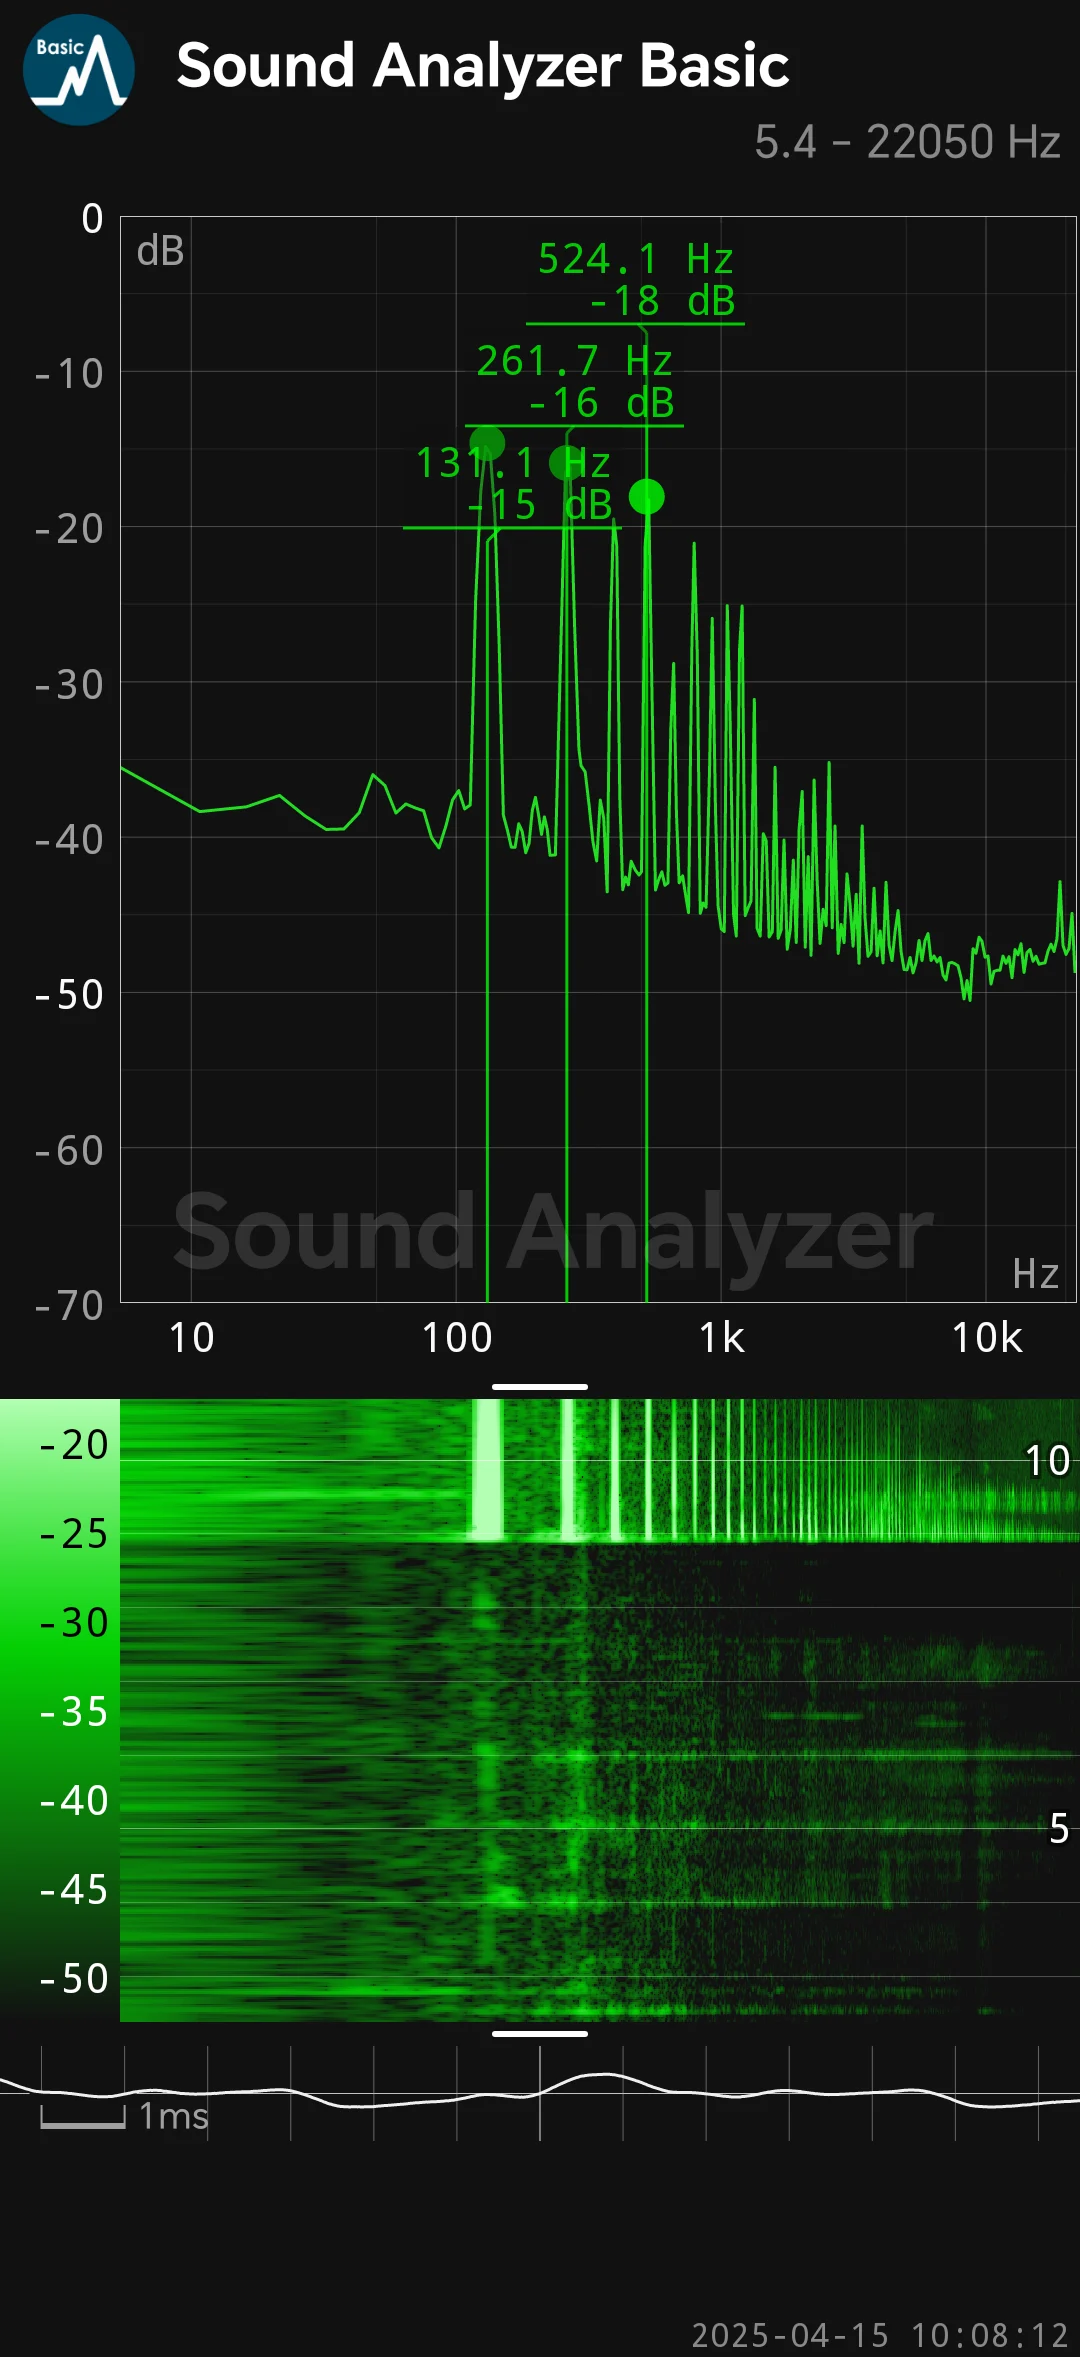
The screenshot above shows the soundboard resonating at a median frequency of 261.7Hz (with a good spread of notes above and below that), which is almost exactly middle C (261.63Hz) – and all that bodes well for the finished instrument (but who knows…).
A similar process applies to the back of the guitar. A lot of folk think the back (and to an extent the sides) just give the guitar it’s tone, but the back can actually produce frequencies in the range of 165 – 700Hz, so it needs to be tuned as well.
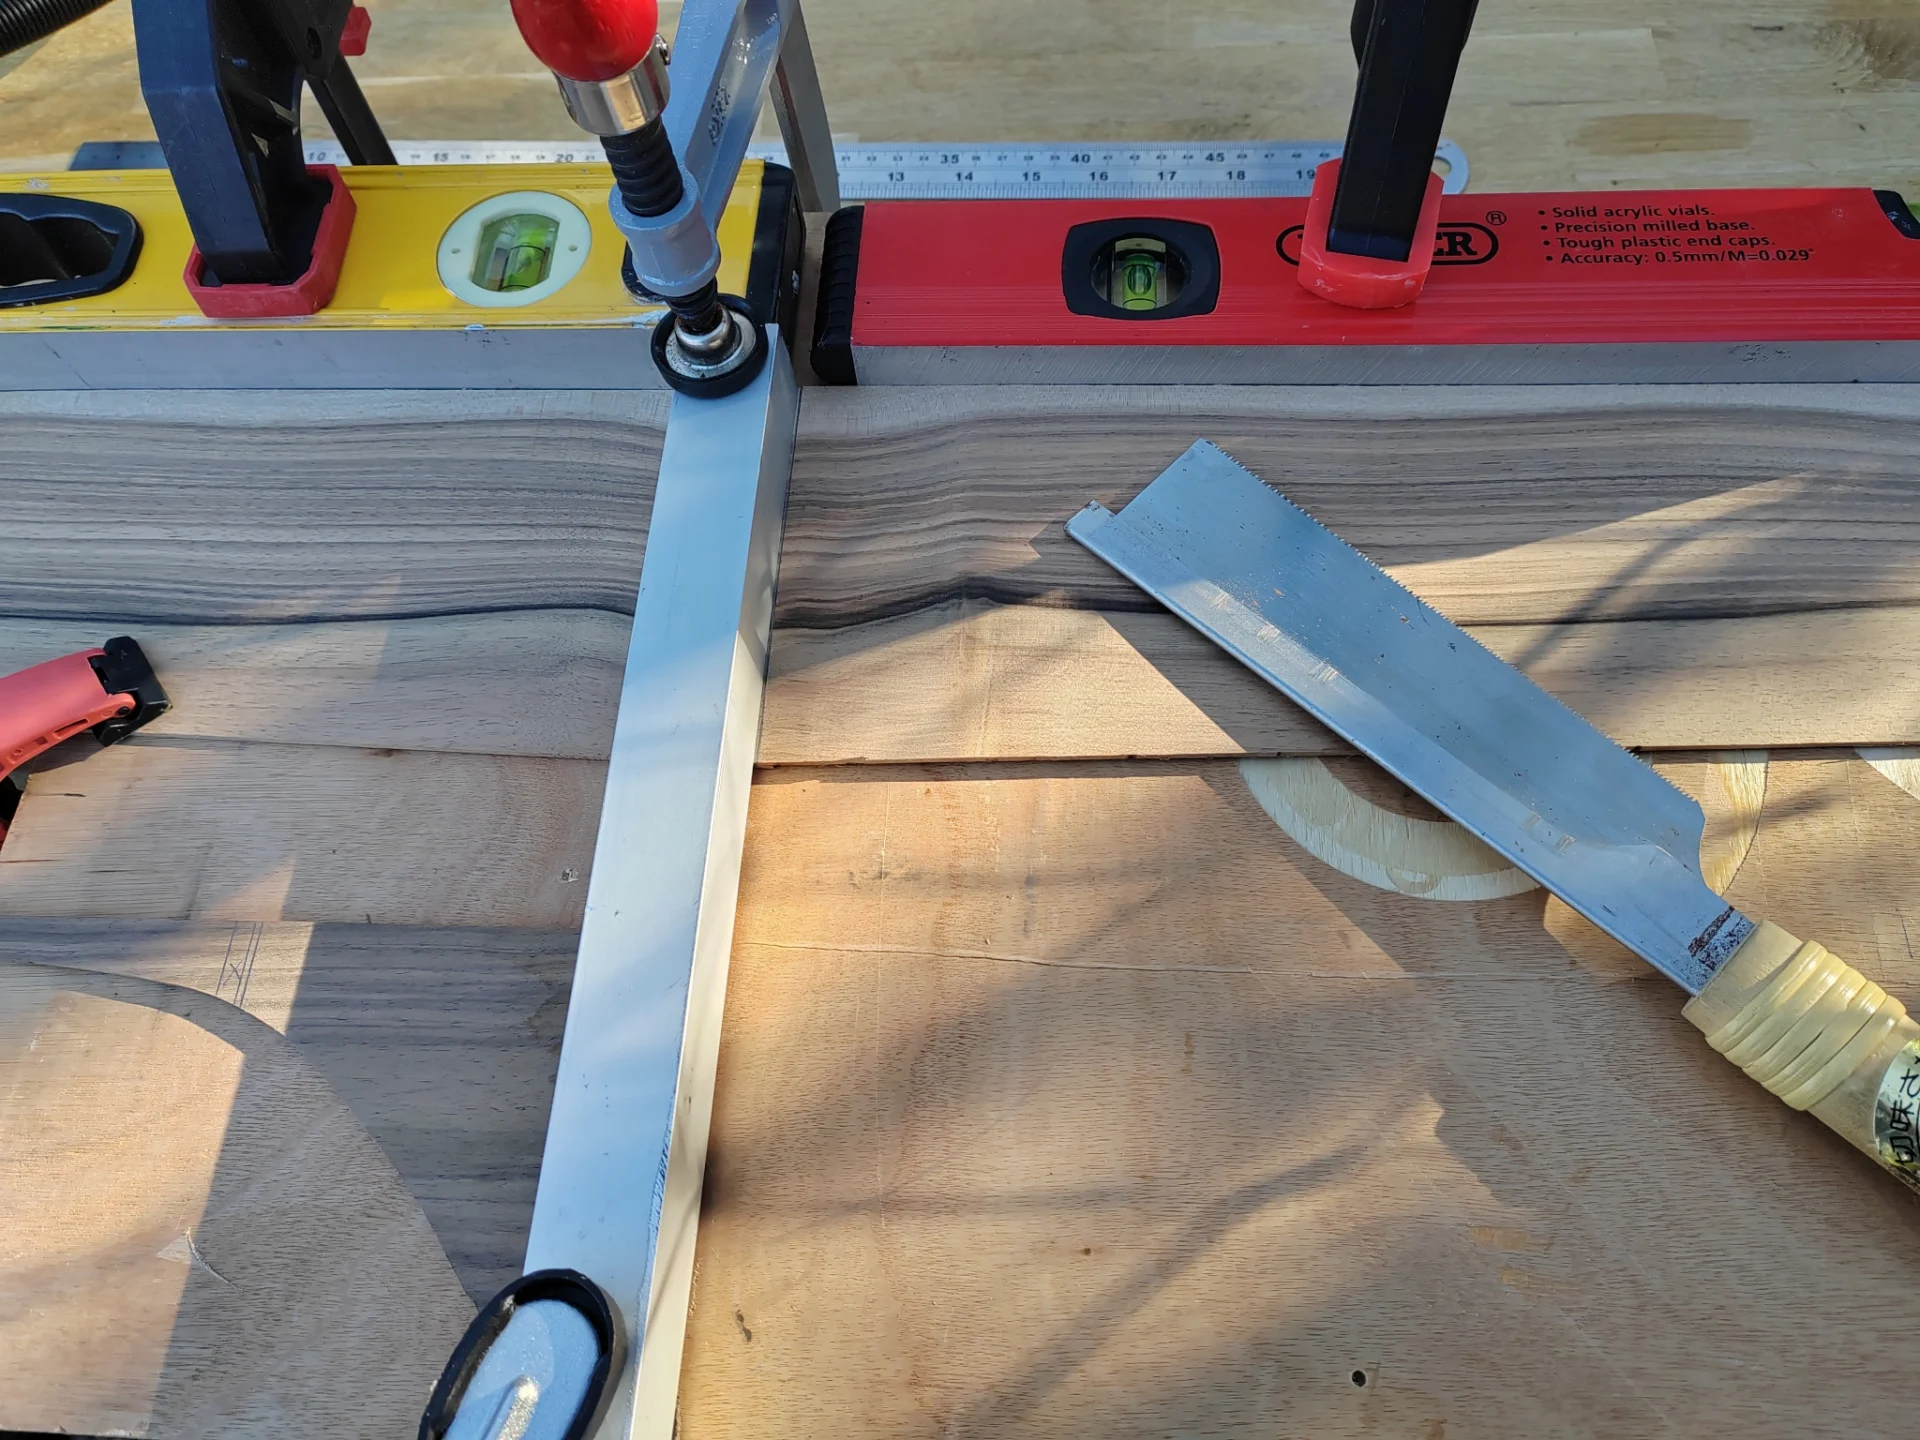
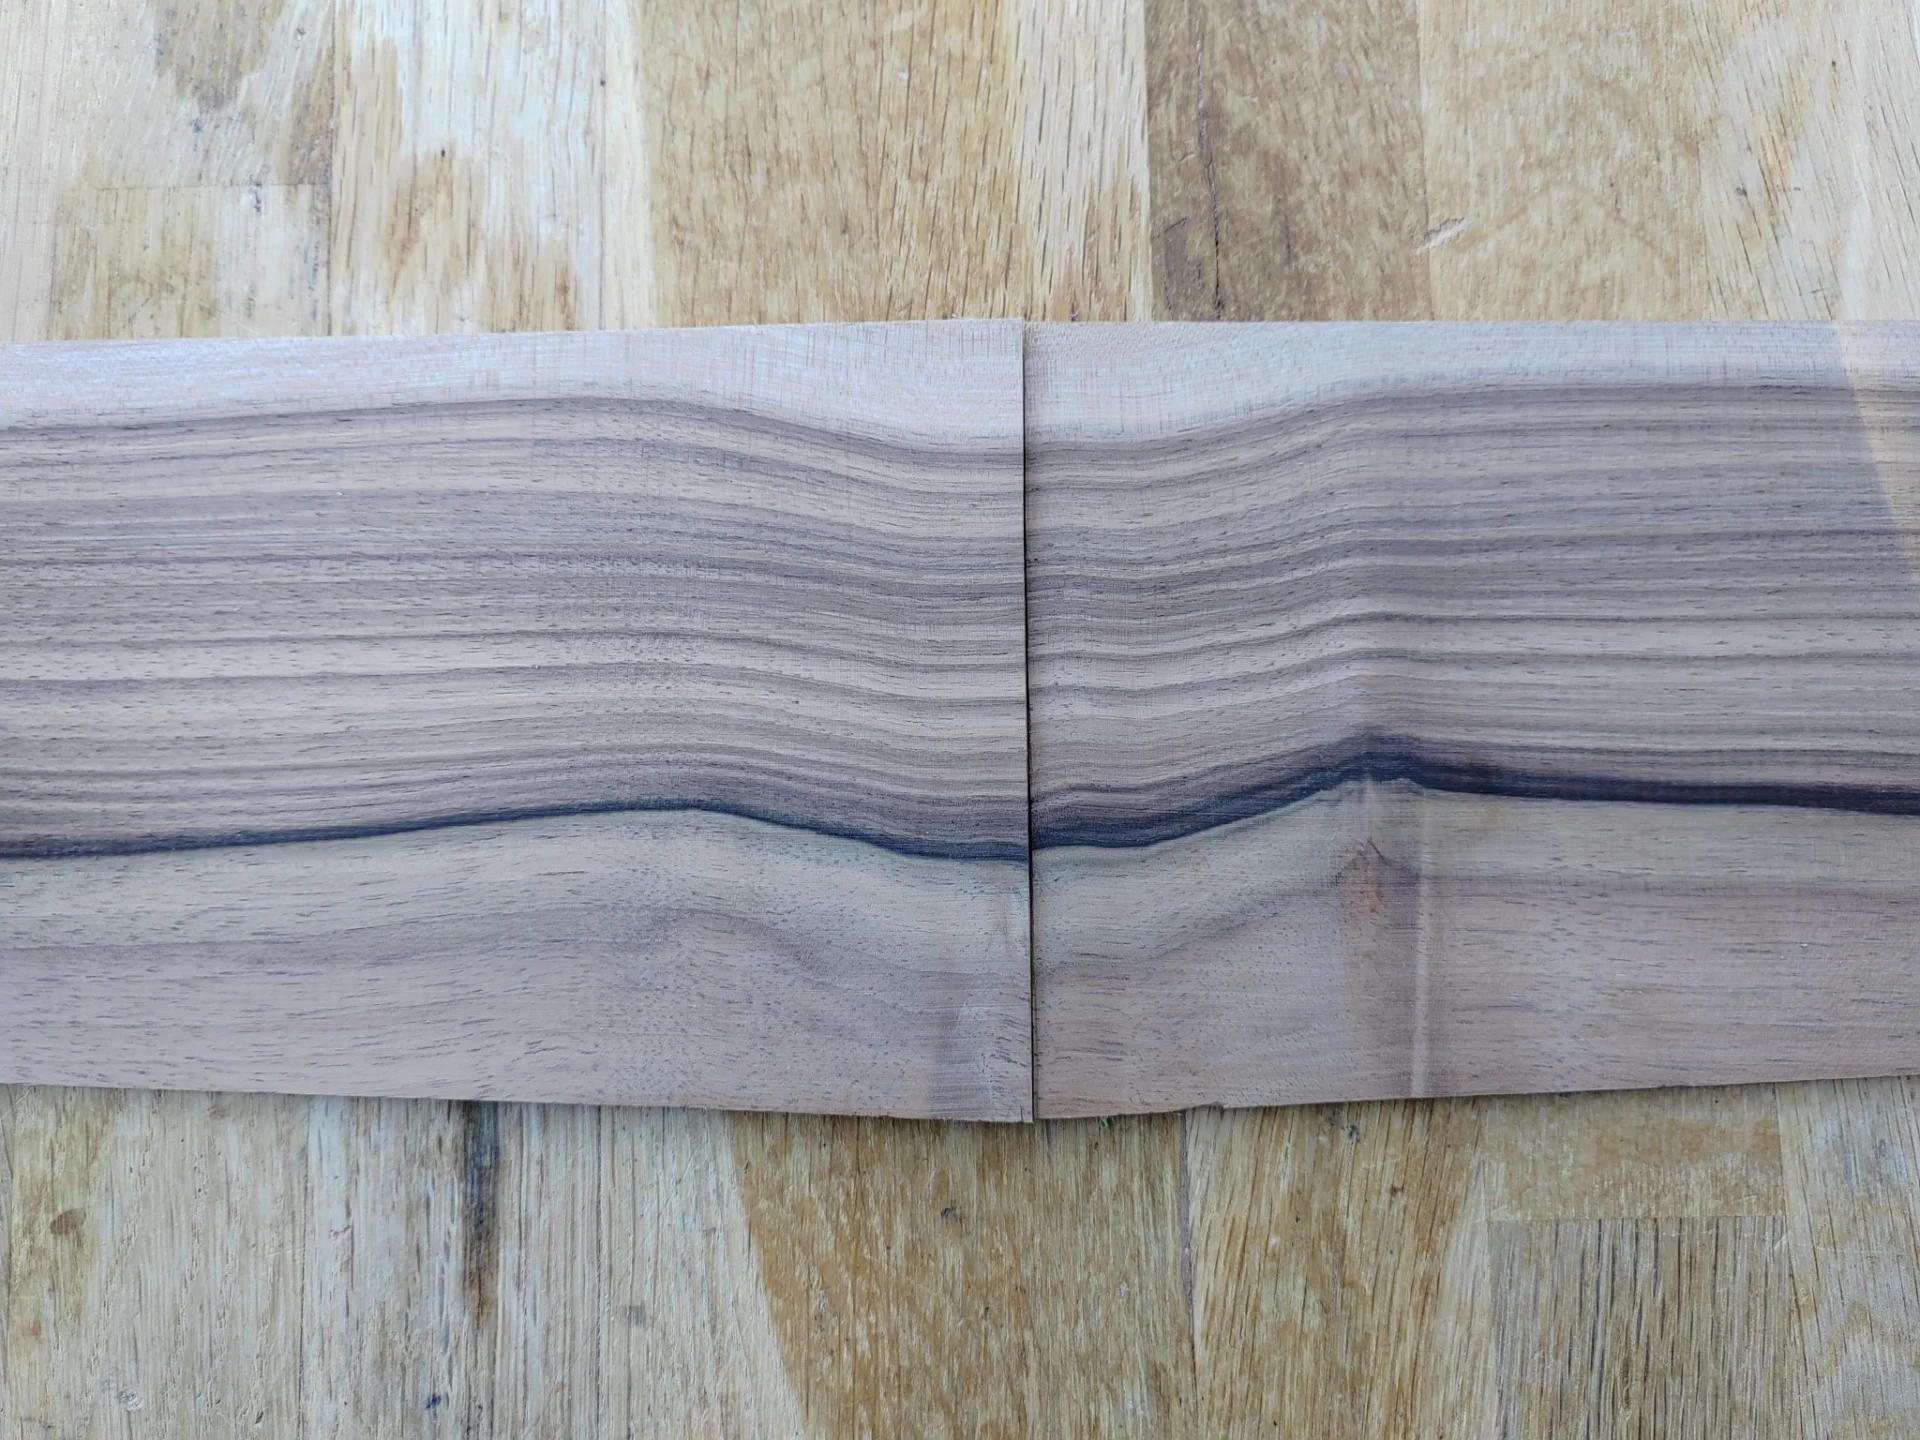
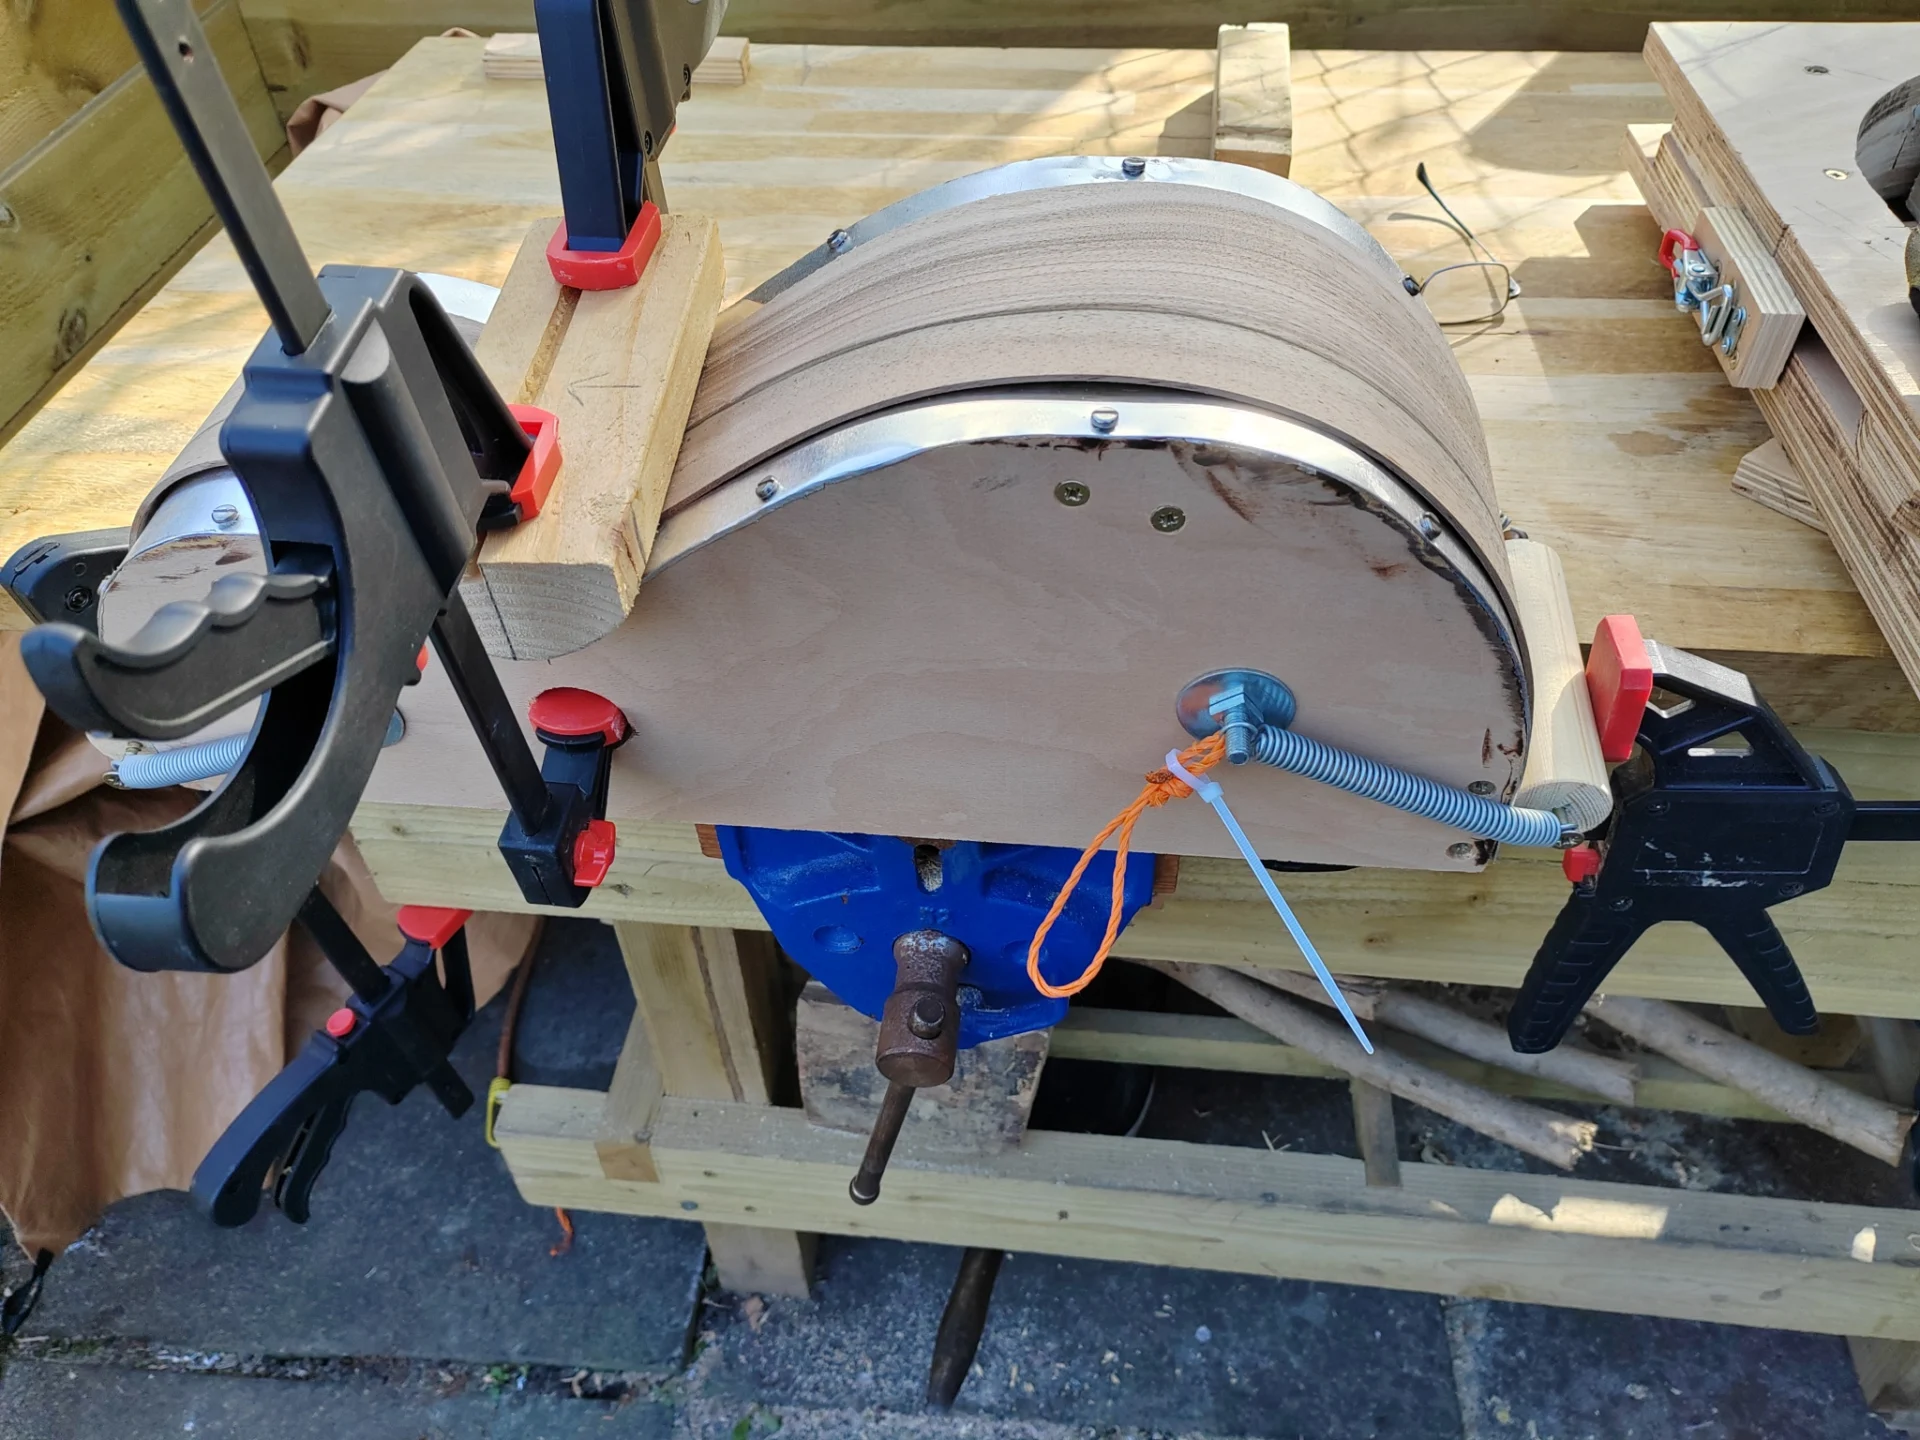
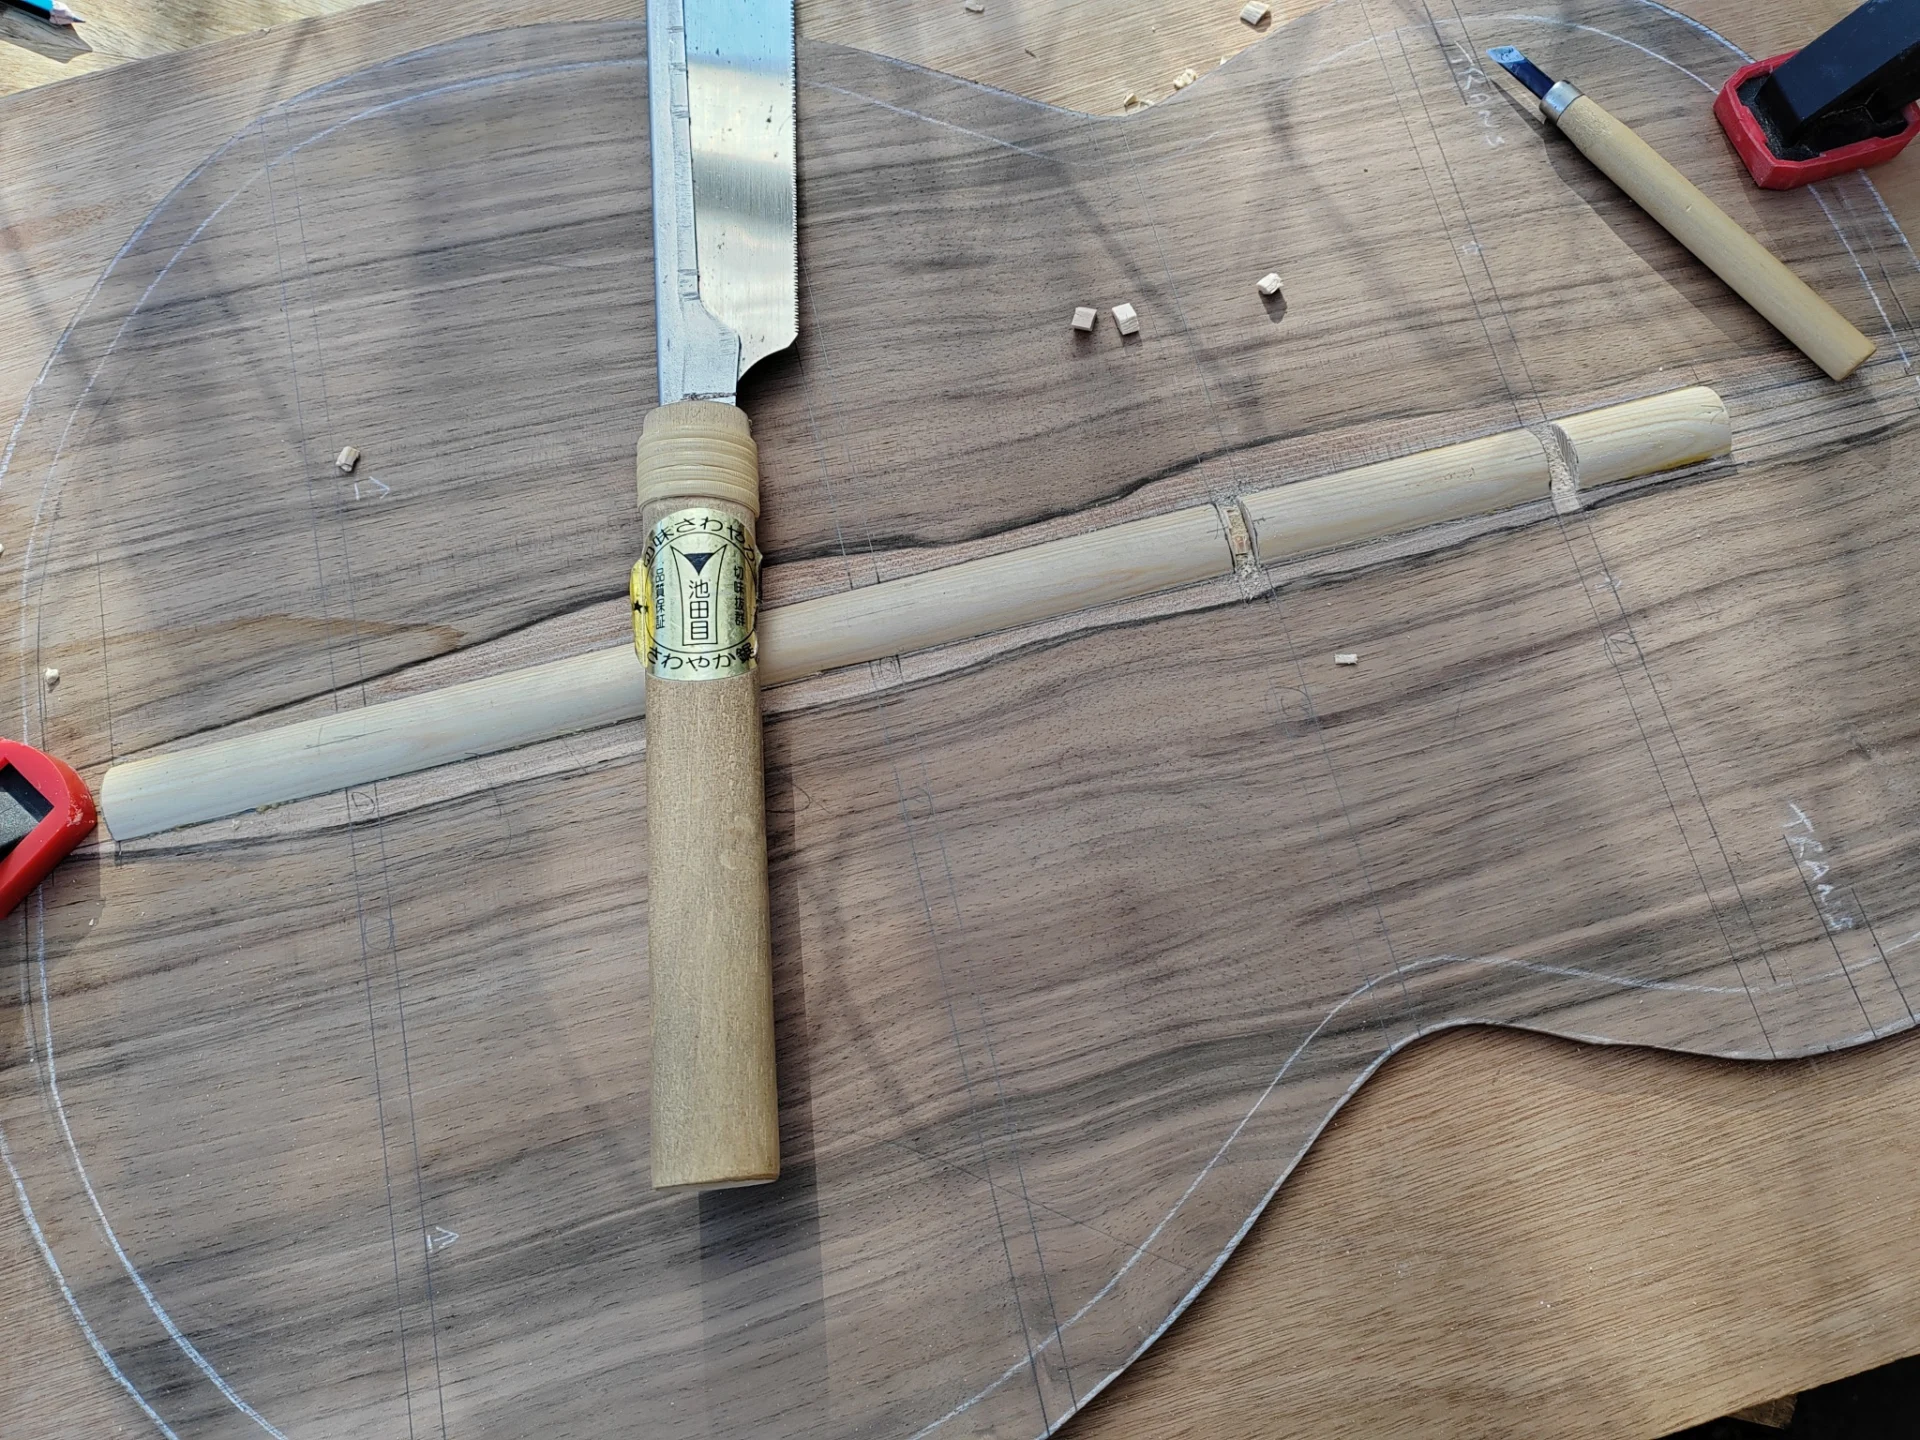
The final task (a kind of landmark stage) undertaken this month was getting the sides into shape (literally). The kind of Heath Robinson setup in the photo was needed to ensure I could cut both sides together at precisely 90° to the soundboard and also match up as far as possible the figure of the wood. To get a very clean ‘butt joint’ a really fine saw (and a good bit of patience) is required.
A lot of guitar builders mask this join with a decorative end graft, but if a really clean joint can be formed (especially with wood with a figure like this) it can look stunning – that’s what I’m aiming for, but I’ll not know how good it is until I glue the sides to the tail block; we’ll see…
Finally the sides were bent – that requires them to be heated in a steam box at a minimum 100°C for at least ten minutes. At that temperature the lignin in the wood softens and it can be bent. This is done using a jig which matches the shape of the guitar. It’s a job that needs to be done quite fast, before the wood cools down and I find it probably one of the most stressful things to do – wood has a mind of its own and sometimes no matter what, it just decides to crack (but not this time, thankfully…).
That’s all for this progress report, all being well, there should be photos of something that resembles an actual guitar next time. Thanks for taking an interest.
Stuart B Campbell
