At last – something that is beginning to look like a guitar!
As with a lot of projects, things have begun to accelerate; and quite a few different tasks have now been completed.
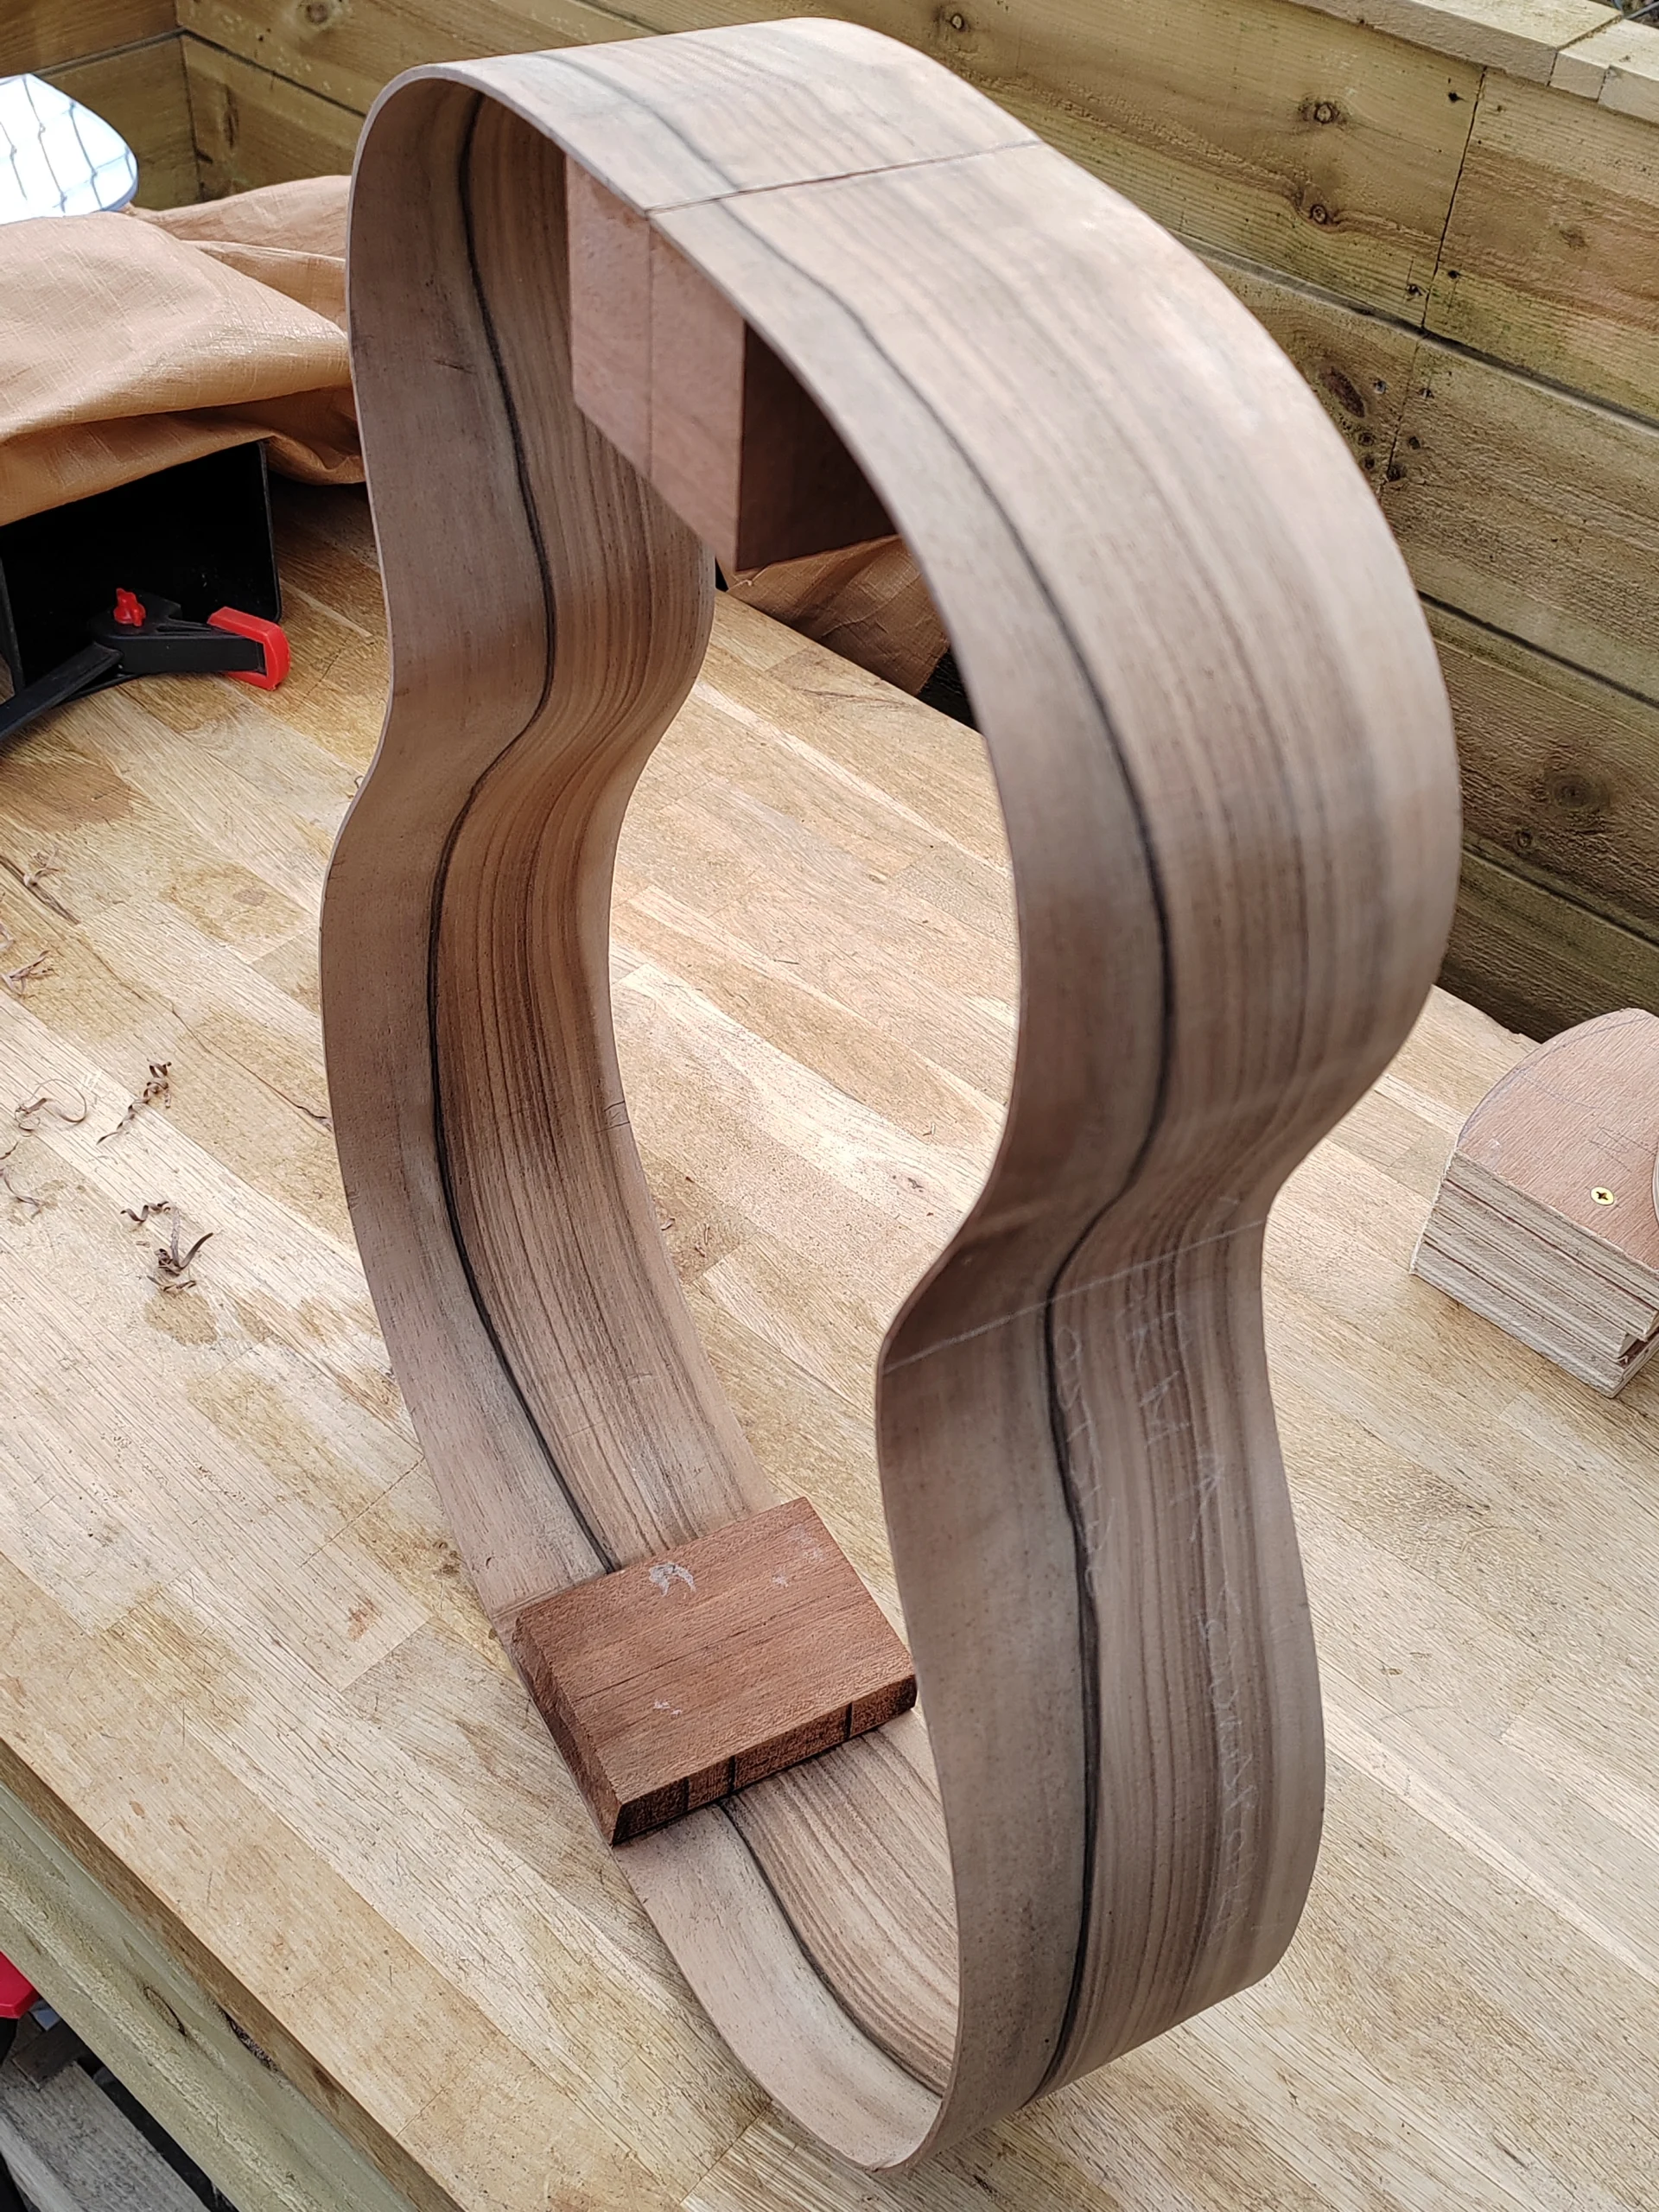
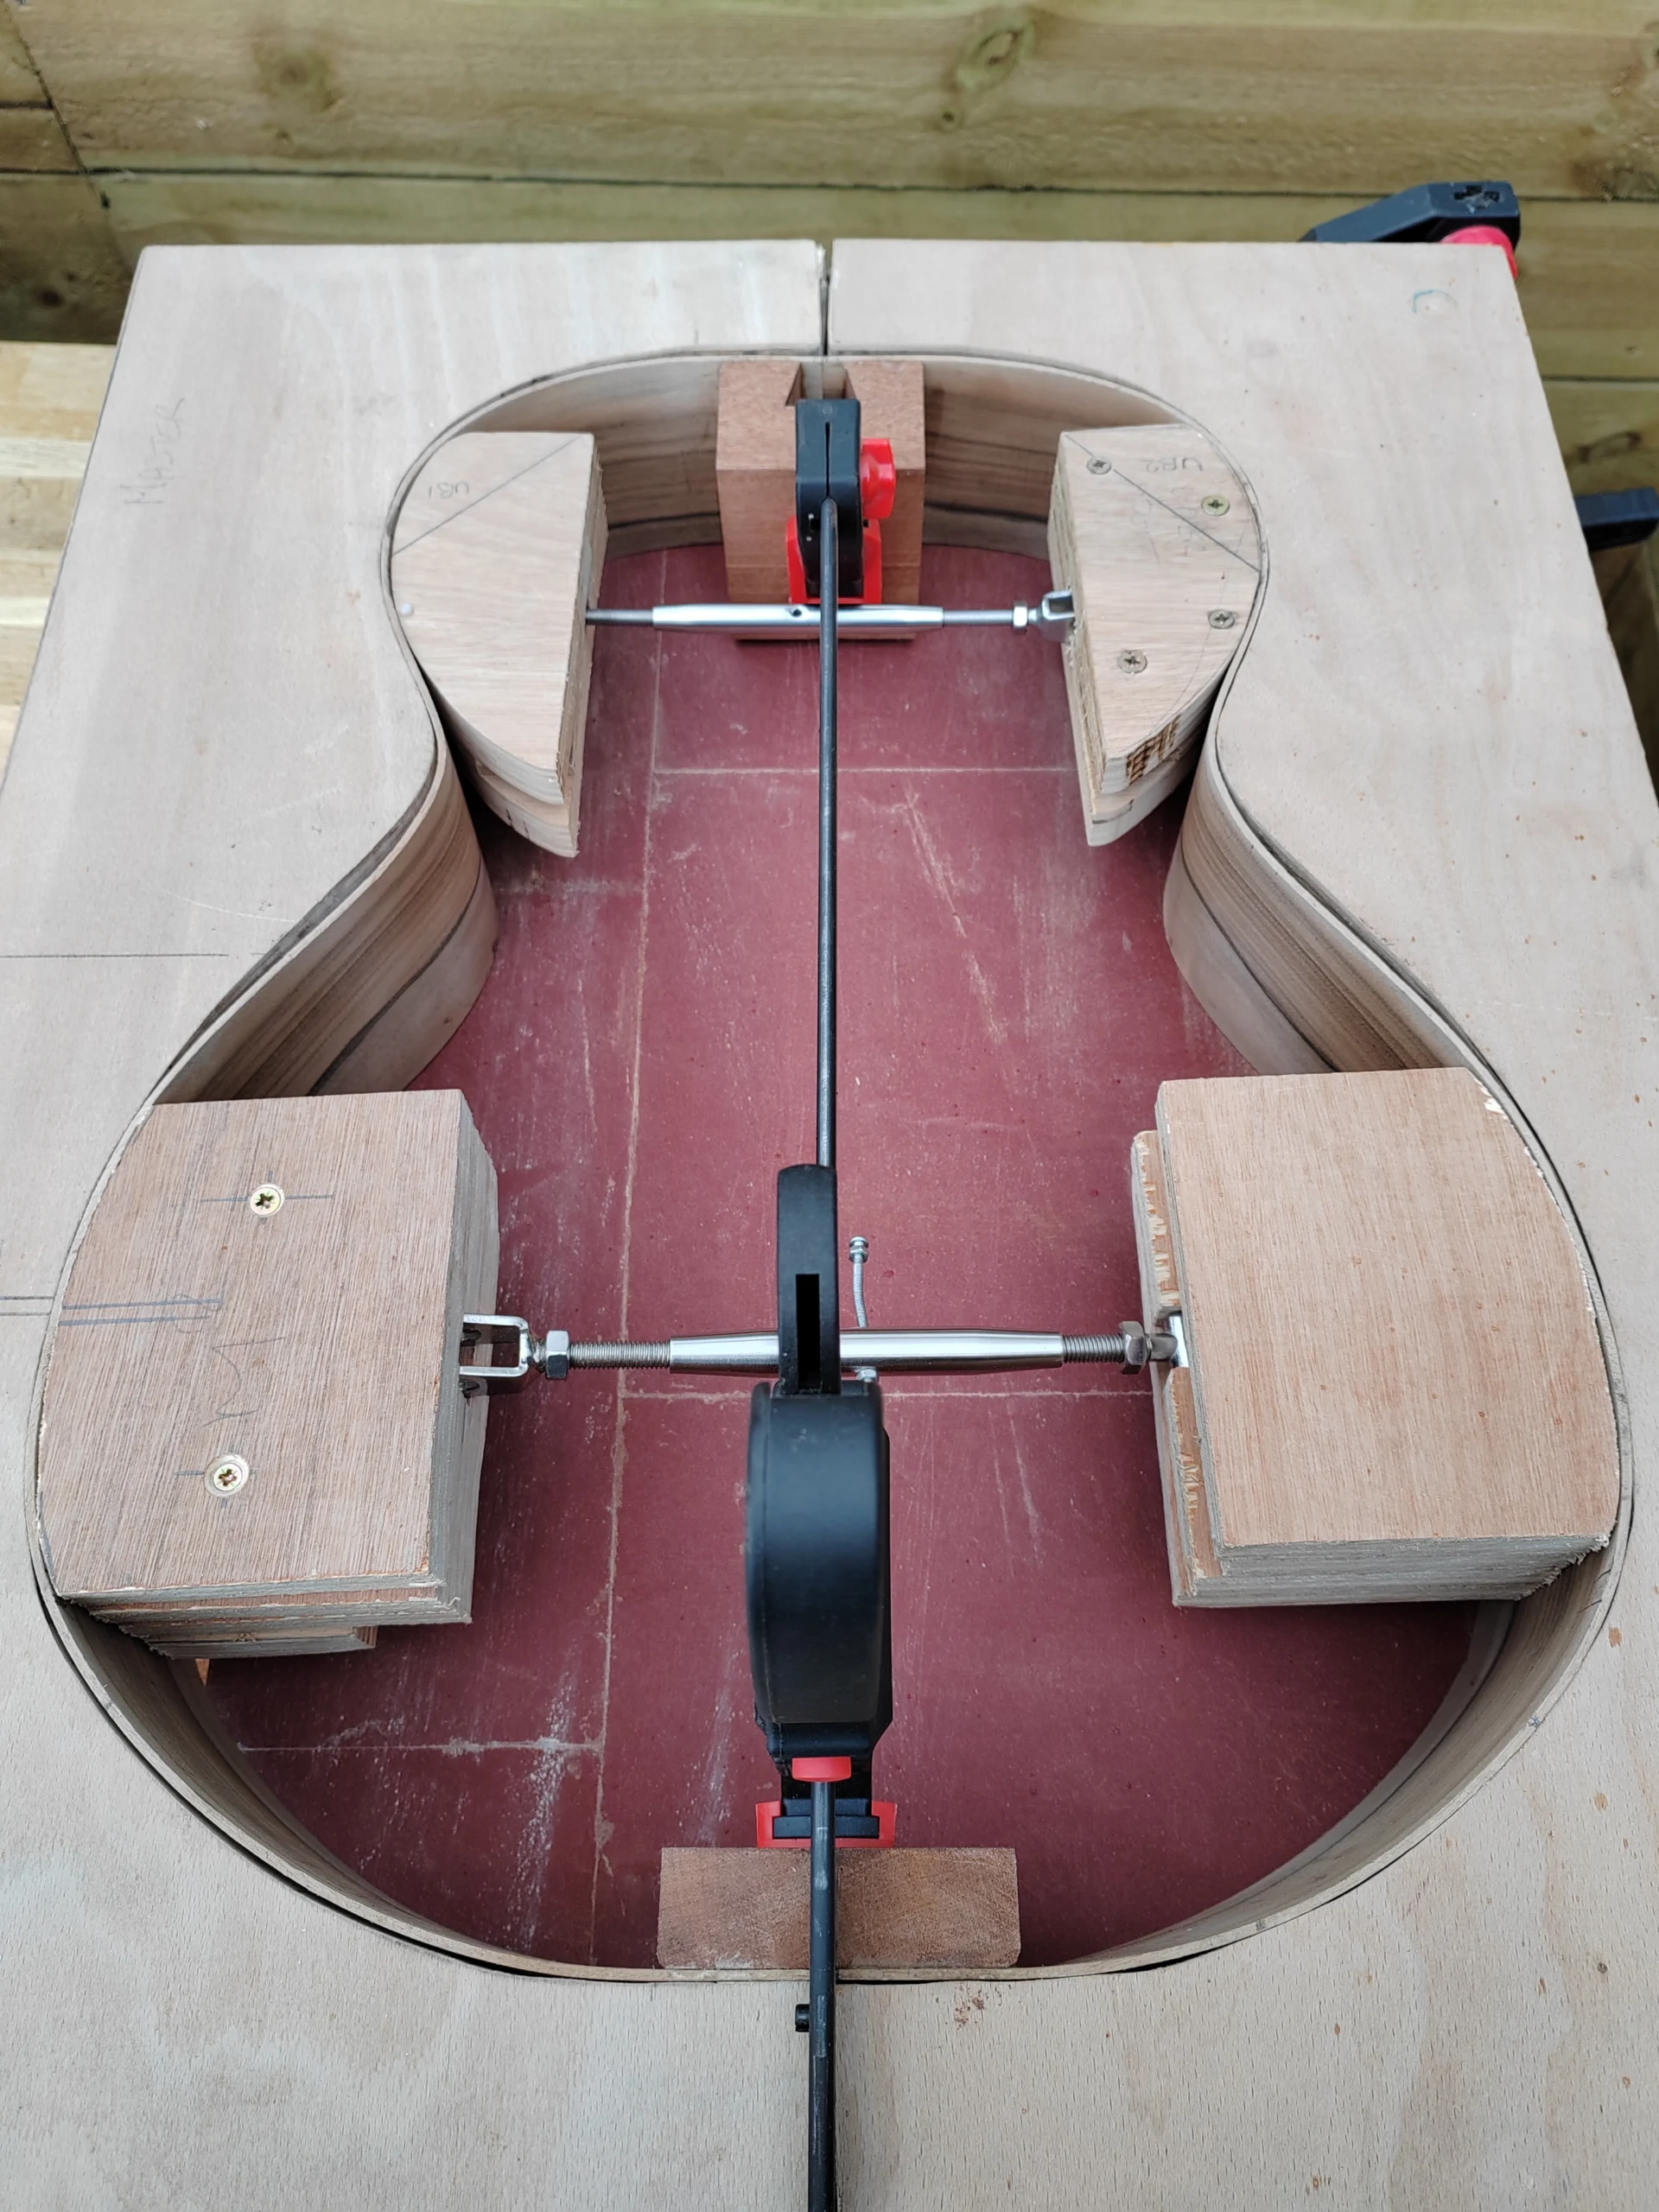
The sides were glued to the heel and tail blocks. The joint at the tail block turned out to be very neat with the grain figure matching up nicely, so I decided not to do a tail graft.
Both sides of the body were made even on the sanding board.
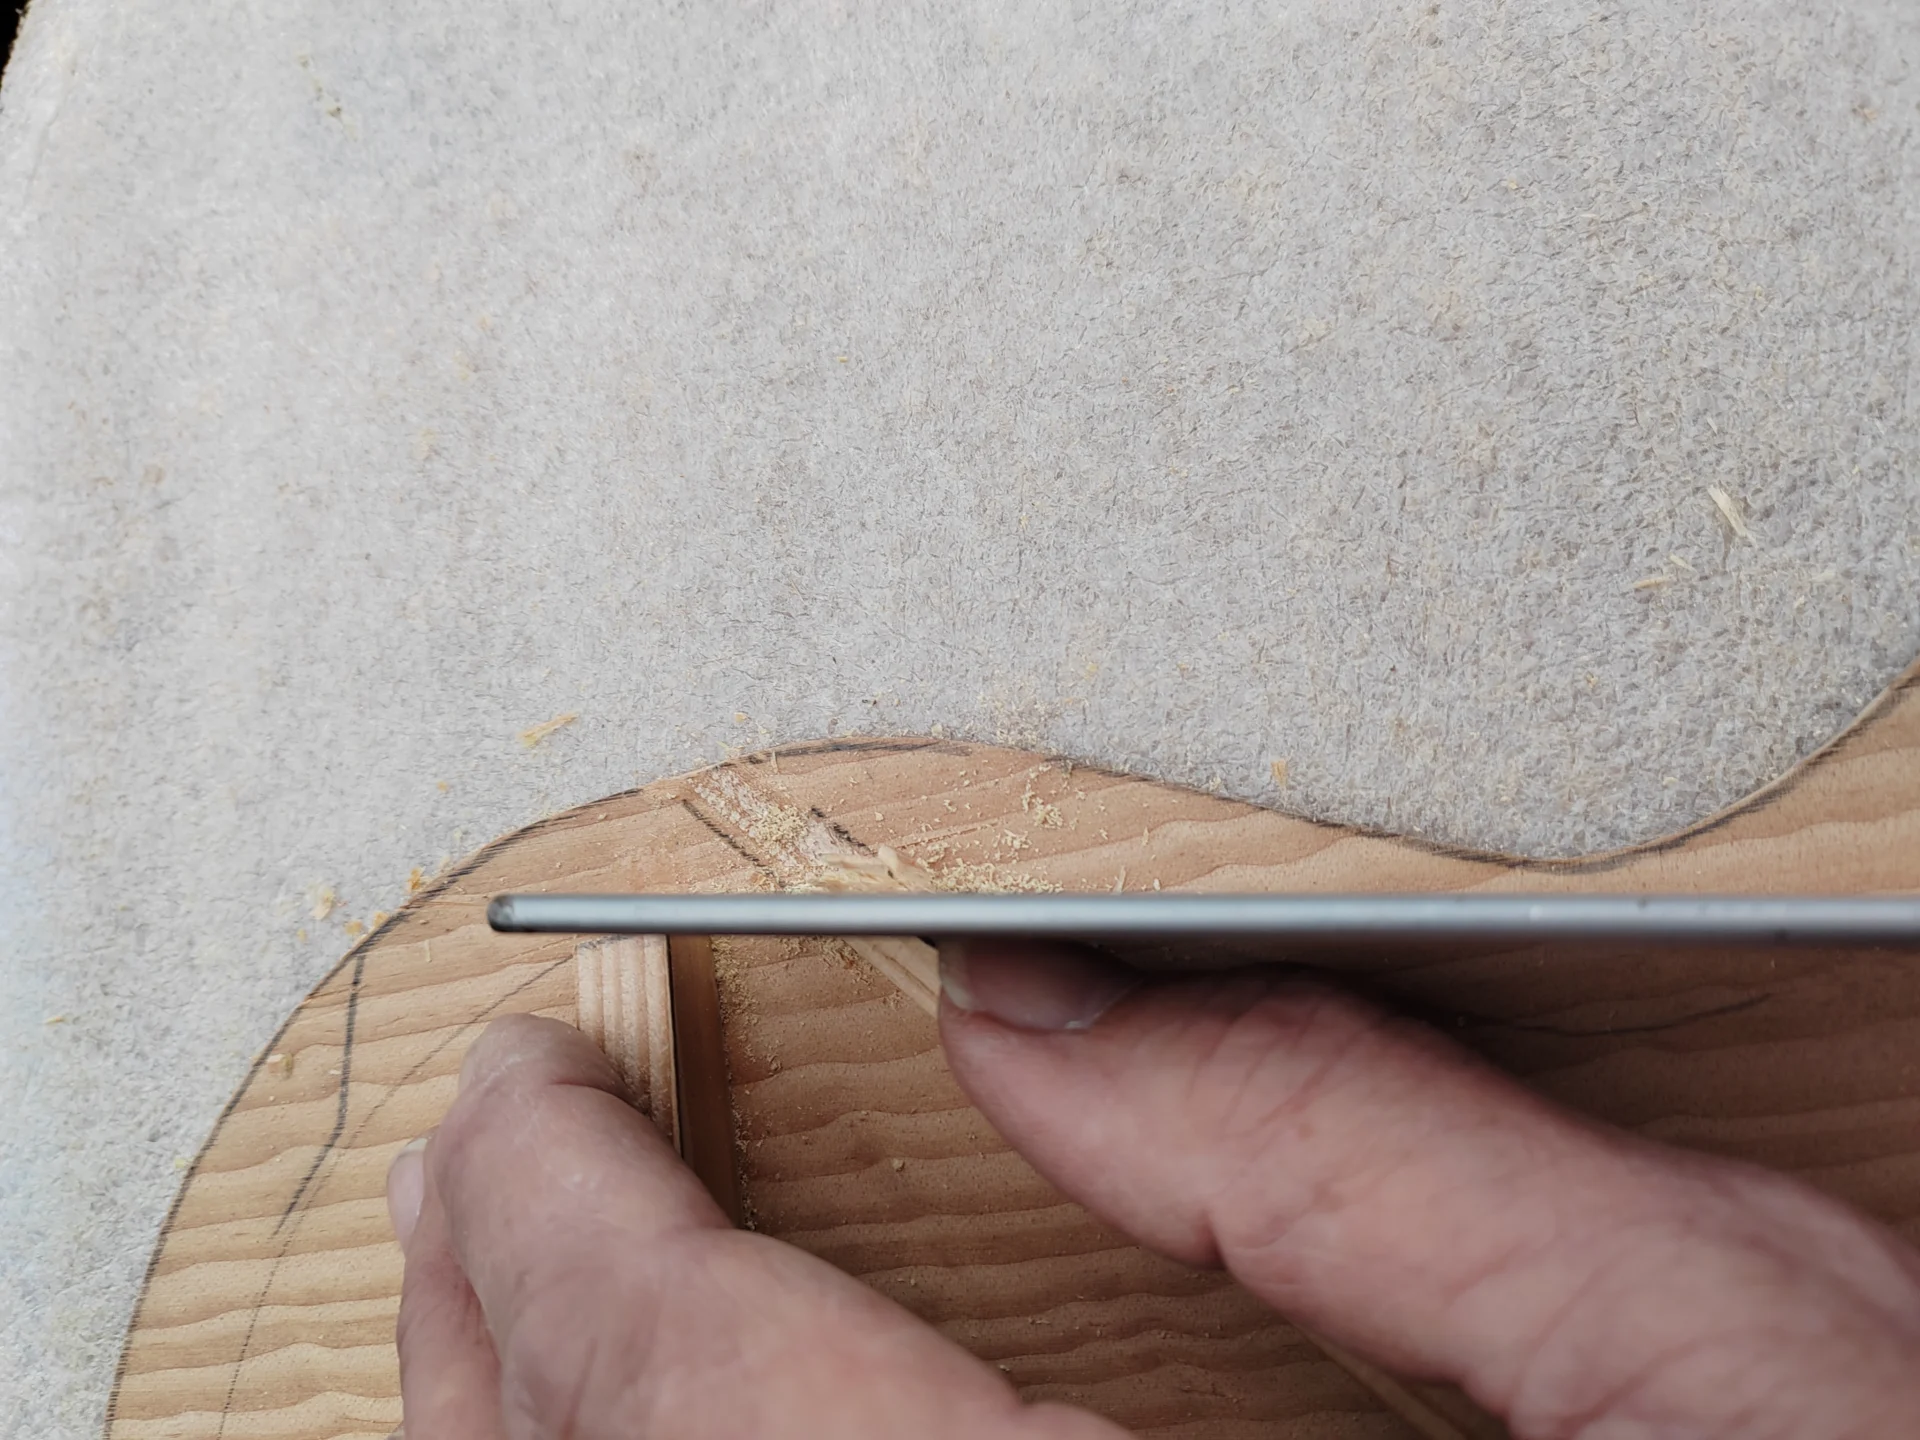
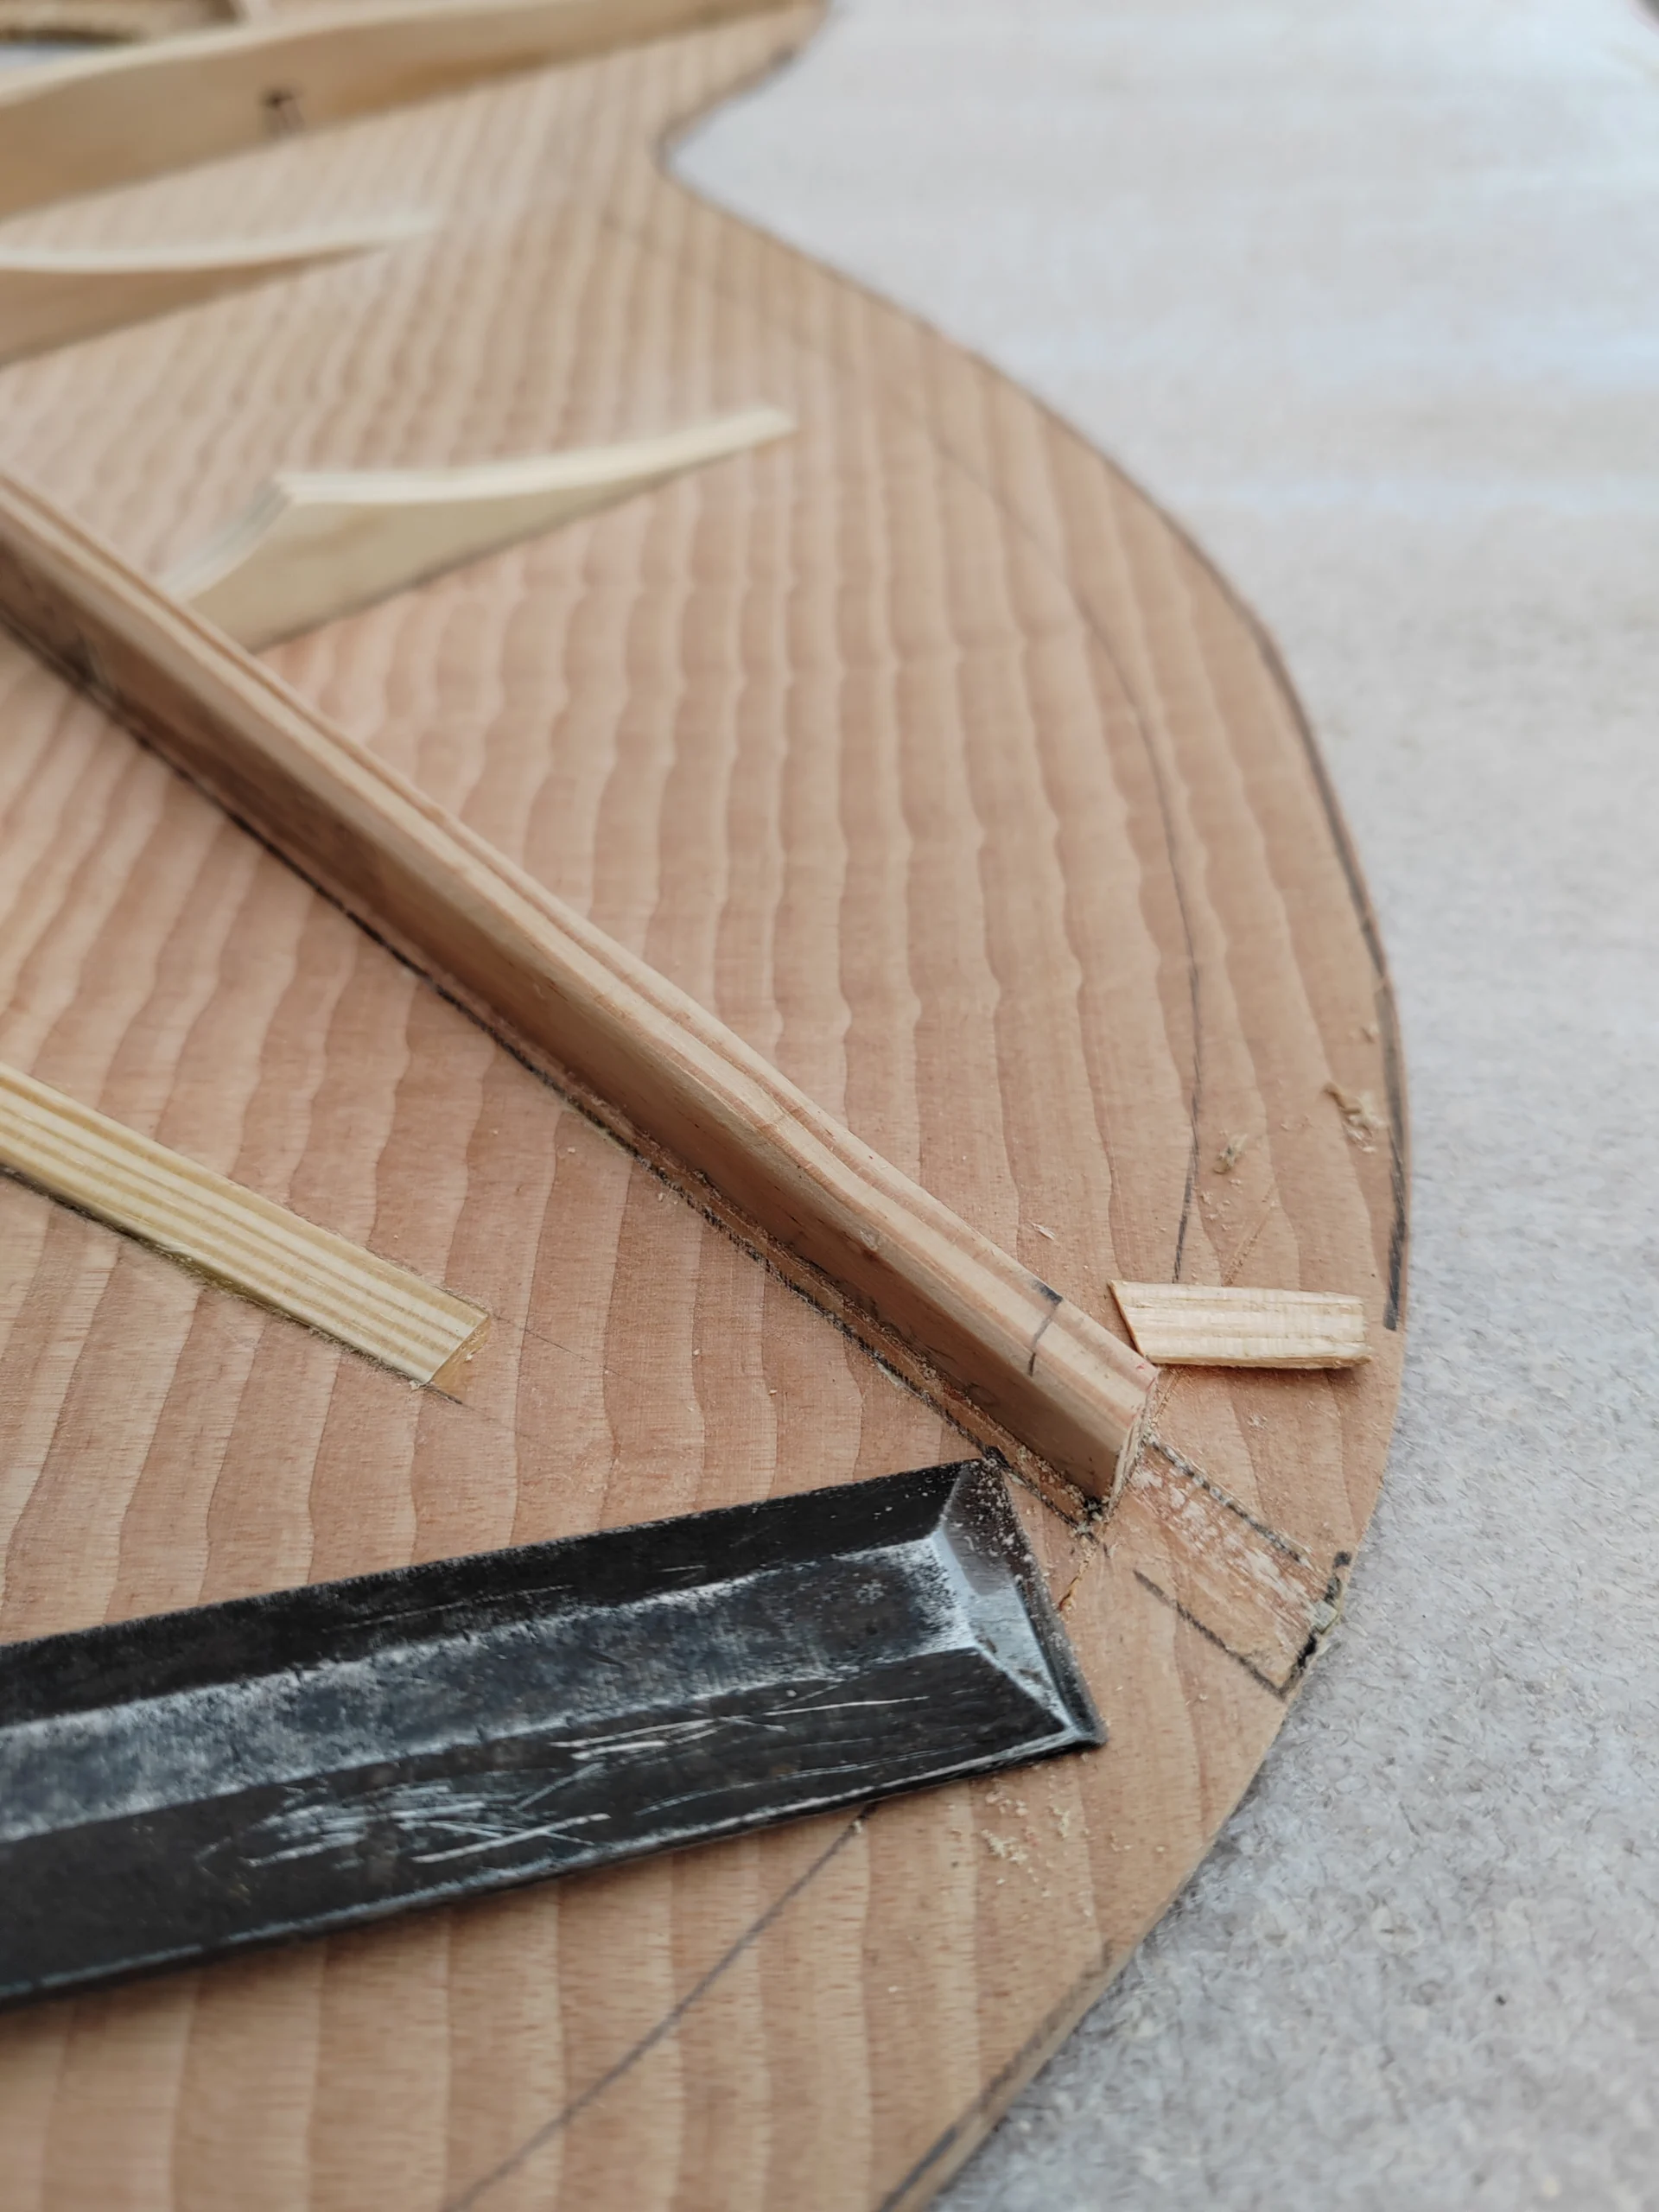
The ends of the braces were marked up so that they would butt against the sides, then cut and removed with a very sharp chisel.
Some builders cut notches in the sides to fit the braces, then trim off the excess, but how I do it means there’s about 50% more of the end of the brace making a joint with the side, which spreads the load and this is mechanically stronger.
The kerf bindings (strips of hardwood that are slotted so they follow the shape of the body – they provide a gluing surface for the back and soundboard ), which are also differential, were then installed using loads of tiny clamps – the masking tape is to catch any glue that gets squeezed out (not that it would be noticeable, but I know; it’s neater and cleaner).
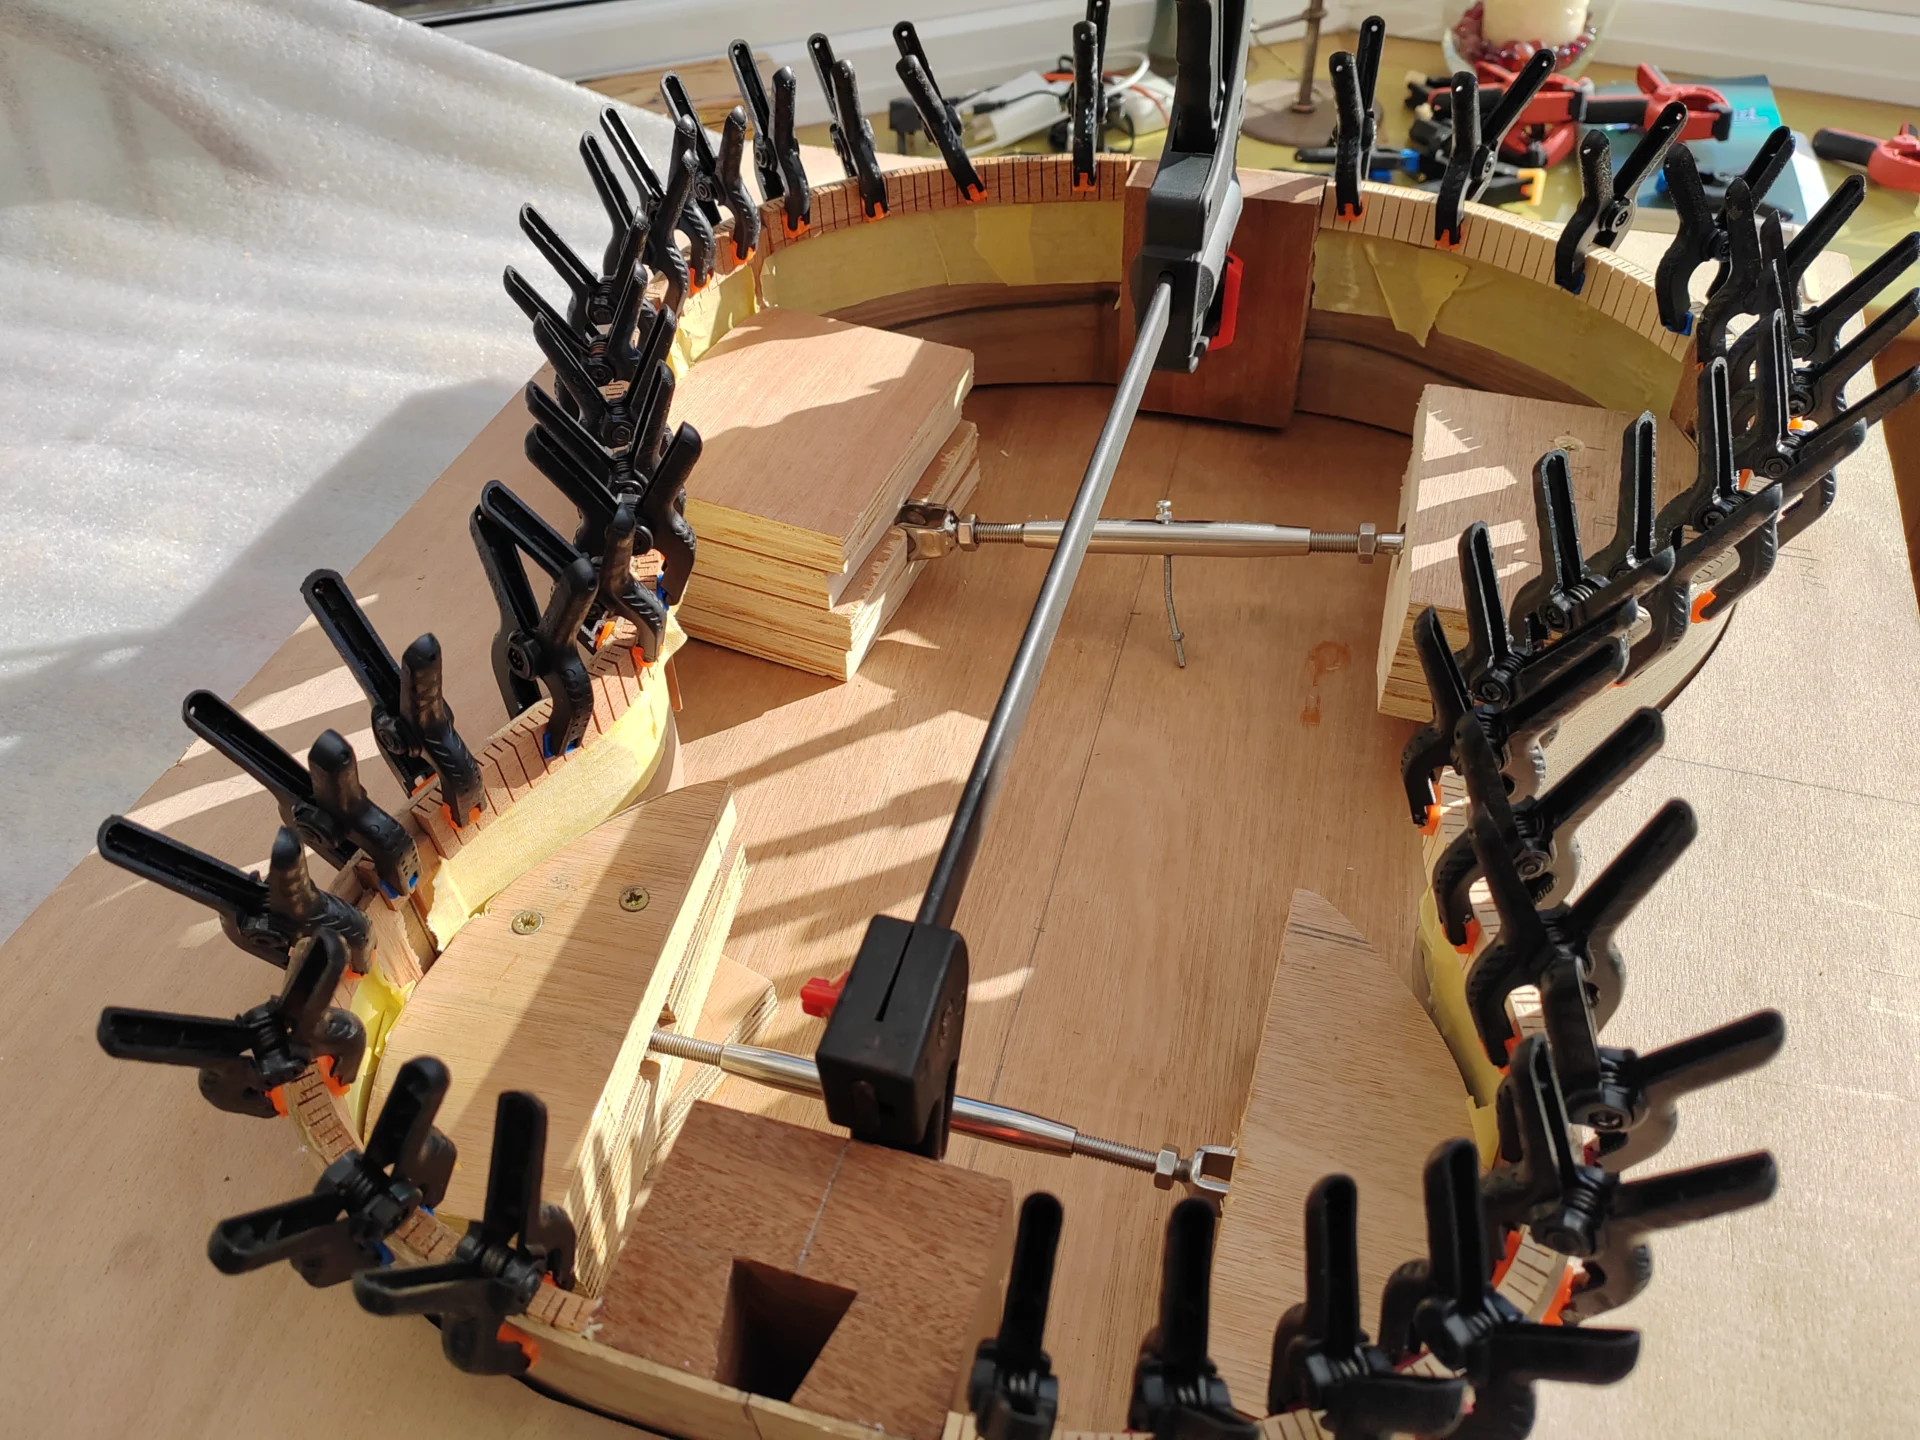
Once the kerf bindings are set, they’re made flush with the rim of the sides.
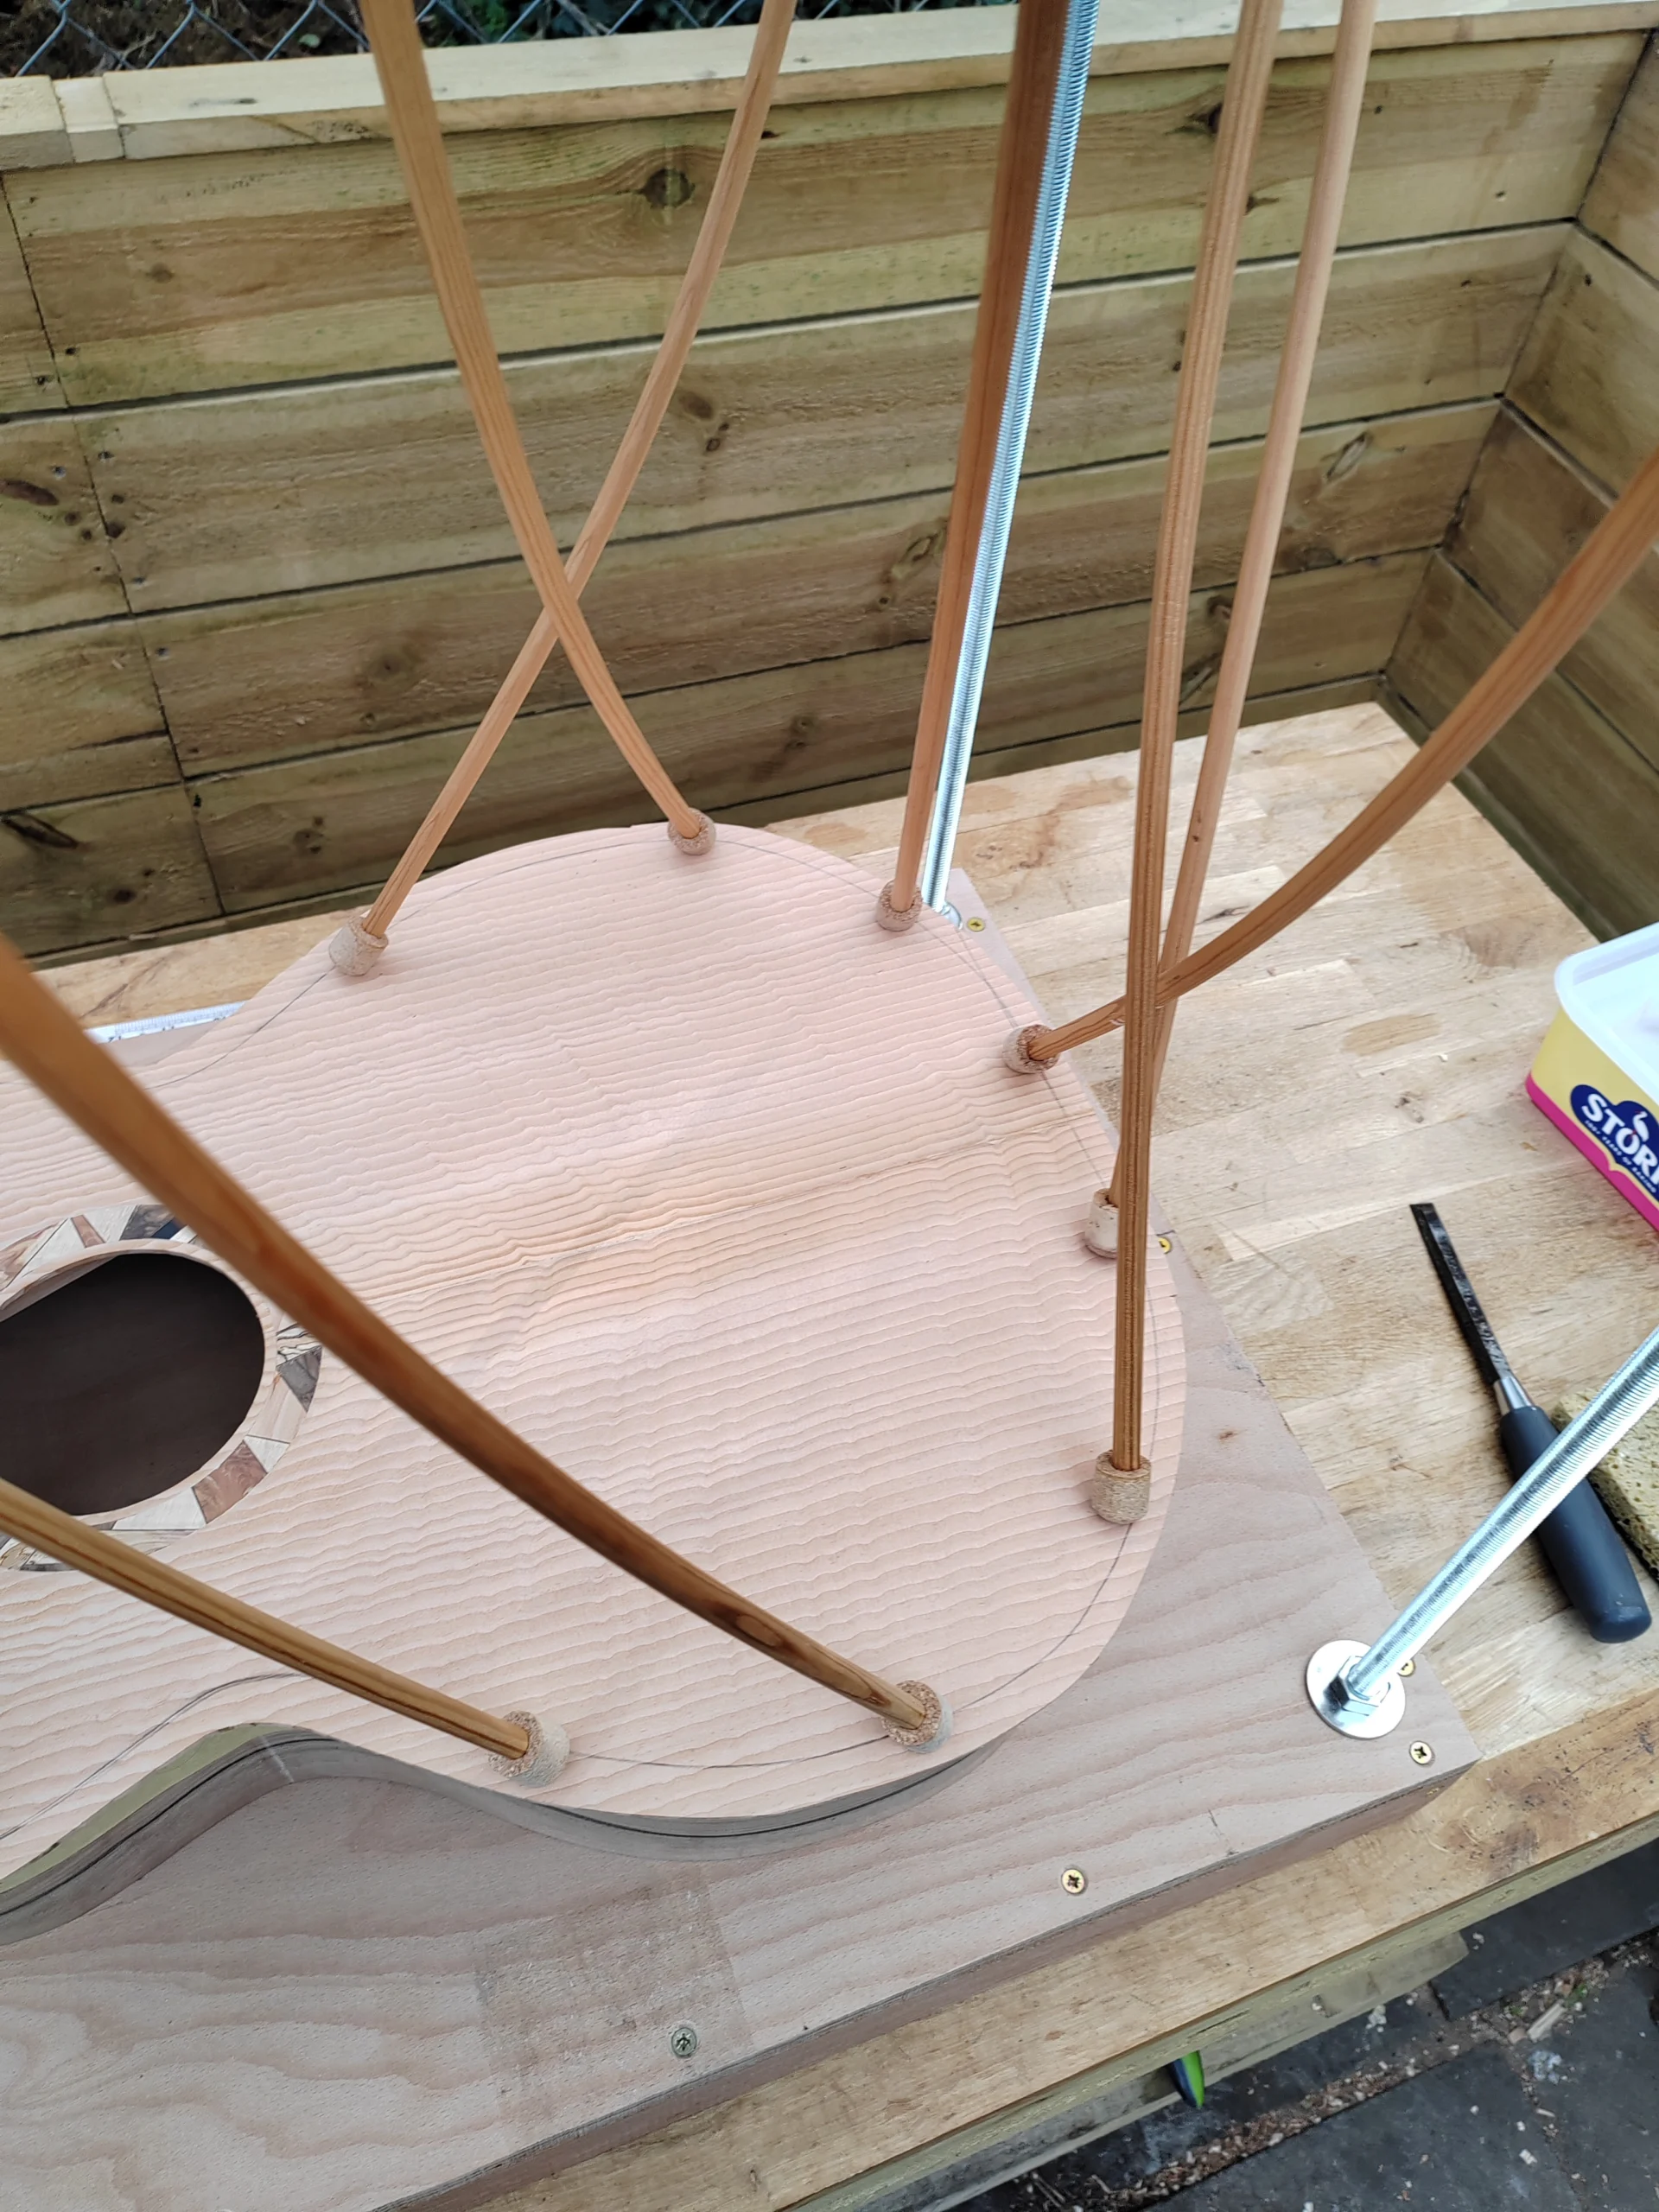
The soundboard and back are glued in place using a ‘go-bar’ deck. The flexible rods, once bent, can be placed exactly where the force is required to ensure a tight fit – each of those rods exert a force of about 2Kg; roughly 20 of them are needed.
The excess material was sawn off and the top and back sanded flush with the sides.


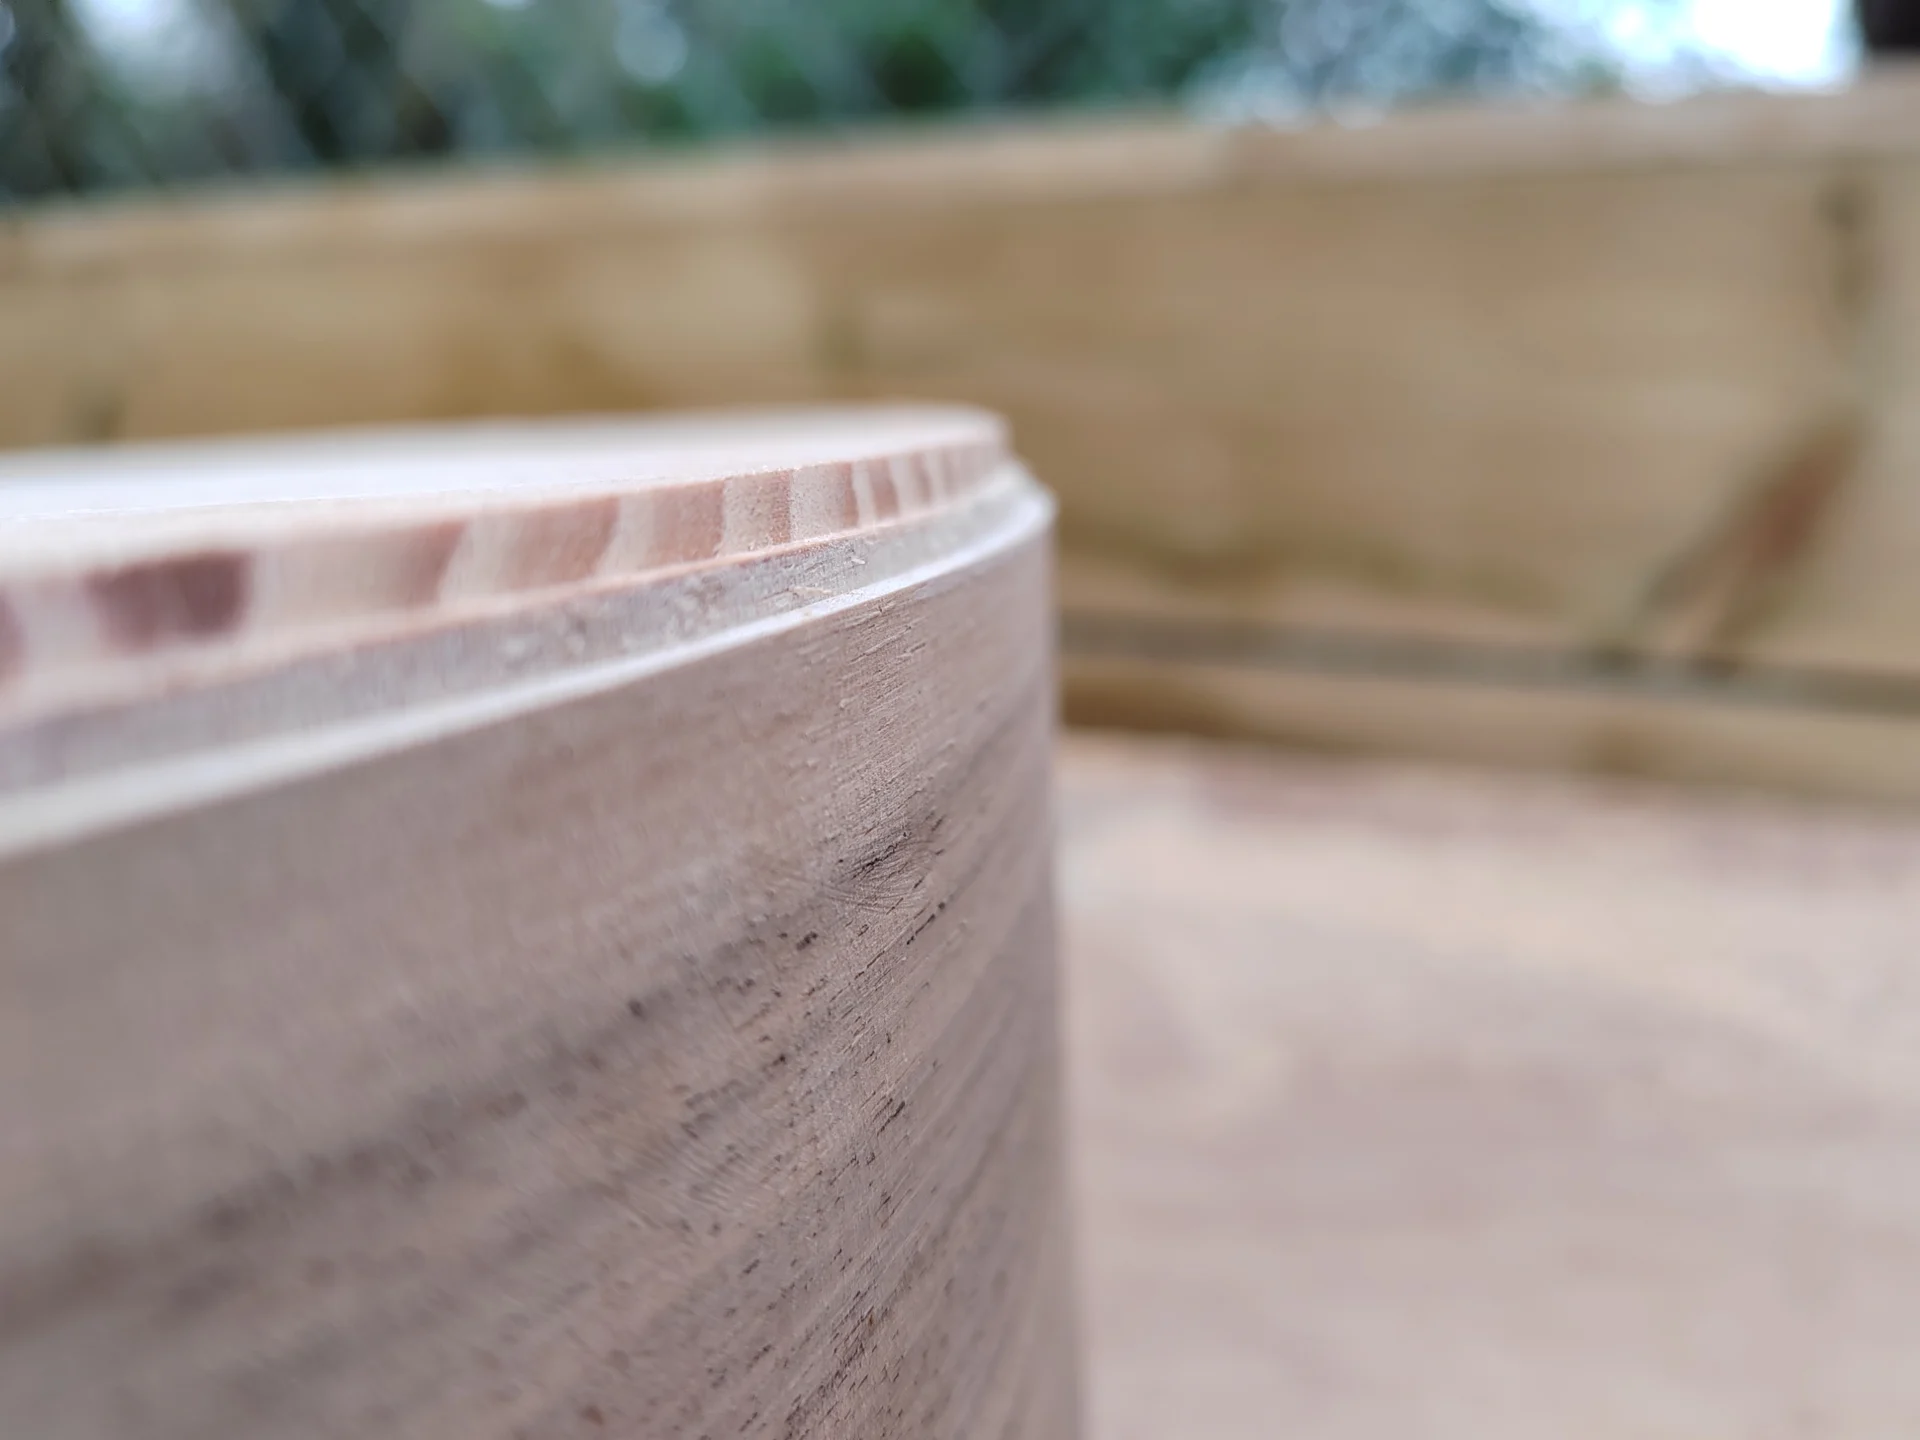
A router table was used to cut rebates into the sides for the bindings. This is a bit of a nervy operation which requires a special router bit that cuts a ‘ledge’ exactly 2mm deep for the back edge; and can also cut another stepped one that’s 2mm and 3.5mm deep. In both cases, the ‘ledge’ has to be precisely 5.5mm high to fit the bindings (and the second stepped one 3mm). At this stage in the process there’s no escape or fixes if anything goes wrong – make a mistake with these cuts and you’re right back to square one making a new body…
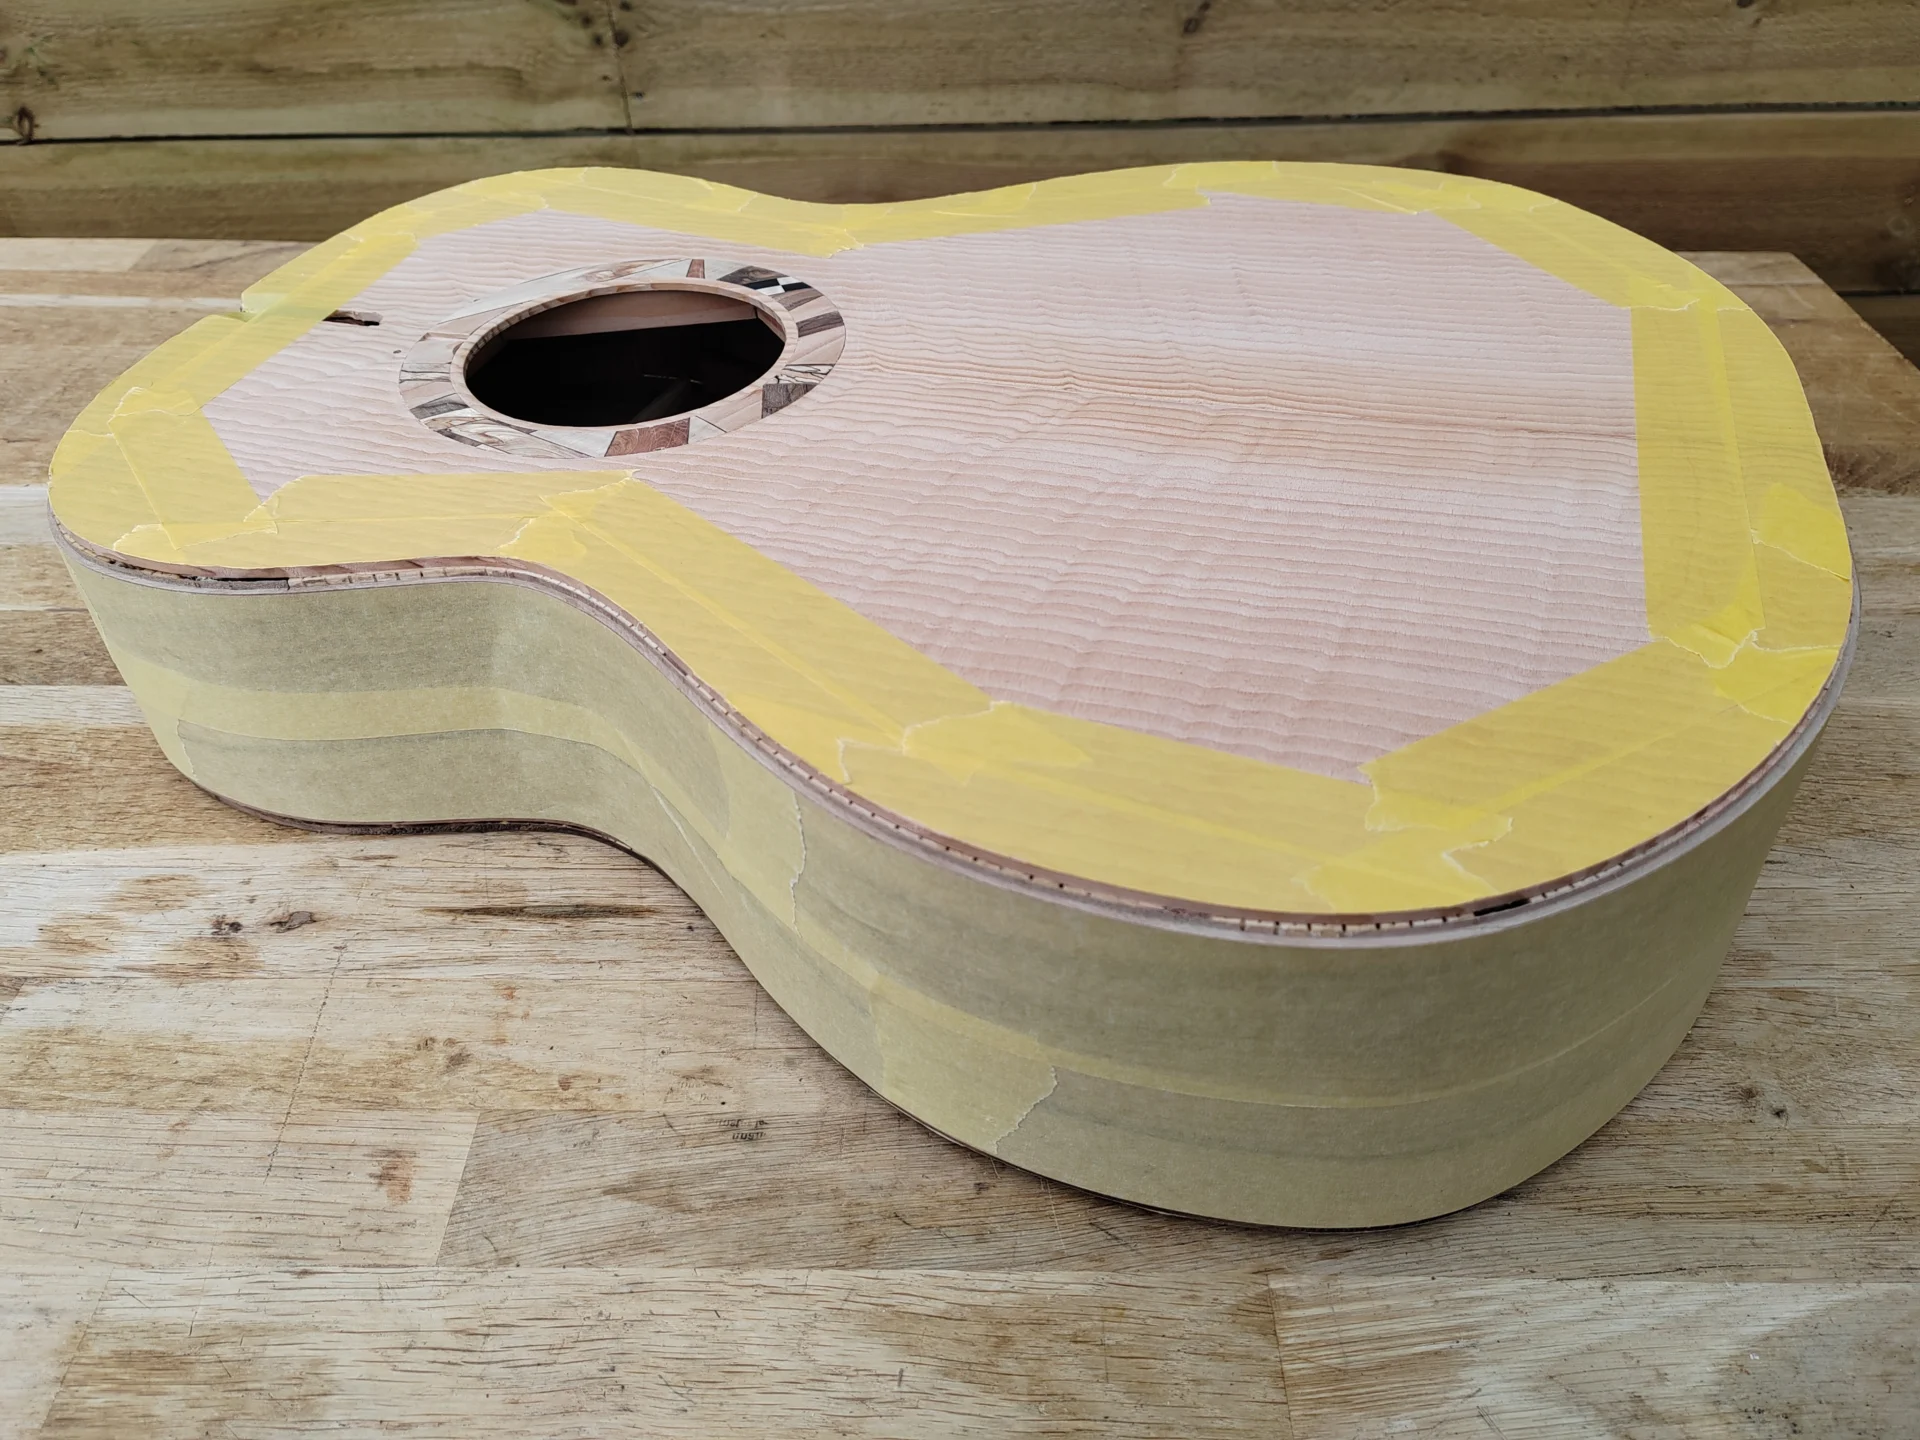
The sides and soundboard get covered with masking tape to prevent drips of glue running onto the wood. In theory it’s possible to wipe off excess glue before it sets, but that’s just the manufacturer’s claim. Any glue, even immediately wiped off with a wet rag, that gets on the wood will sink in, making it difficult when it comes to applying the finish; and the method of ‘clamping’ the bindings means it’s impossible to see any squeeze-out.
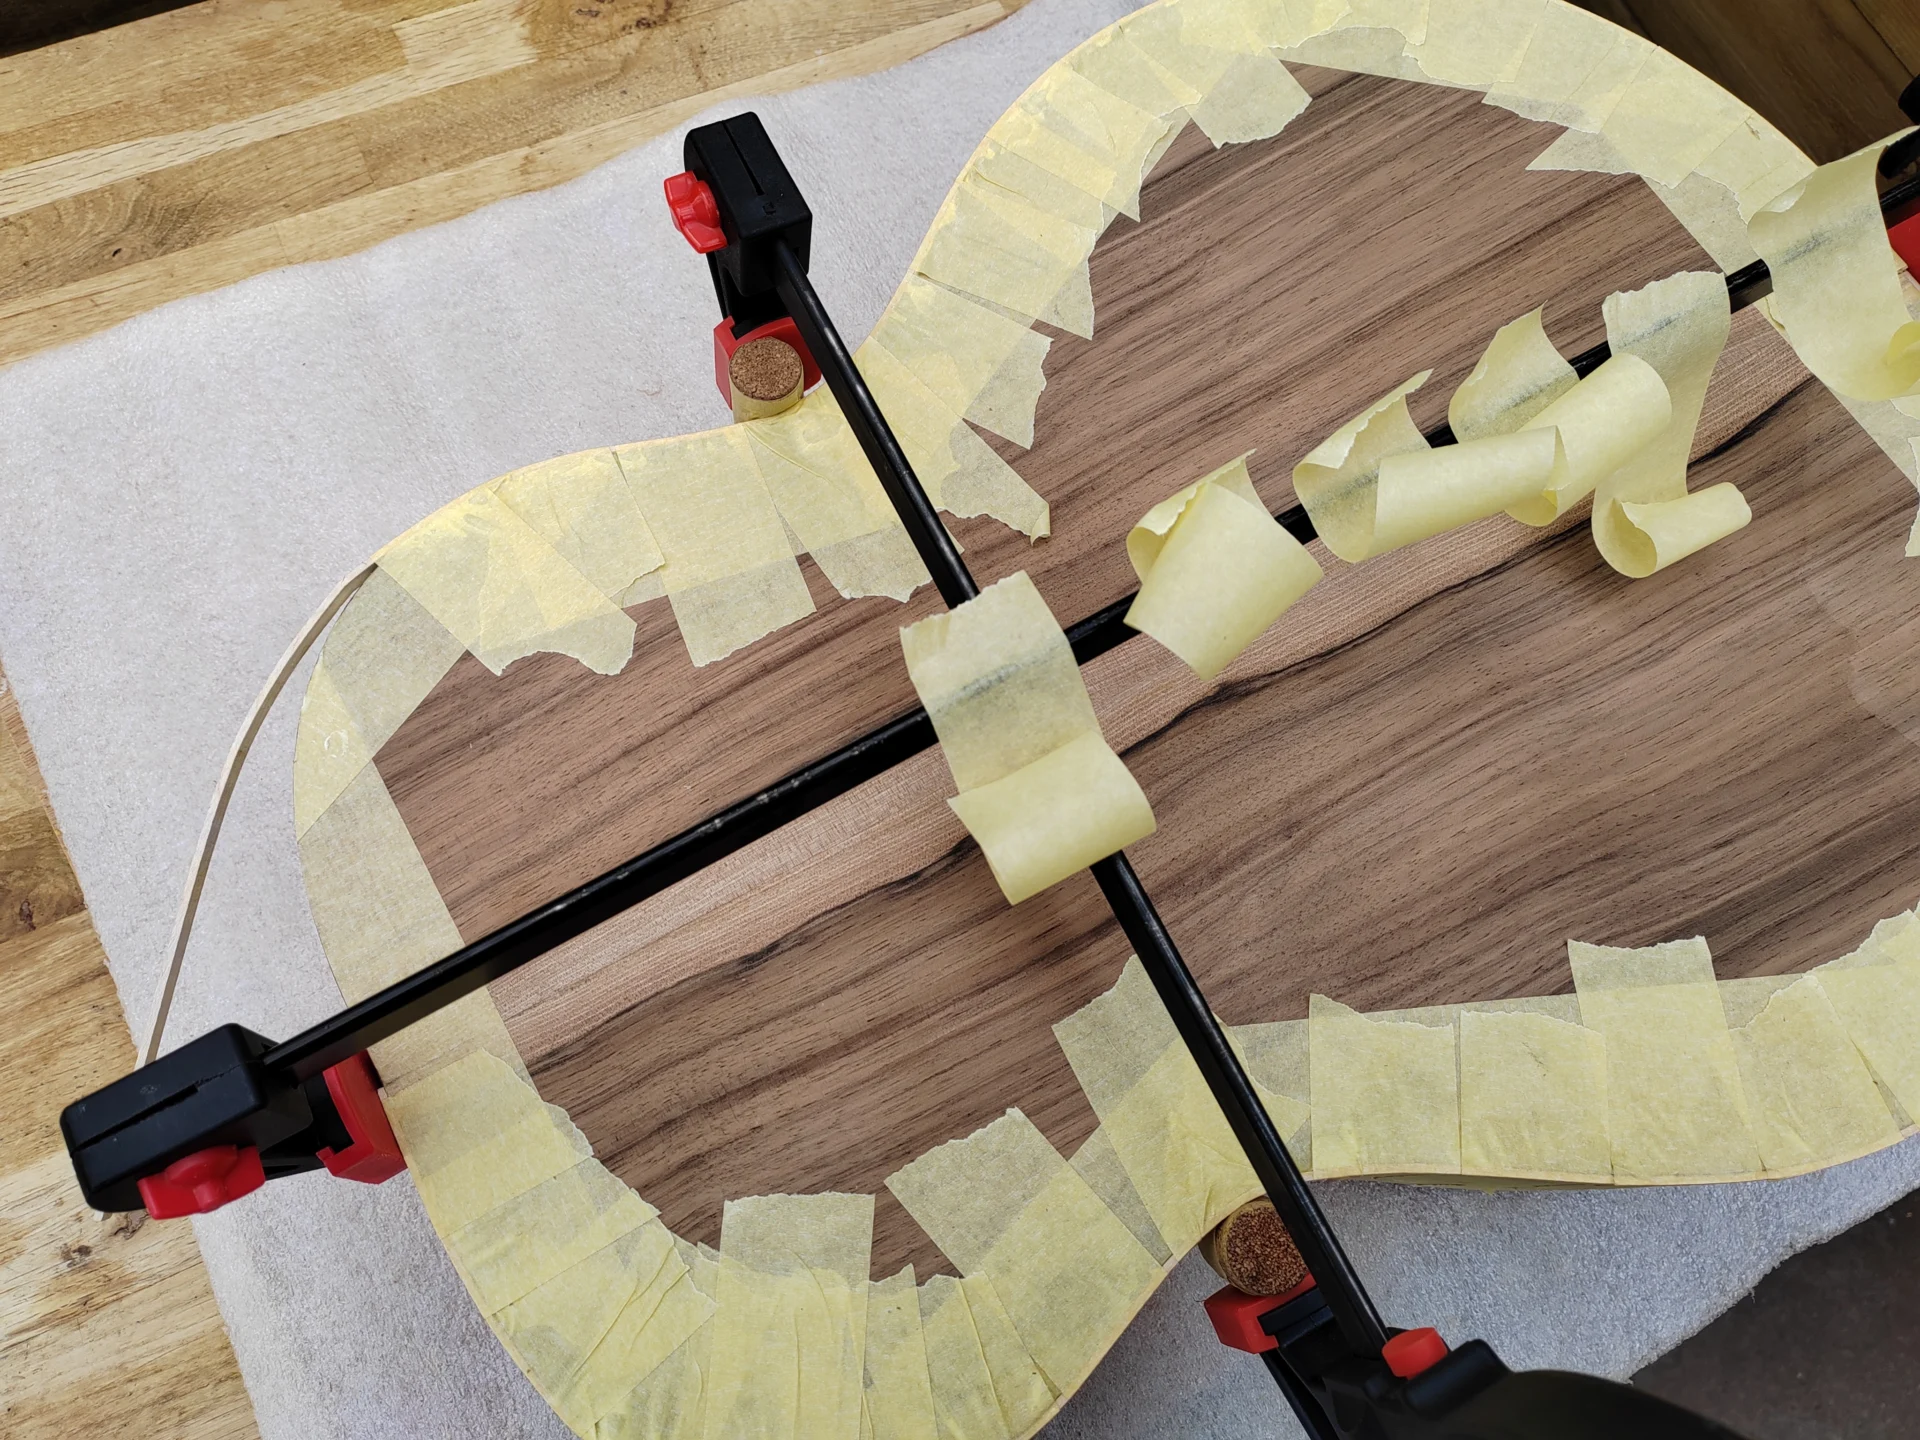
The bindings (Flame Maple for the back edge and Rosewood and Flame Maple for the soundboard) are glued in place, working on just a few centimeters at a time, and ‘clamped’ using masking tape. This is quite a time consuming task (especially doing the double layer for the soundboard edge) and guaranteed to give you sore fingers, because a fair bit of force is needed to get the bindings pressed in tight.
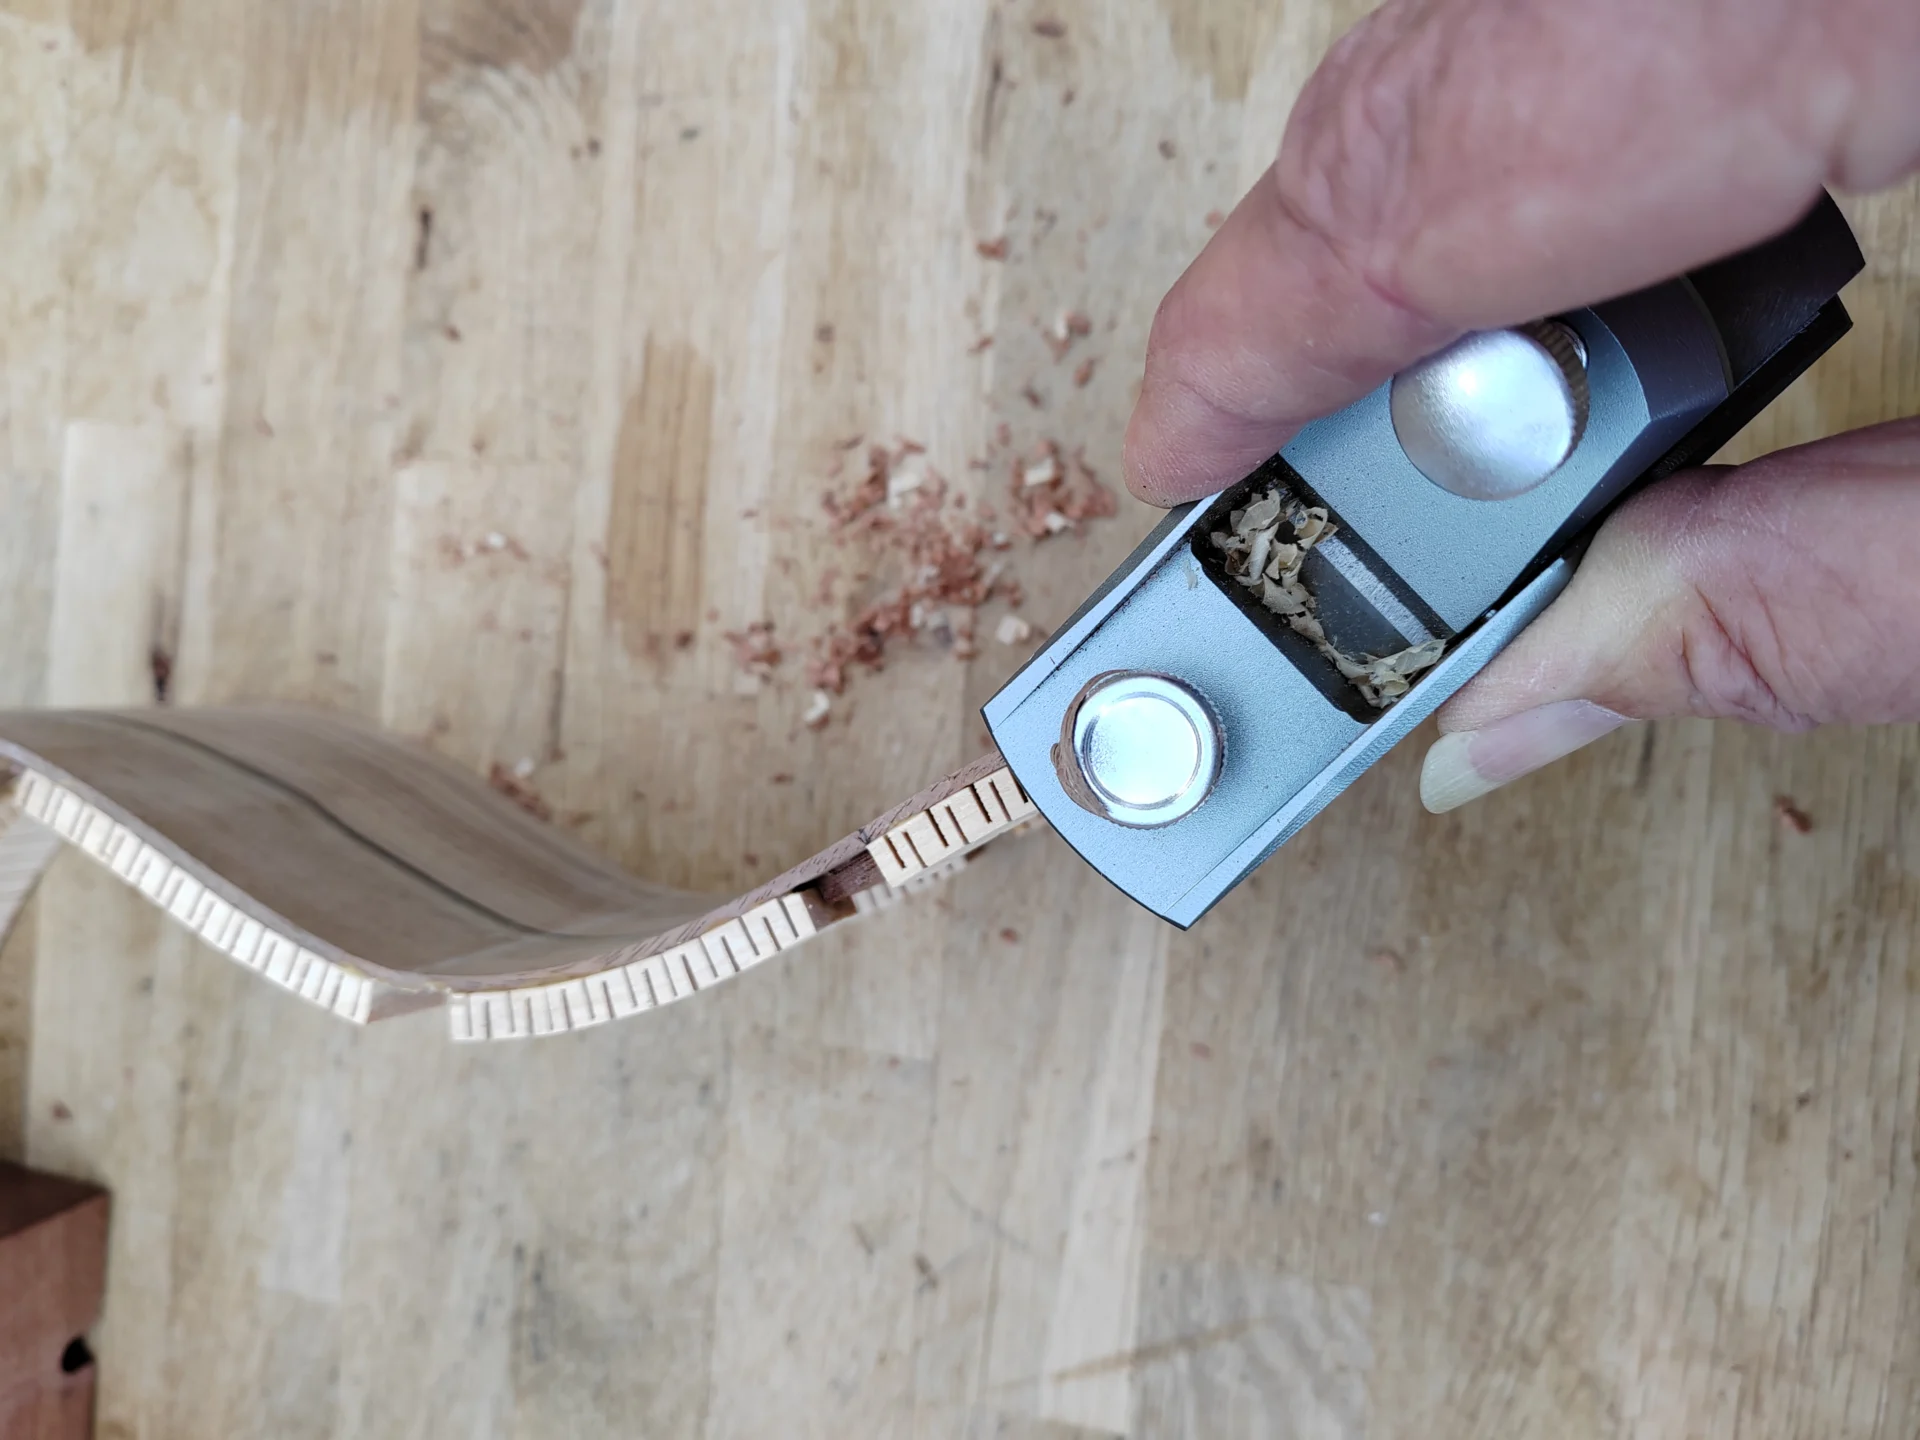
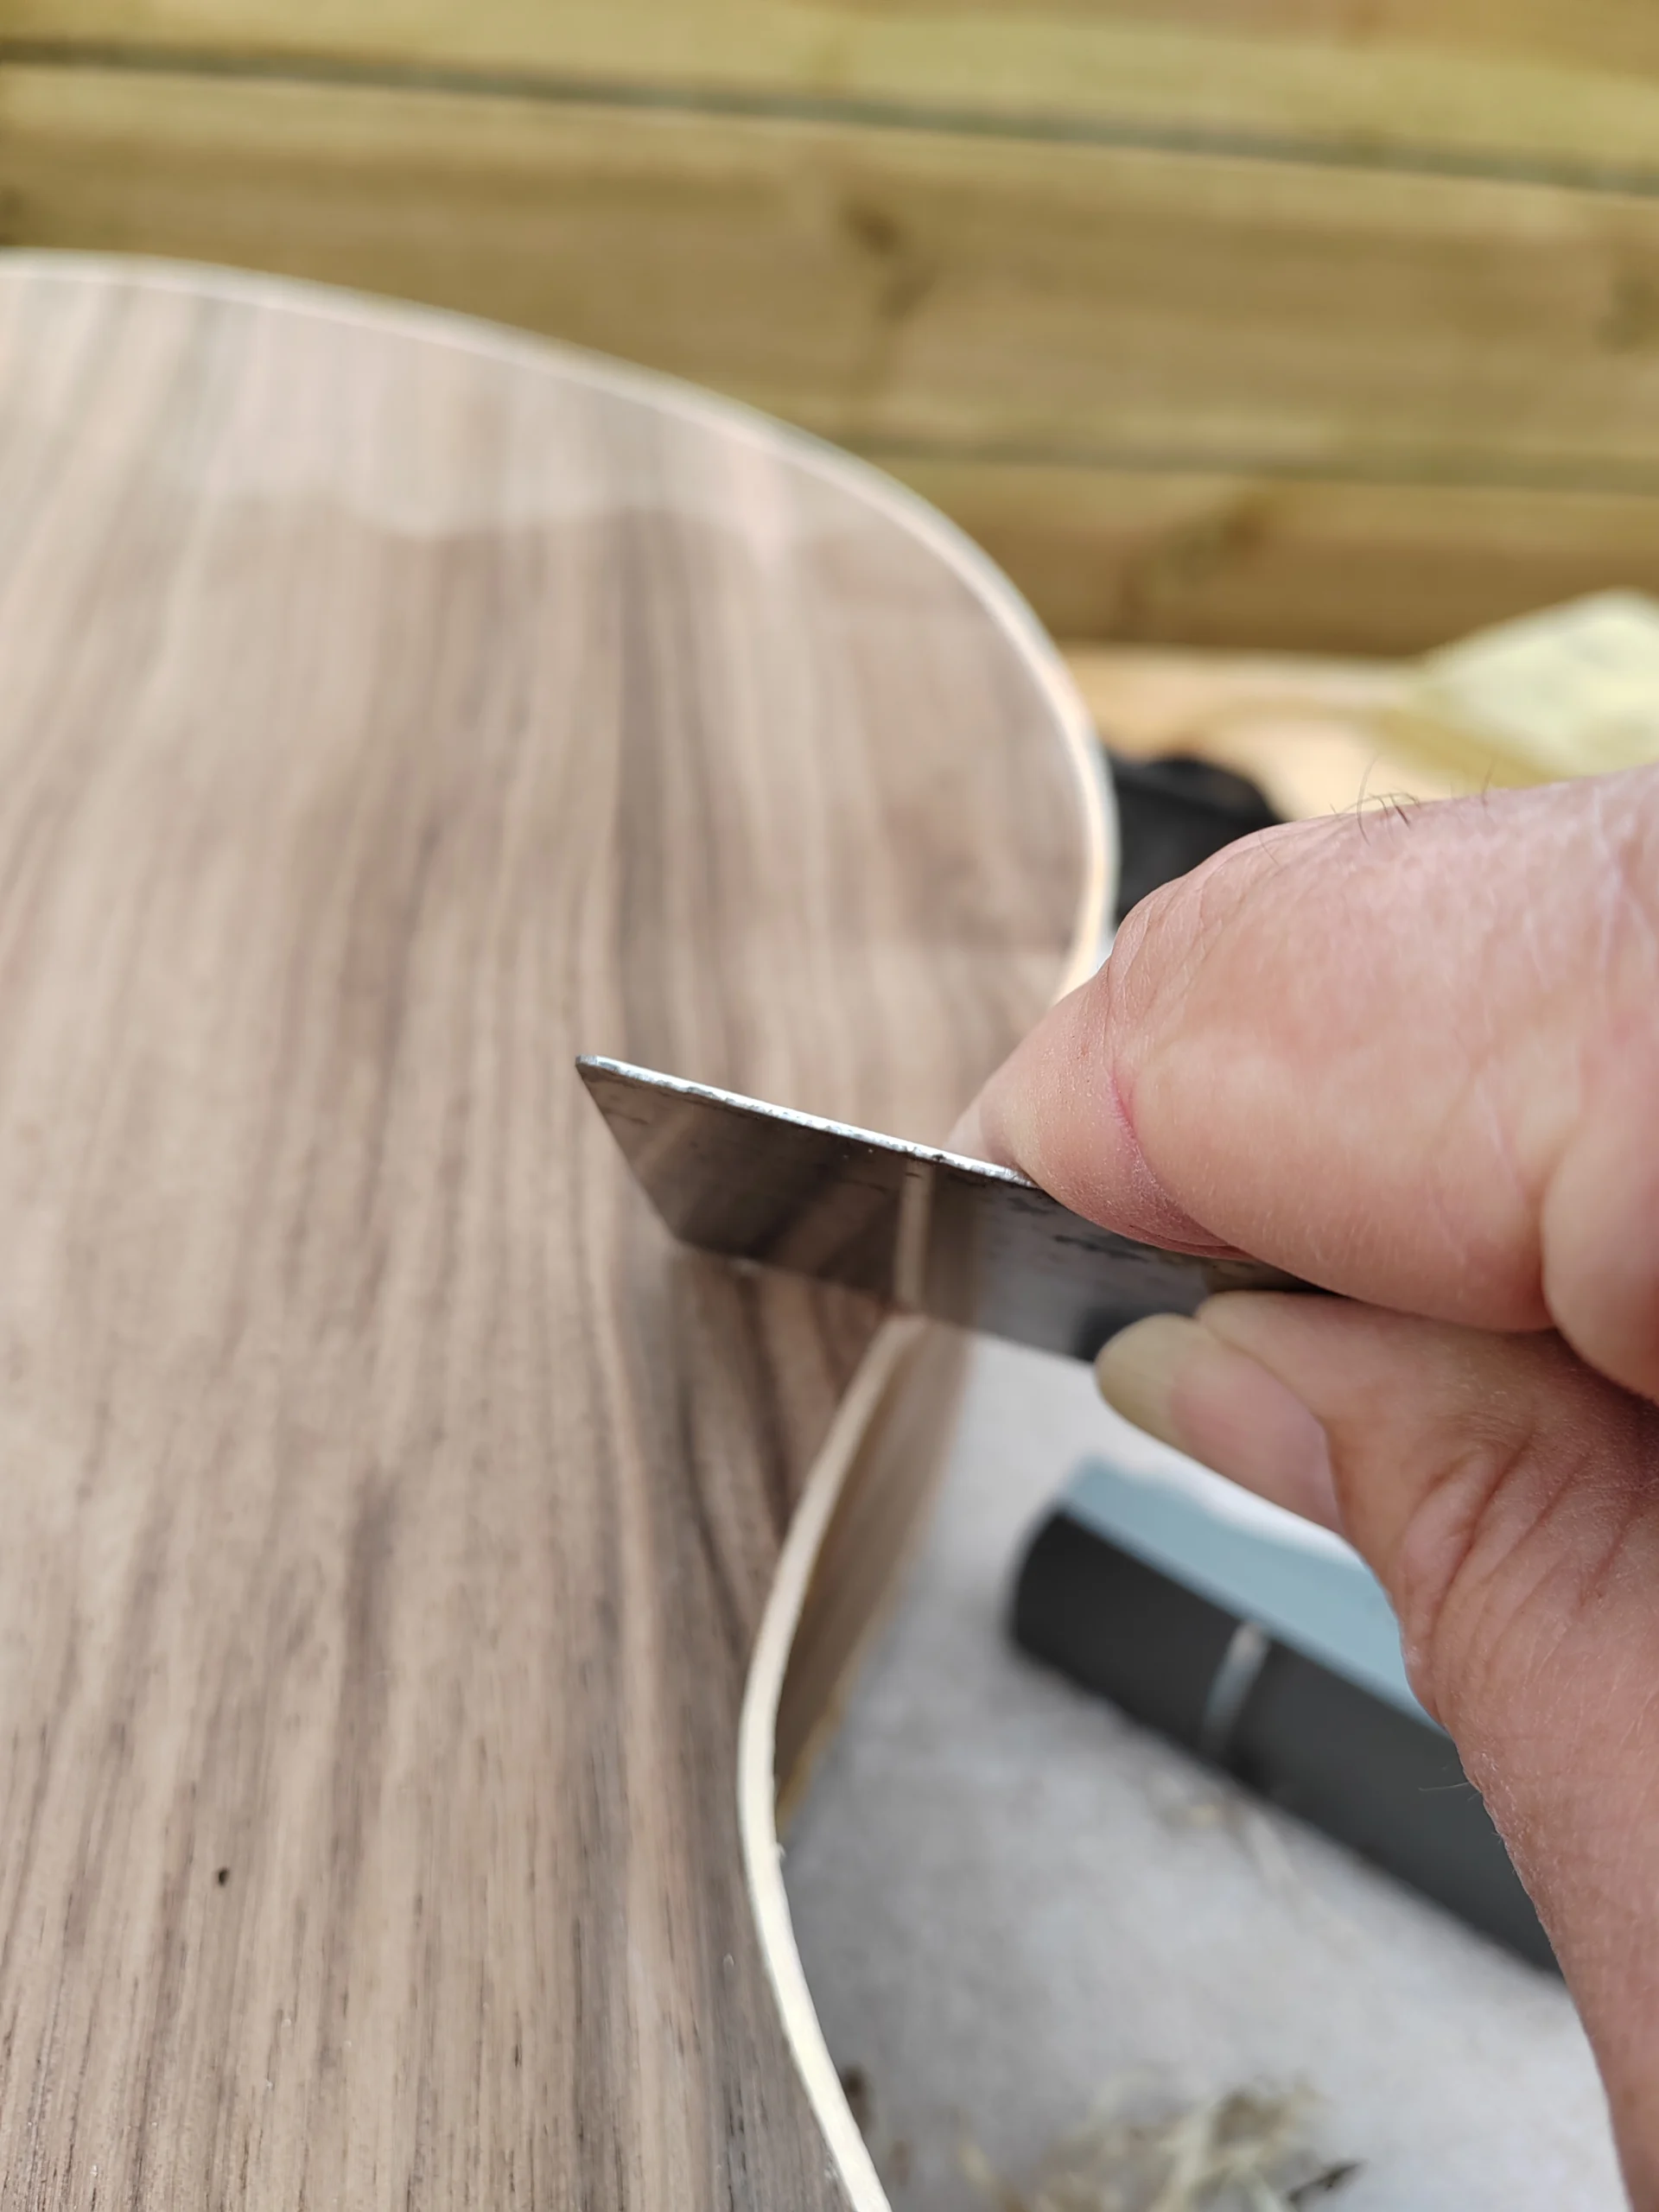
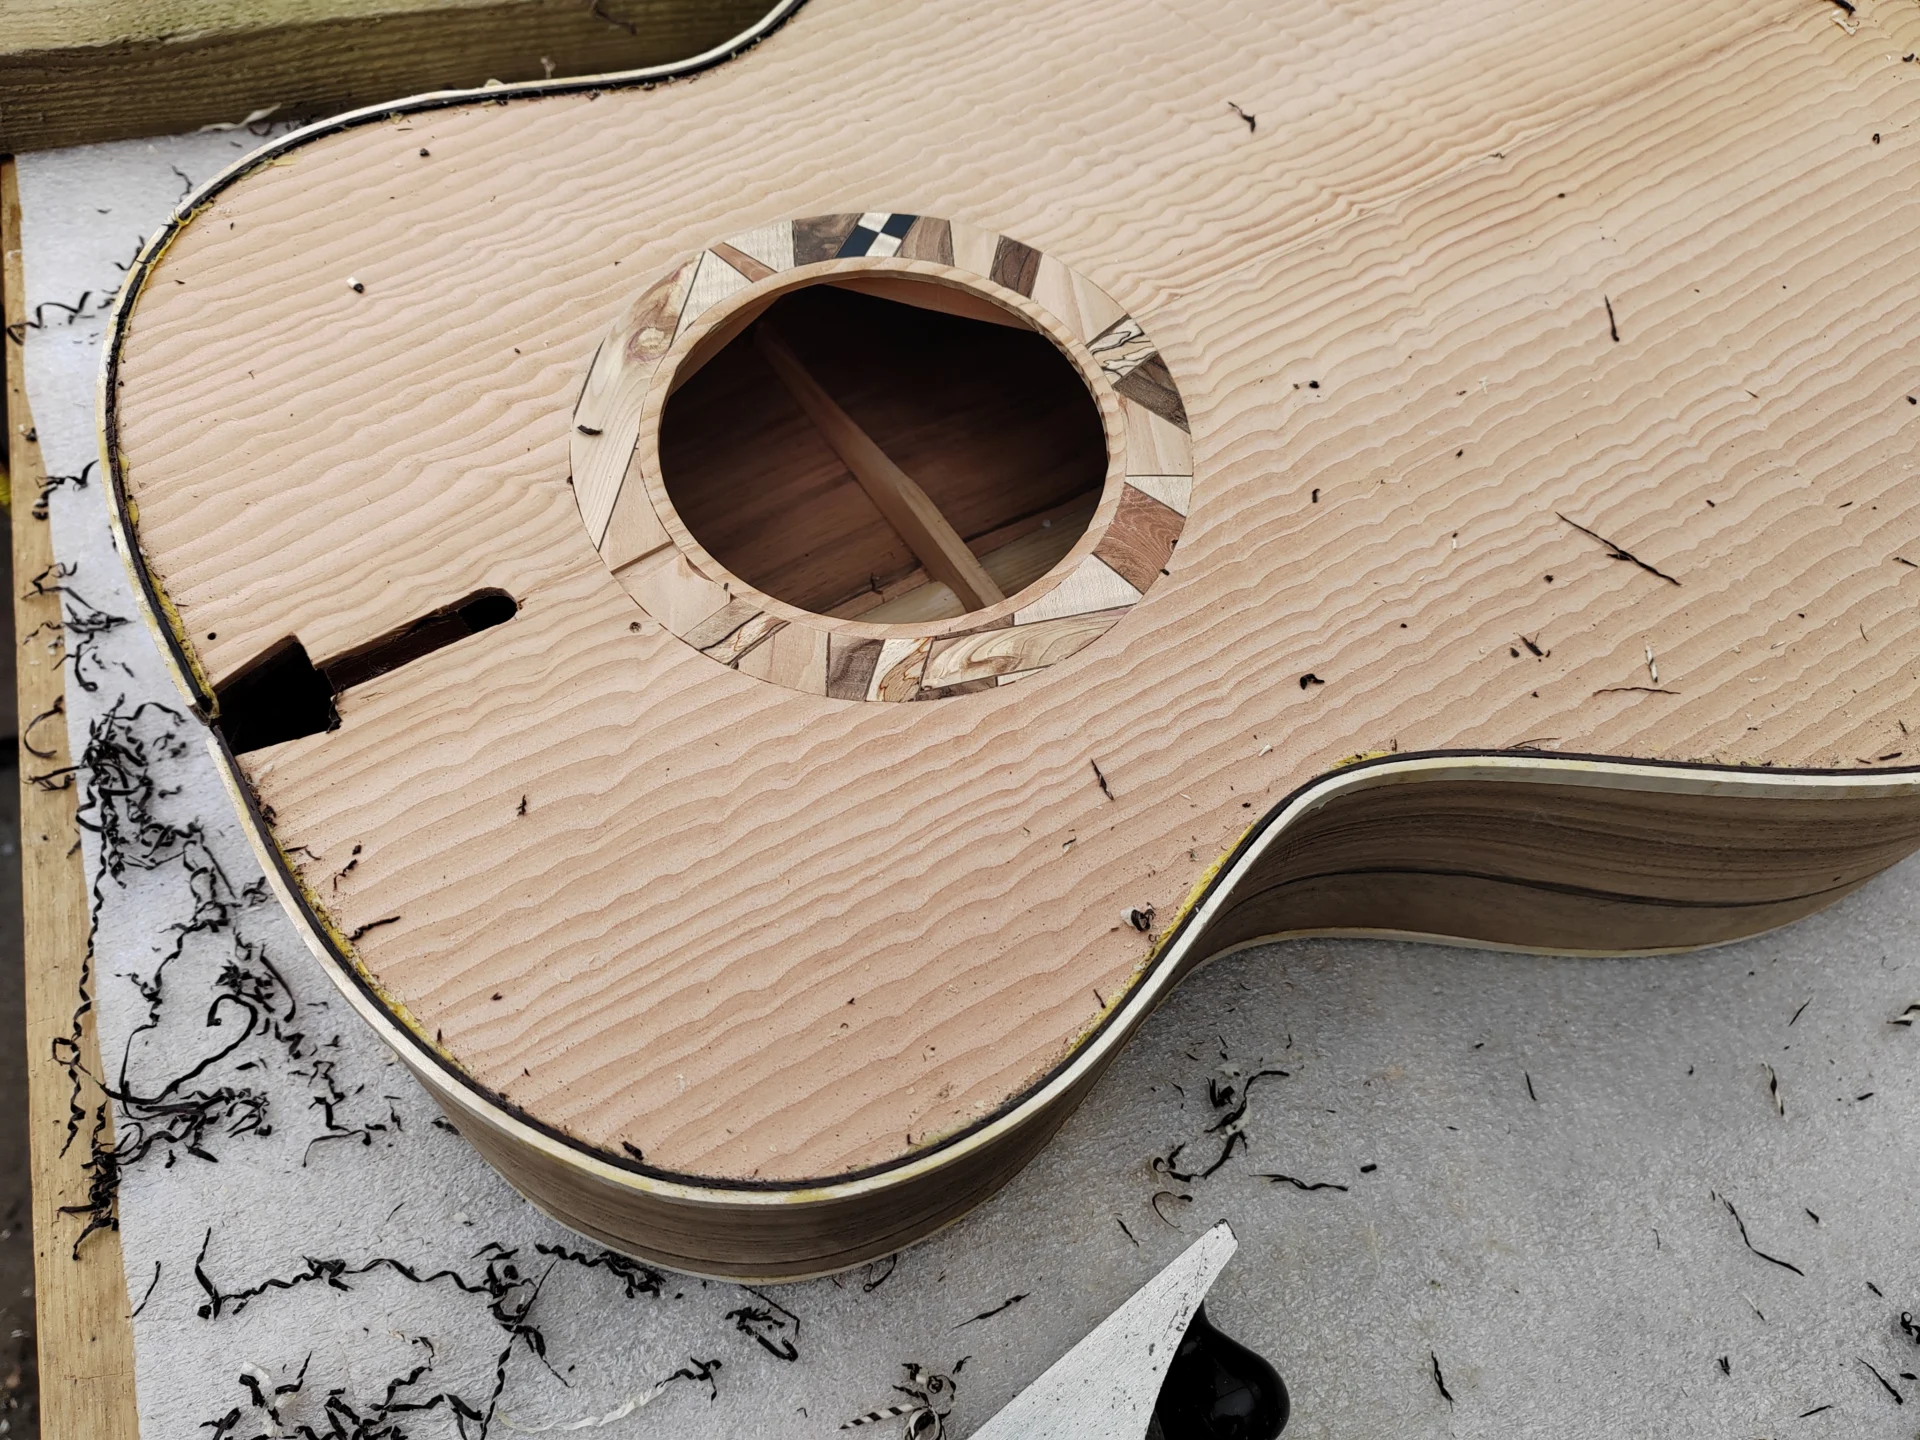
Once the glue has set and all the masking tape is removed, the bindings’ excess are first planed, then a cabinet scraper used to make them flush with the back and soundboard.
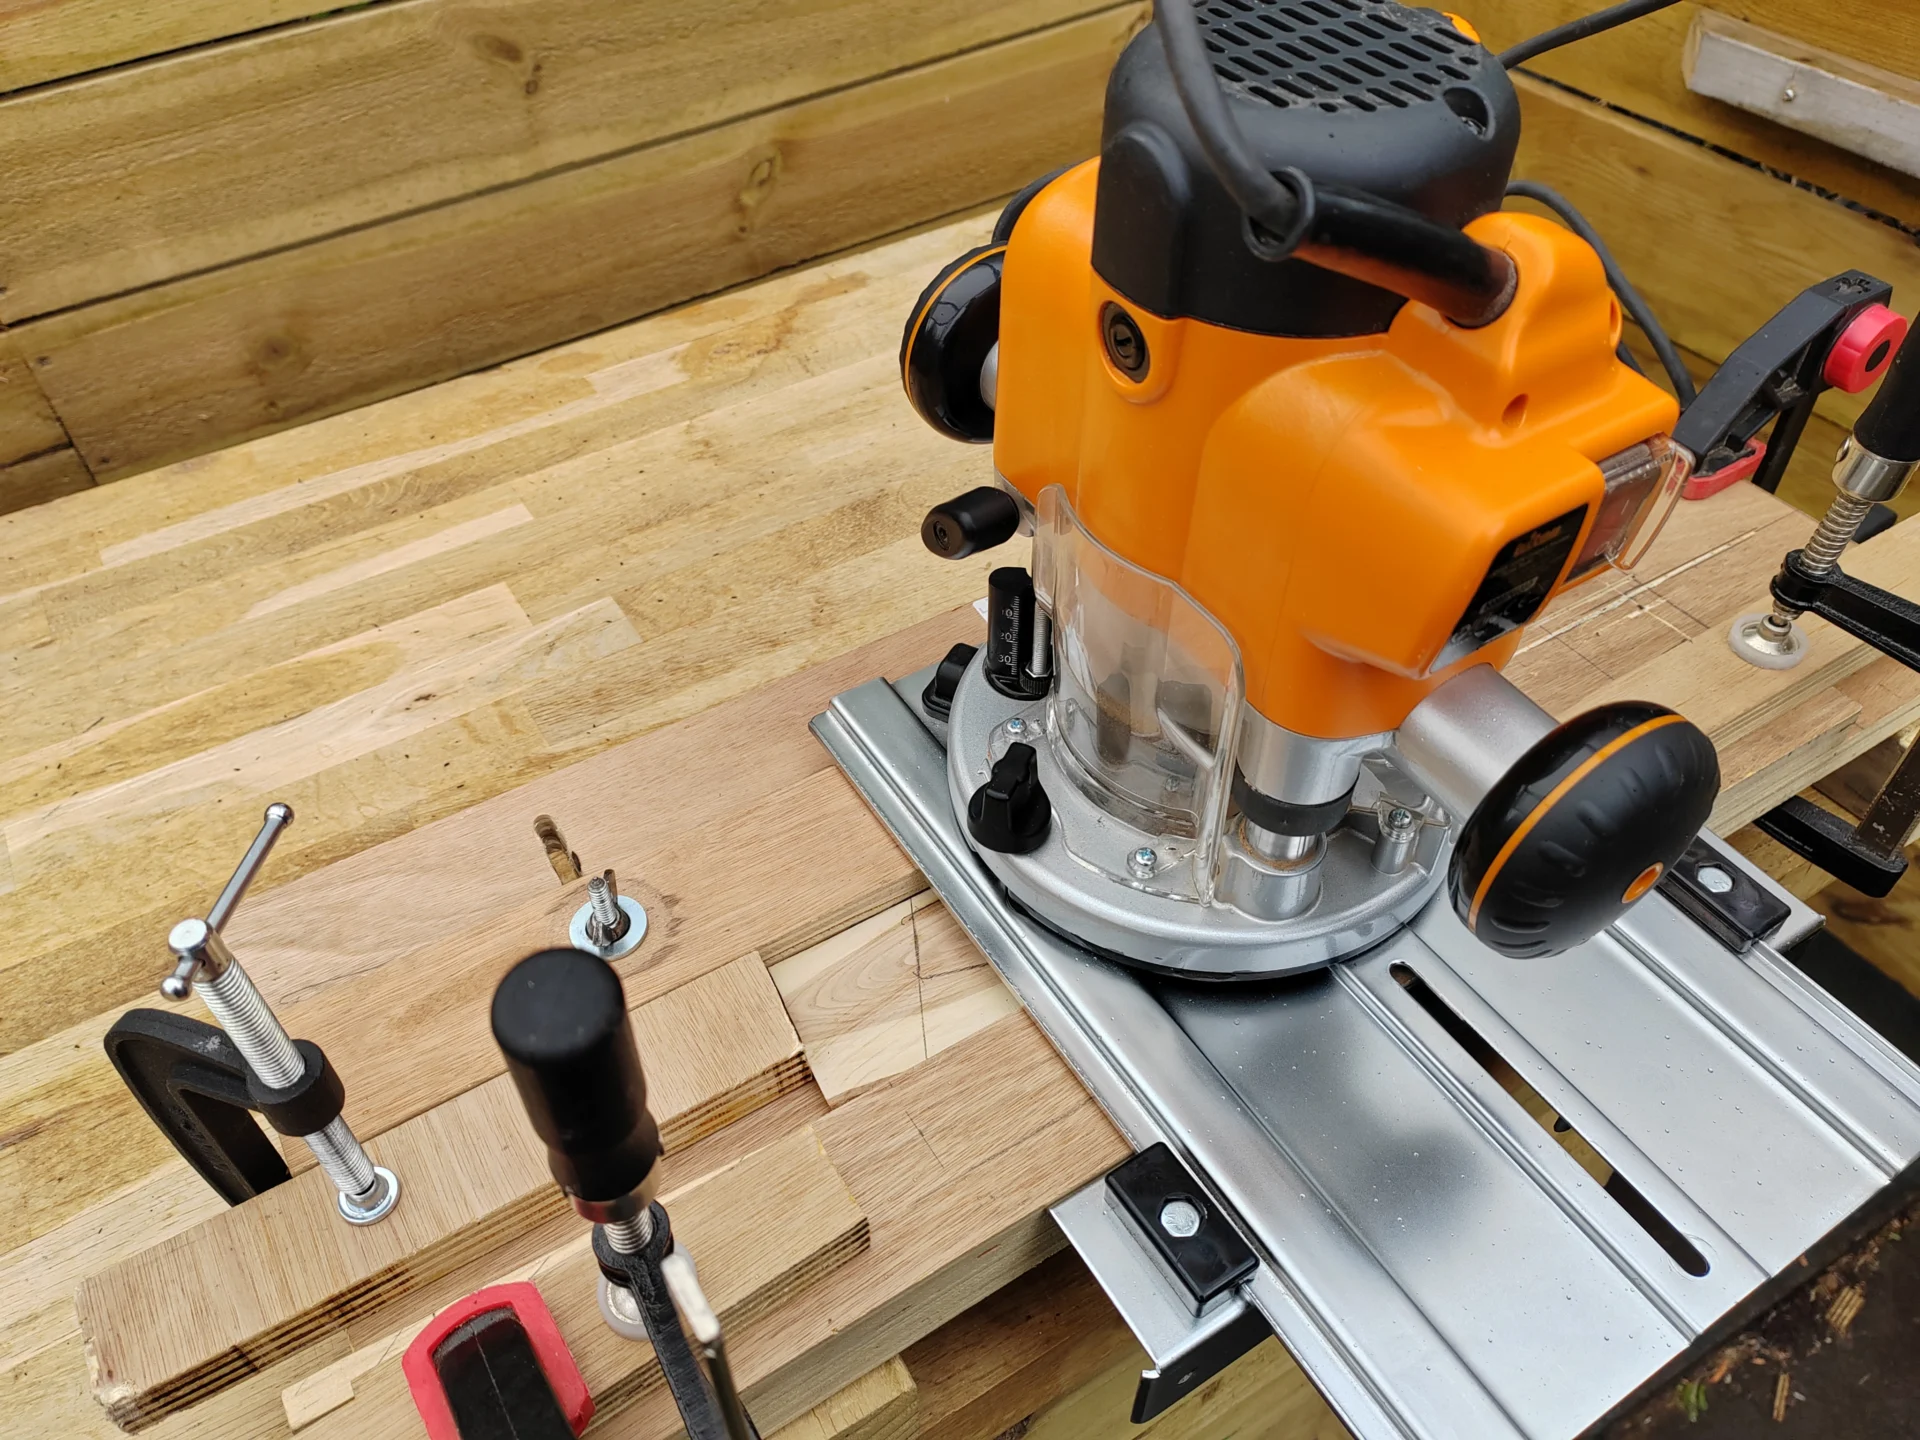
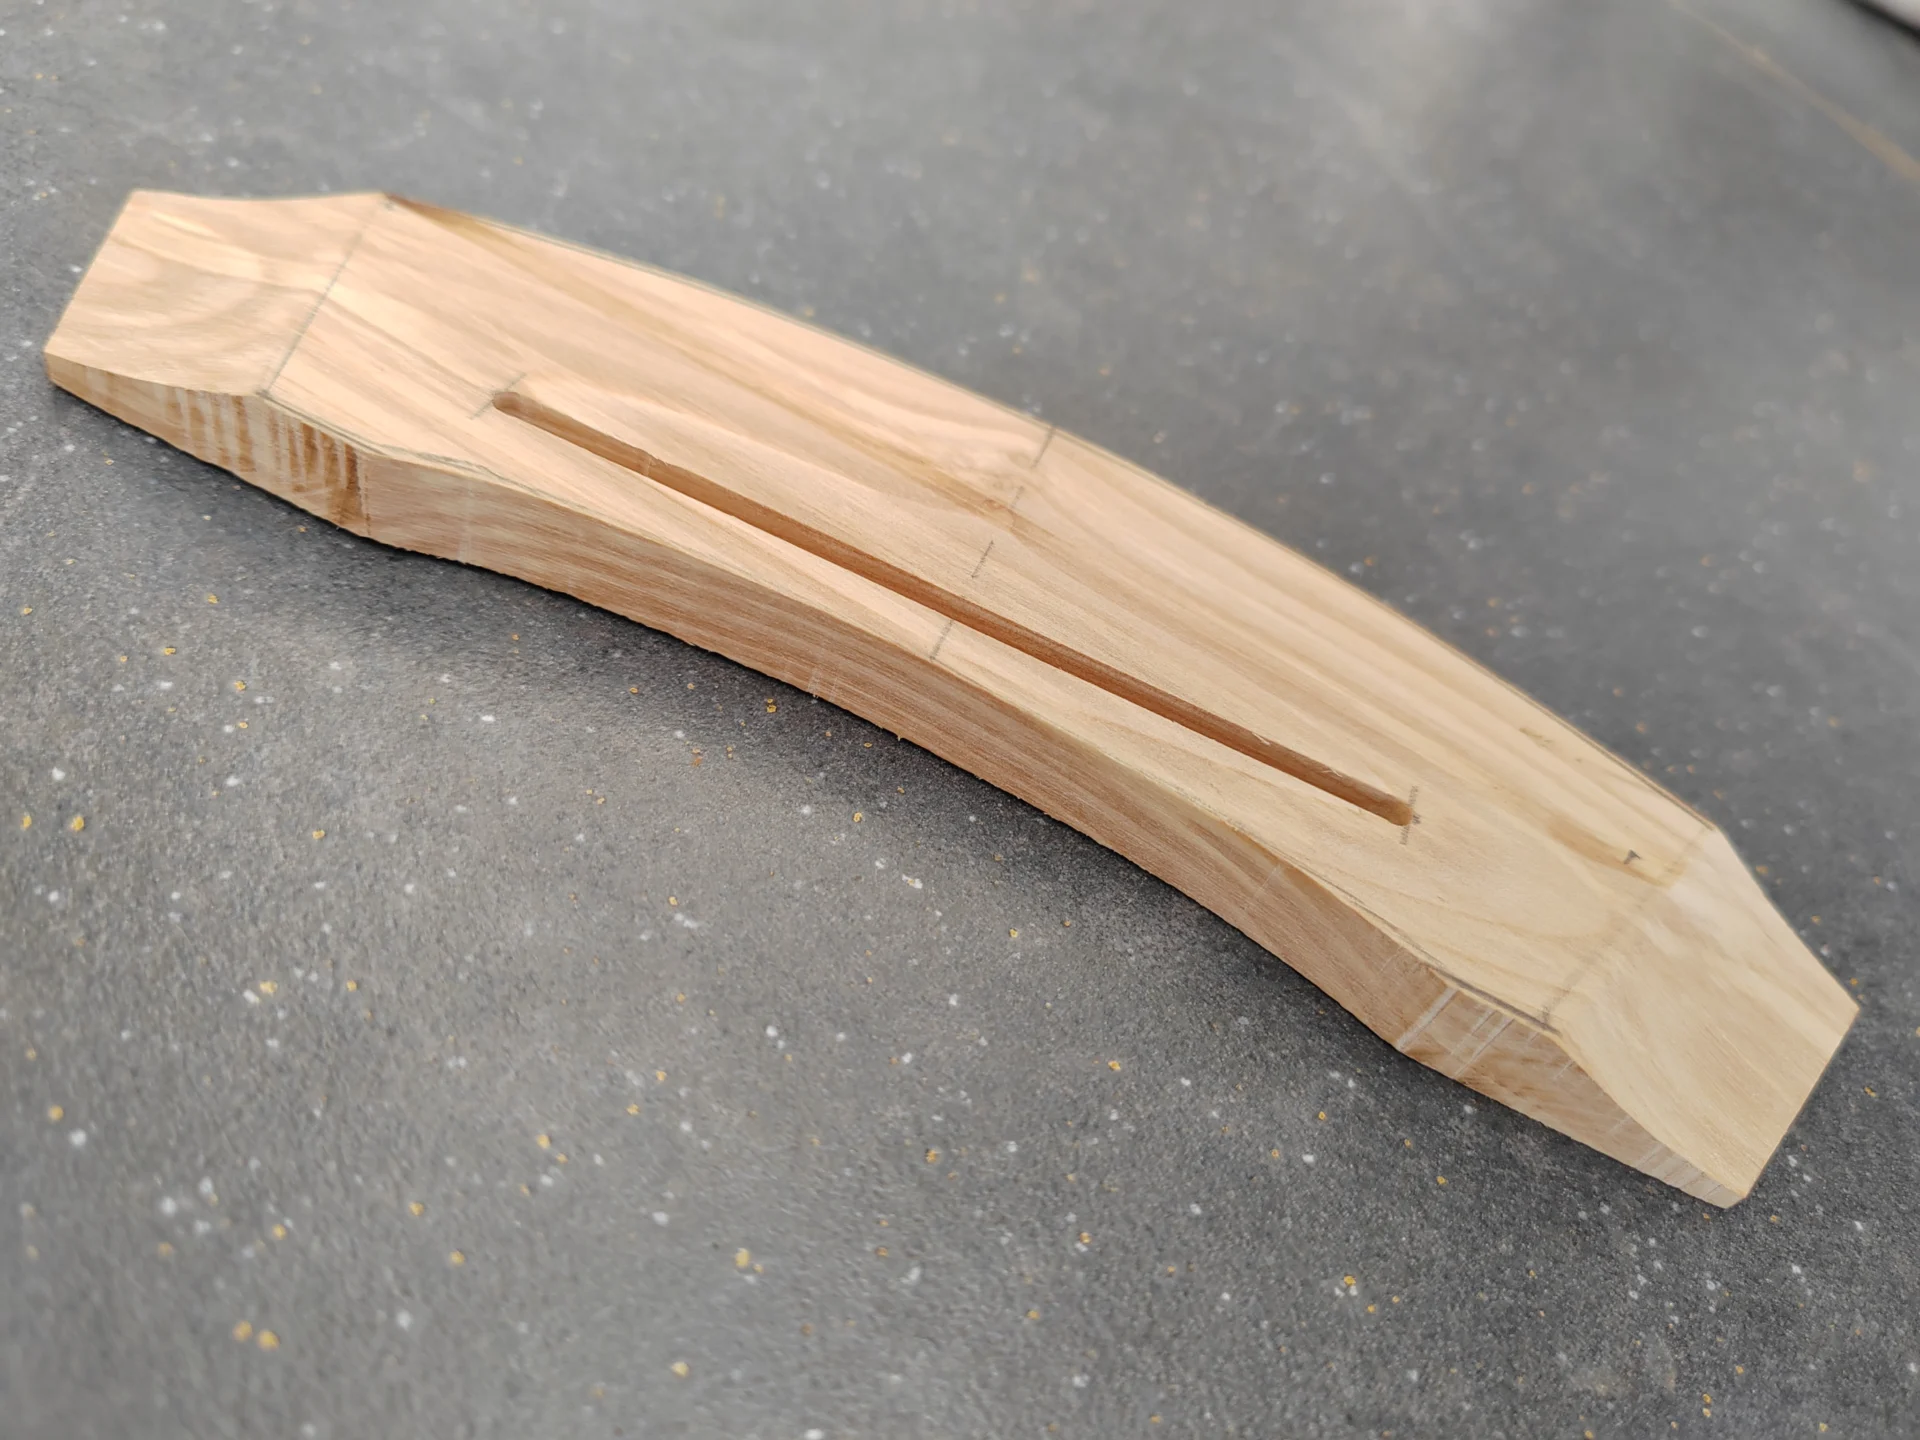
Making the bridge was another task tackled this month. Every router jig on the planet is designed to cut parallel slots – and they do this very well. The slot in a guitar bridge, however, needs to be at a slight angle (2° in this case – it depends on the guitar scale length) and I heartily wish it didn’t. Setting up the jig to, in effect, cut a squinty slot is a nightmare, requiring wedges and a lot of finger-crossing… If there’s an easier way to do this, I haven’t found it (yet).
The bridge is made from Lilac – there’s still a bit of work to be done on it. I’ve used this wood for my last couple of builds and I think it works well. Why Lilac? Well, it’s pretty unique (and looks amazing – it grows only a few steps from the back door… maybe it’s a way of atoning for the air miles involved in using rosewood for the fingerboard. Lilac is a very dense wood (it has Janka Hardness of 10,440 N – rosewood is also 10,440 and ebony 13,700 N, for comparison, oak is only 4,980 N). Lilac used to be dyed black and used for piano keys…
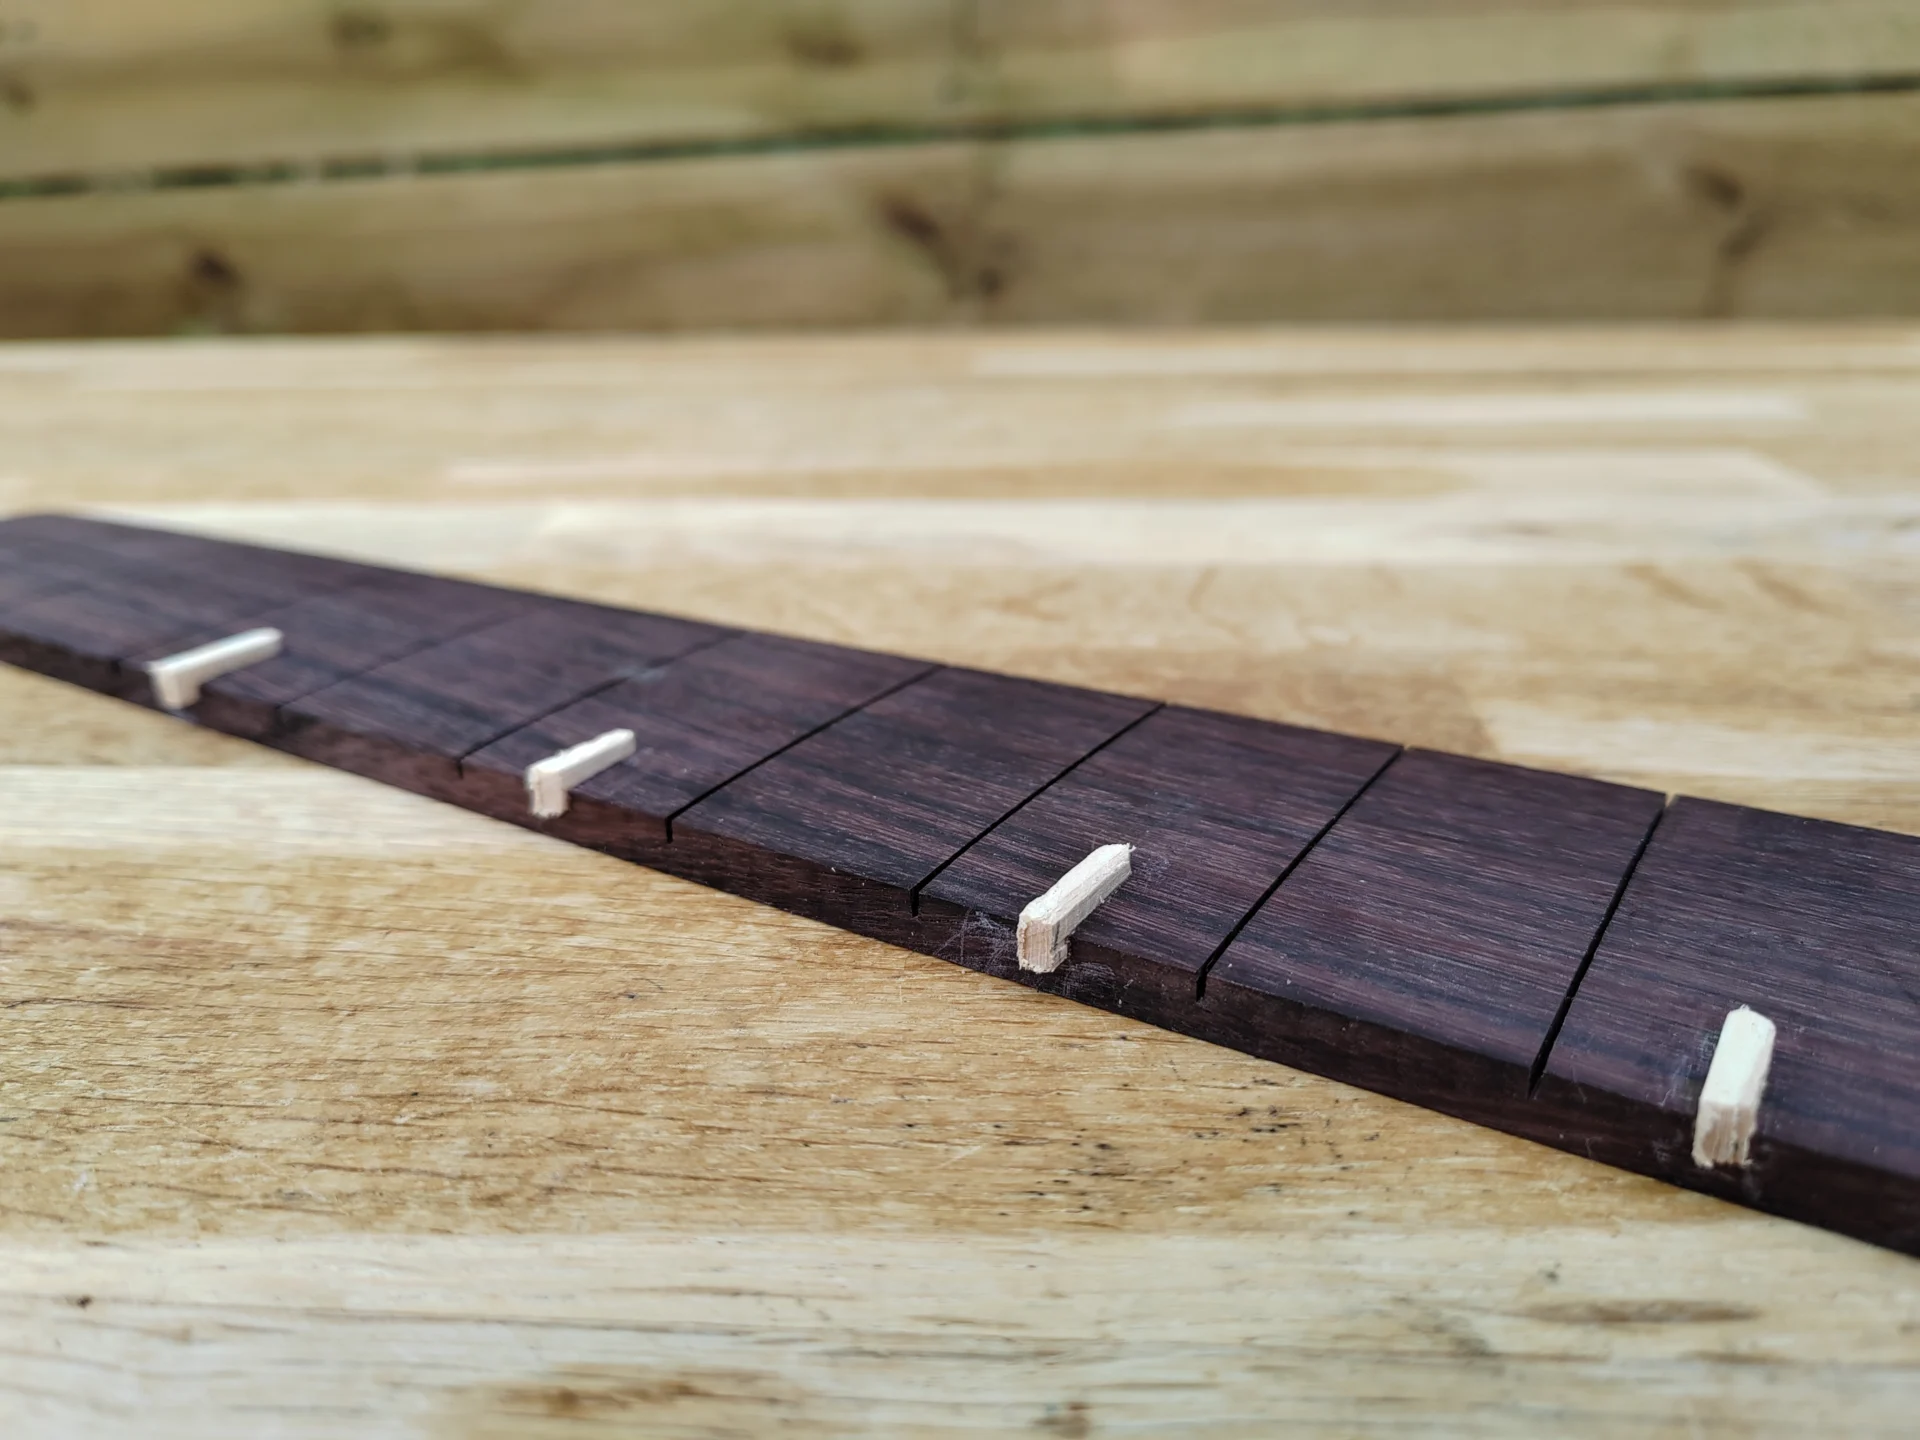
I also cut the rebates (9 of them) in the fingerboard for the fret position markers. These are half-depth, 3mm, so they are visible on the edge. The fret position markers were then glued in place. These are also made of Lilac. It’s necessary to use a really sharp chisel to pare off the excess material, one thin sliver at a time – another task which is a disaster waiting to happen: one slip resulting in a gouge out of the fingerboard and a new one is needed…
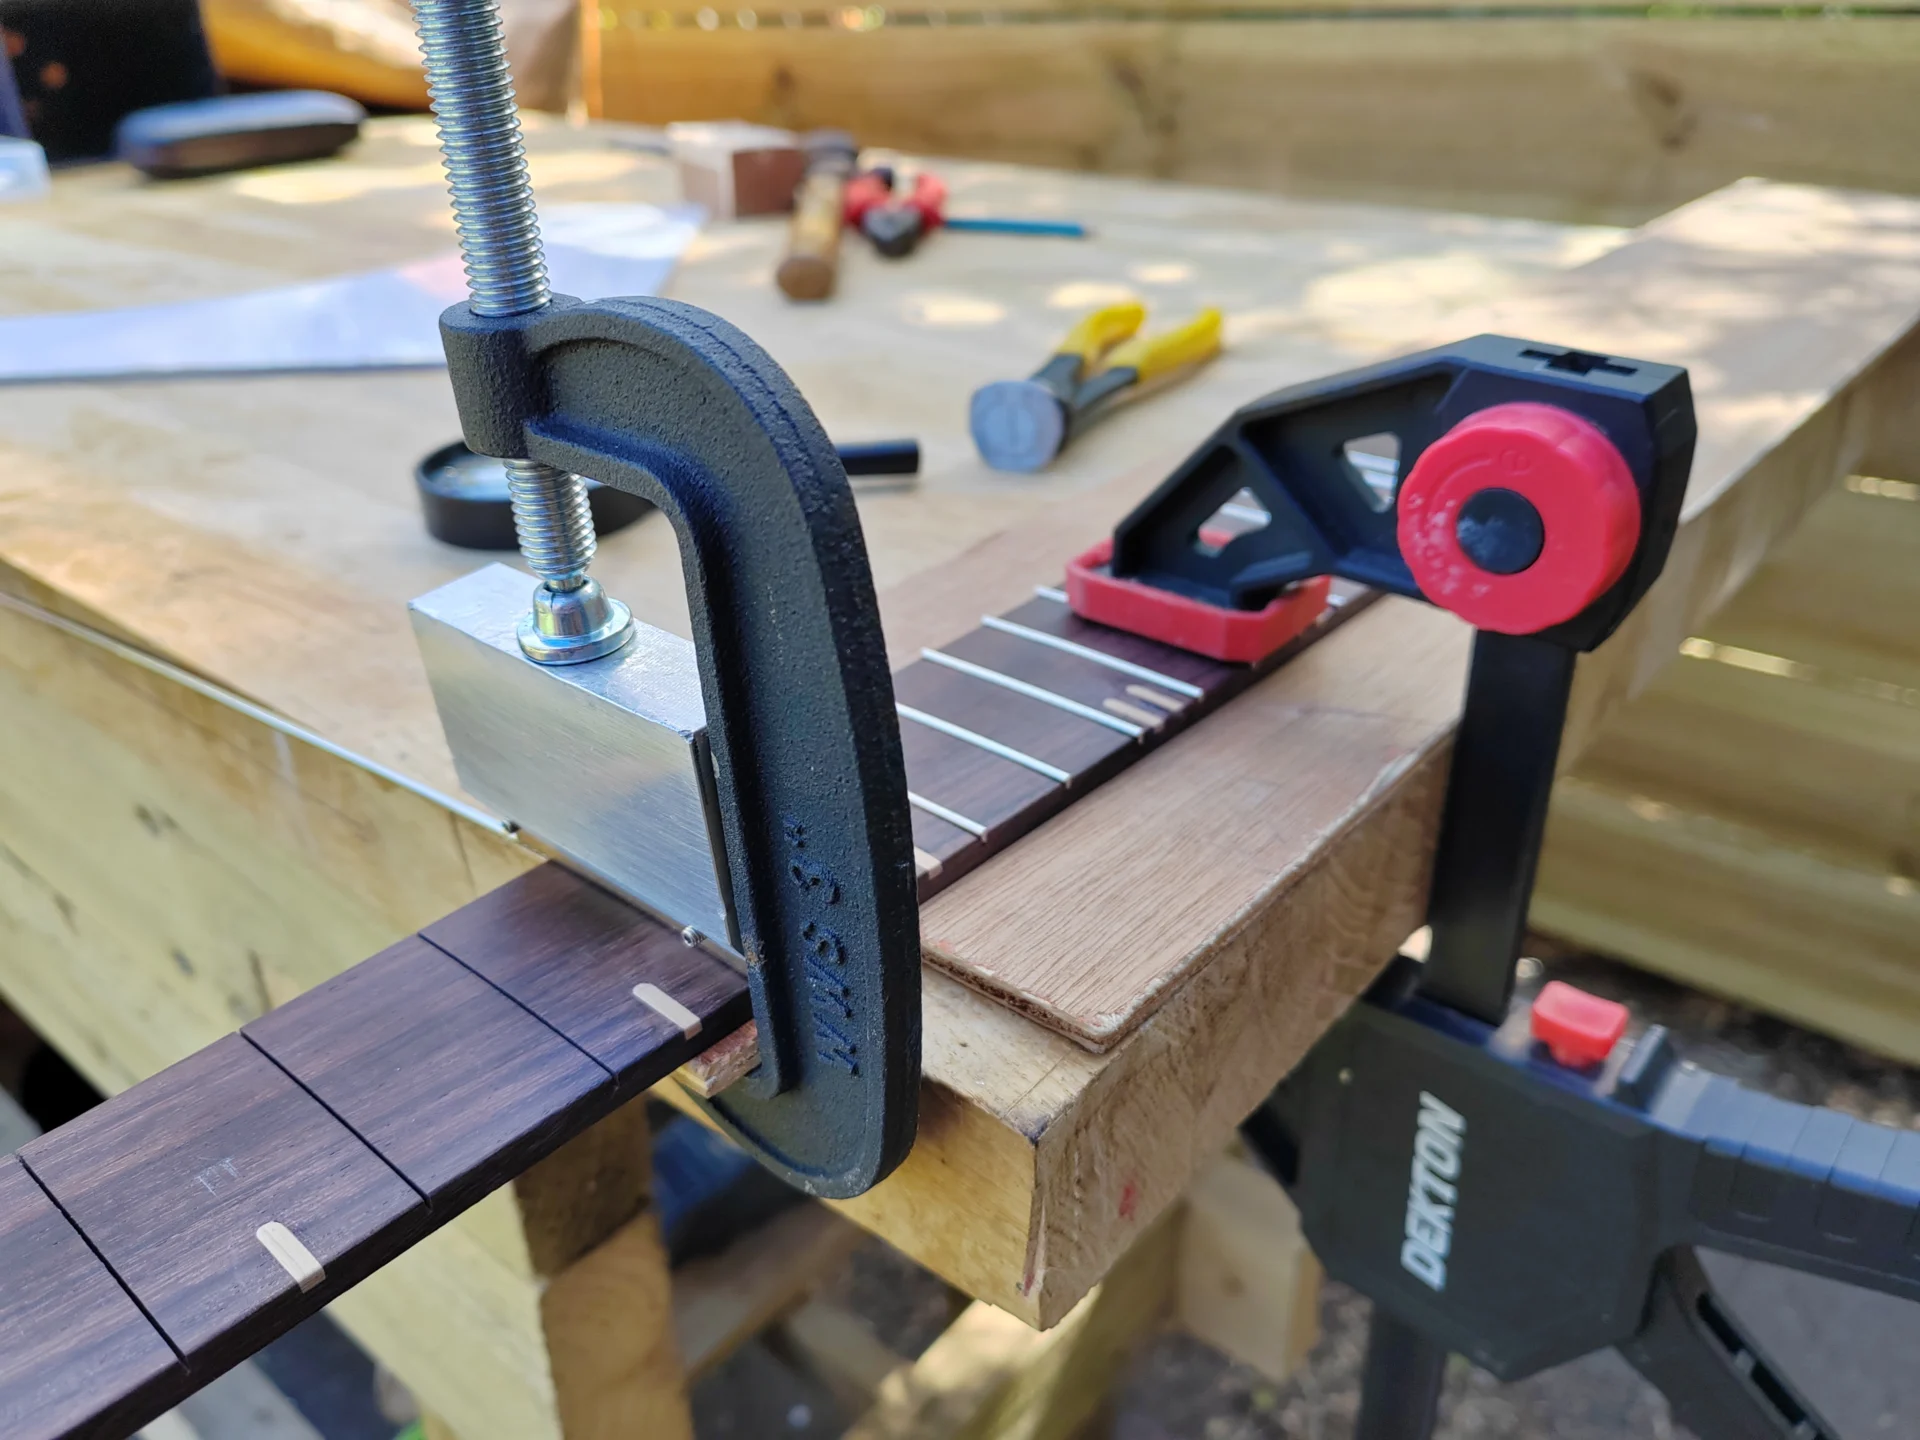
Another task completed was installing the frets – 21 of them. It’s a kind of repetitive procedure, but not one to be rushed; it’s another task where if you get it wrong… well you’ll know the script by now… There’s a few different ways this can be done. I use a caul, which matches the radius of the fingerboard, and press the frets into the slots with a clamp. This gets the frets very close to being level, sometimes no extra work is needed (if I’m lucky… we’ll see).
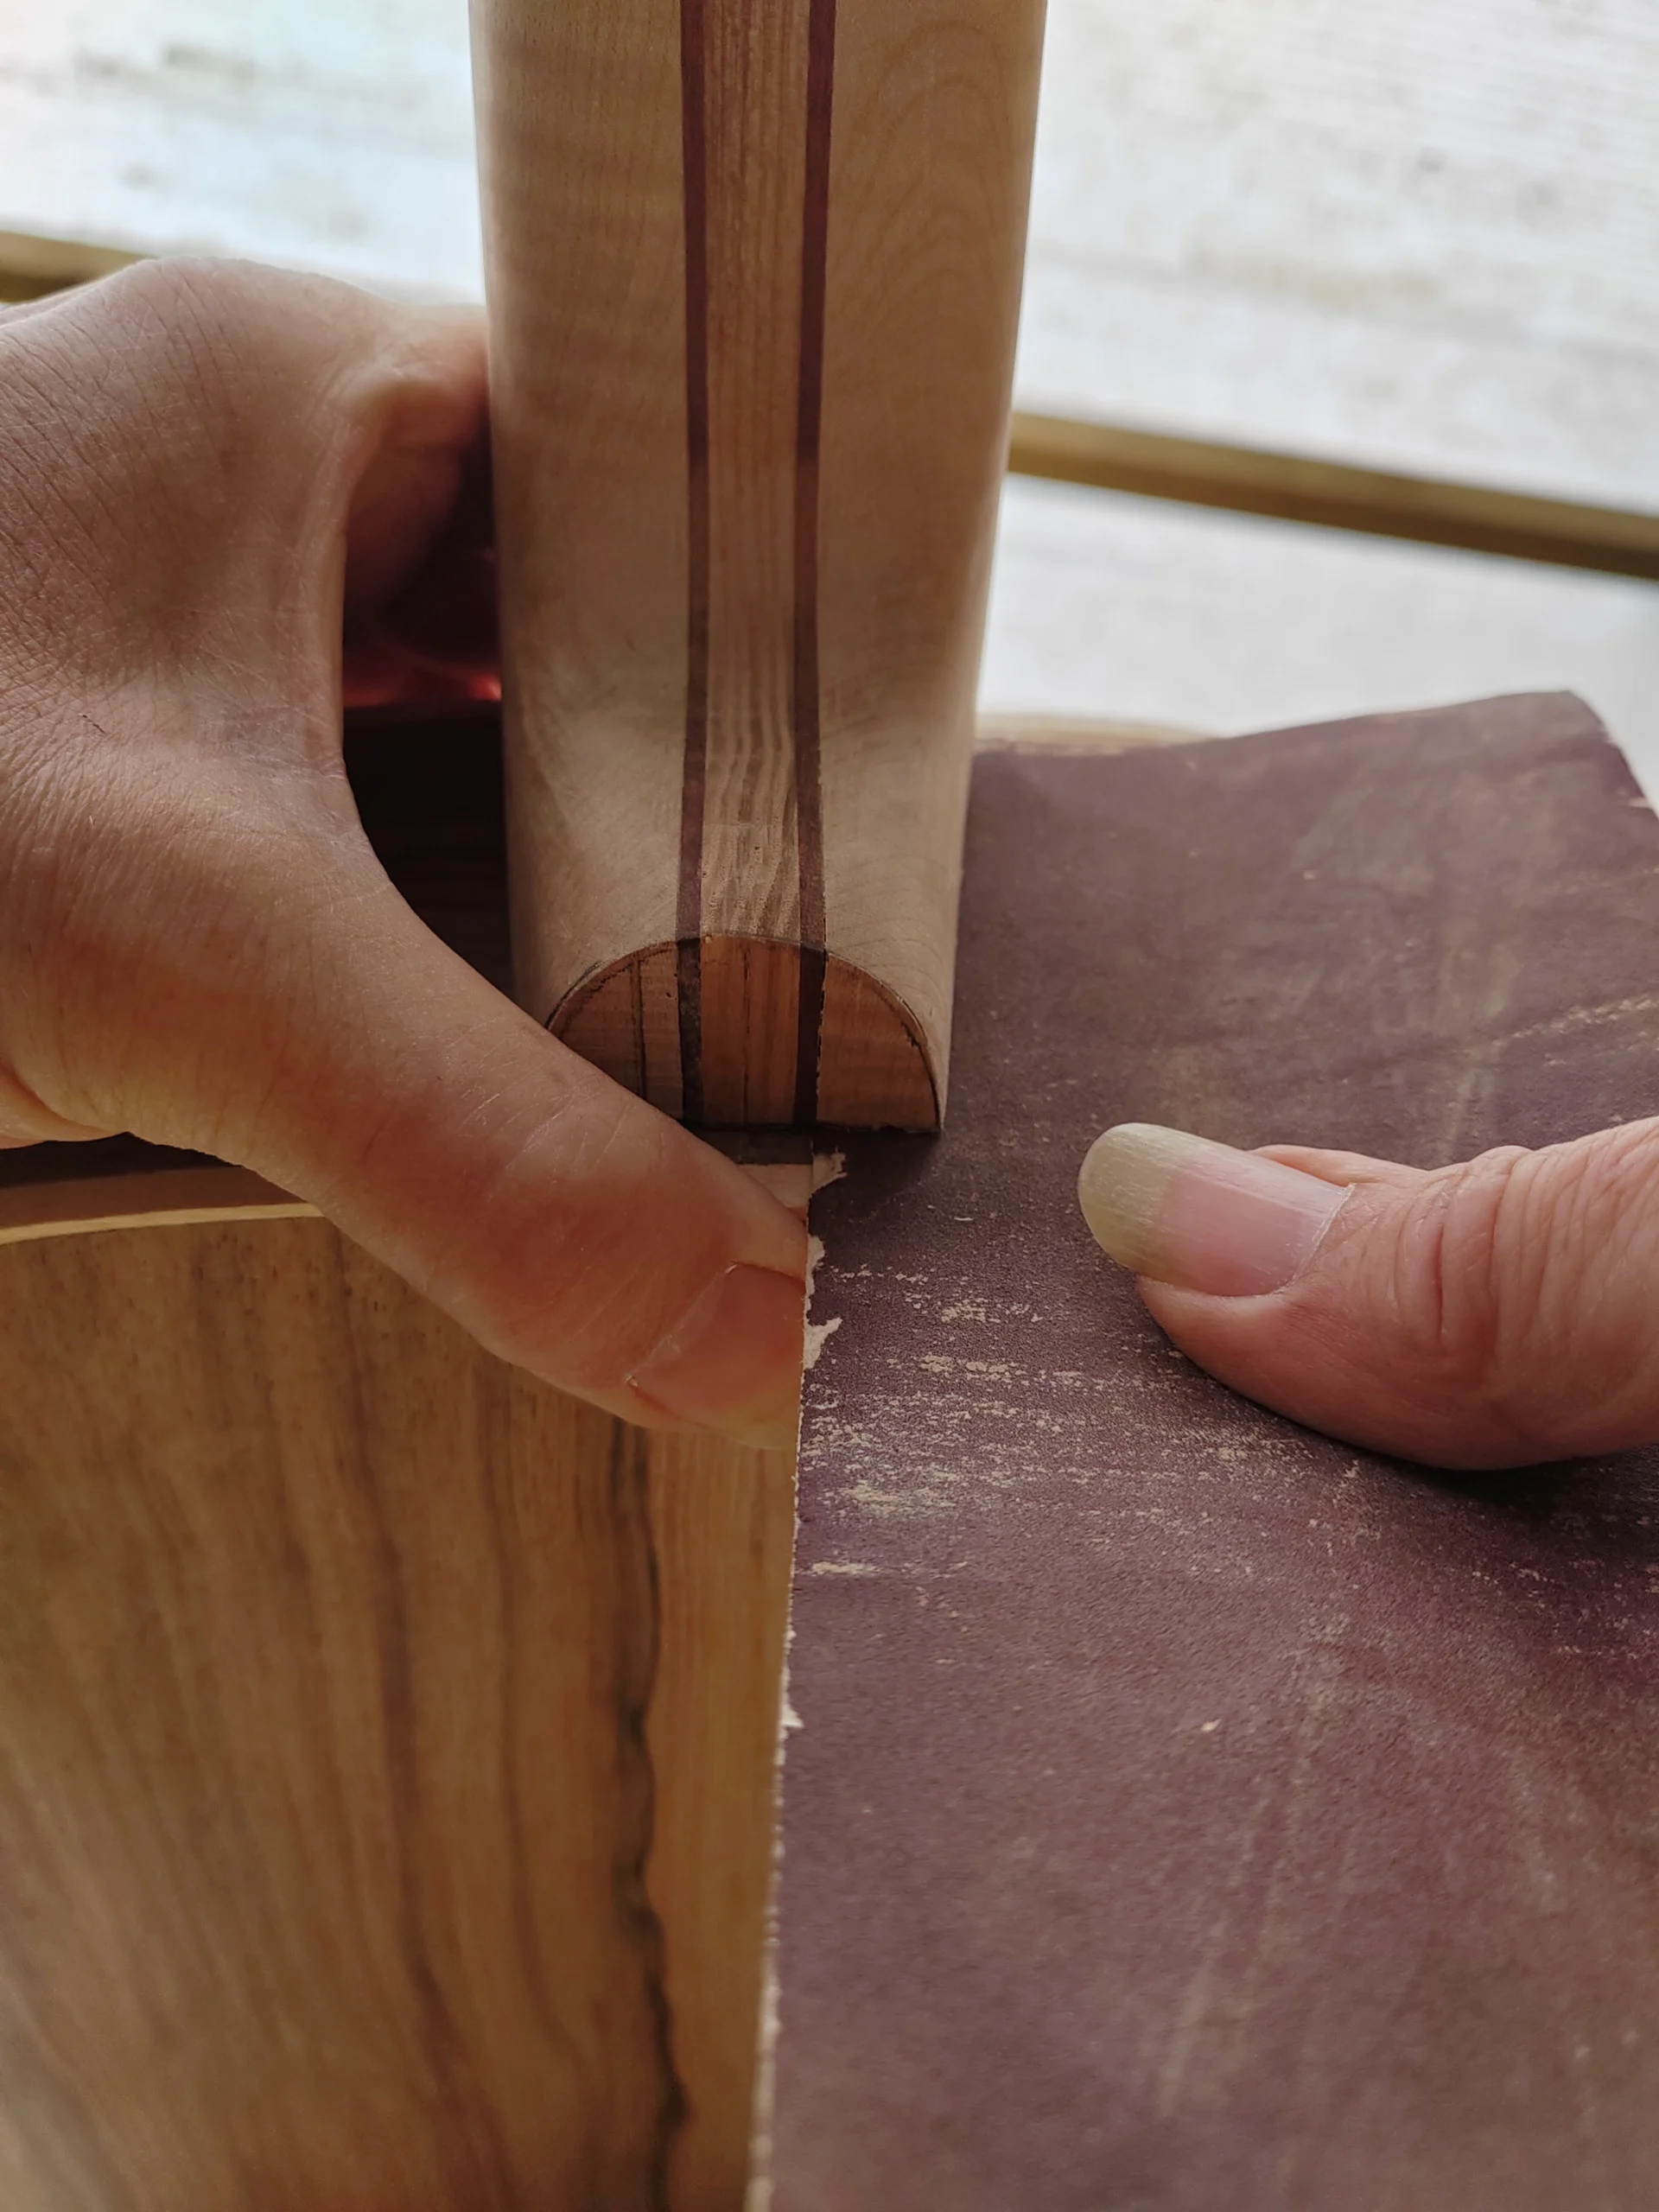
The last, but critical, task completed was setting the neck break angle. At a glance, the heel of most guitar necks appear to join the body at right angles. They rarely actually do. In order for the strings to rest on the saddle without being so high they make playing difficult, the neck has to be set at a slight downwards angle – 1.2° for this guitar; it’s determined by the height of the bridge and the scale length. This angle is achieved by pulling through a length of sandpaper while holding down the neck, alternating sides so the neck stays centred and checking every half dozen passes. It’s one of the most tedious tasks involved in guitar building and seems to go on for an eternity, but it’s done now.
That’s all for now. The next post will probably (hopefully) be the last as far as how this guitar build has gone. Next time I hope there will be some pictures of the finished instrument.
Just in case you’re still undecided about parting with a (no doubt hard earned) £10 for the chance to get your hands on the finished item, you might like to know you’re 180,229.9 times more likely to win this guitar than the National Lottery…
